


How to make quick and easy Bisquick sausage cheese balls that everyone will love with ground sausage and shredded cheese. These old fashioned southern snack bites make the perfect appetizer for Game Day, holidays and parties!
I’ve made all kinds of sweet treats with Bisquick baking mix, like Bisquick cinnamon scones, Bisquick cinnamon muffins, Bisquick cinnamon biscuits and even Bisquick campfire drop biscuits. You can do so much with it, but I’ve never tried making a savory snack or appetizer with Bisquick until I made these sausage cheese balls. And let me tell you, these little guys are the BOMB.

The Bisquick mix gives these sausage balls a light and fluffy texture with a perfectly crisp edge, making them oh so addictive with irresistibly delicious cheesy flavor. I recommend making a big batch of these cute little bite-sized treats, because like my Italian cauliflower meatballs, they disappear fast! Sausage cheese balls are perfect for your New Year’s Eve party, Game Day, potlucks or any other social get-together.
Ingredients & Substitutions Notes
This recipe is pretty simple to make, so you should be able to find everything at your local grocery store…
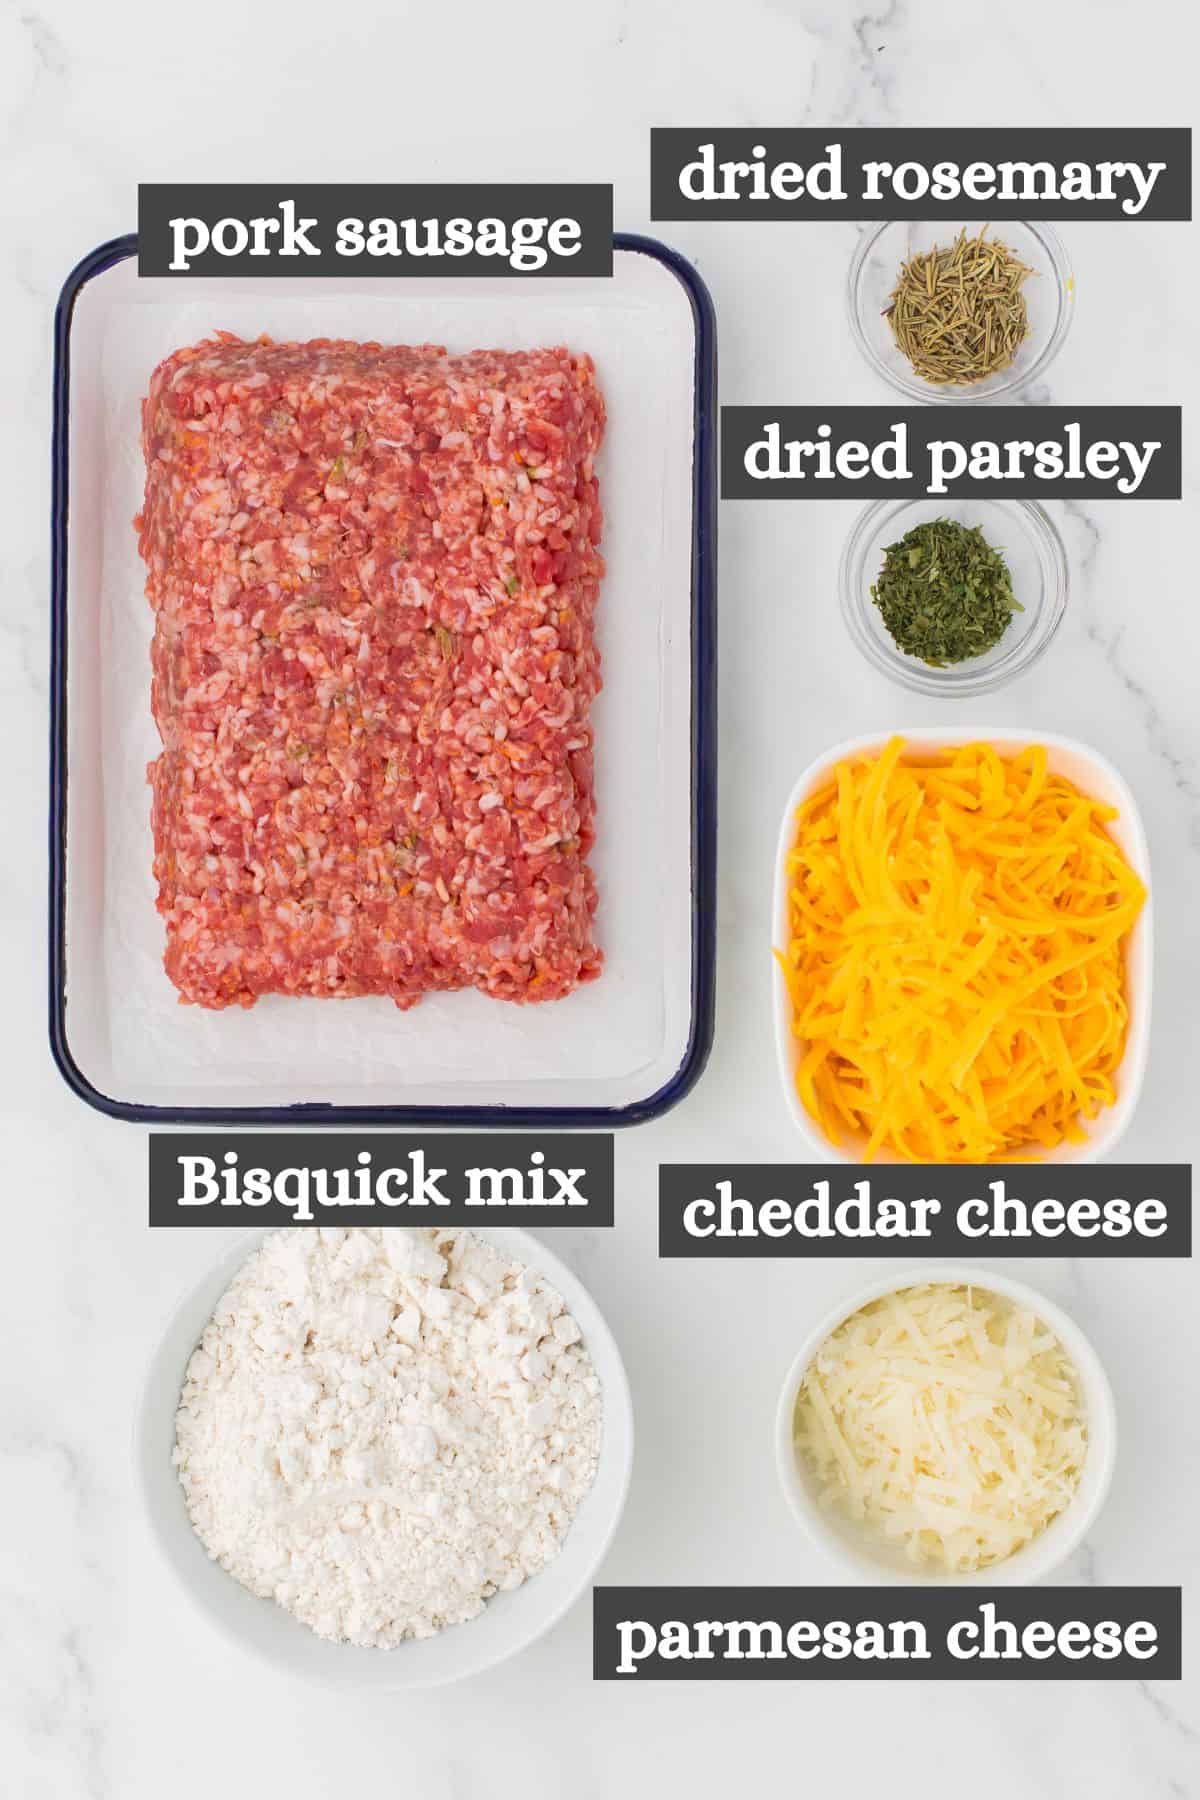
- Ground Sausage – I usually use my family’s favorite pork sausage for this recipe, but you can also use turkey sausage if you prefer.
- Bisquick Baking Mix – Bisquick is my go-to baking mix for this recipe, but any all-purpose baking mix will work. If you’d rather not use a store bought baking mix, you can use my recipe for homemade biscuit mix instead!
- Shredded Cheese – This recipe calls for both cheddar cheese and parmesan cheese for a little extra flavor. I recommend buying blocks of cheese and shredding them yourself with a box shredder, since the anti-caking agents in pre-shredded cheese at the store can dry out your sausage balls, making them fall apart!
- Herbs & Spices – You’ll need dried rosemary leaves and a little bit of dried parsley for these sausage and cheese balls.
How to Make Bisquick Sausage Cheese Balls
Before getting started, you’ll want to preheat your oven to 350ºF and get your cheese shredded. Then be sure that you have something like a jelly roll pan on hand to bake your sausage balls on.
Mix Up Your Sausage and Cheese Balls
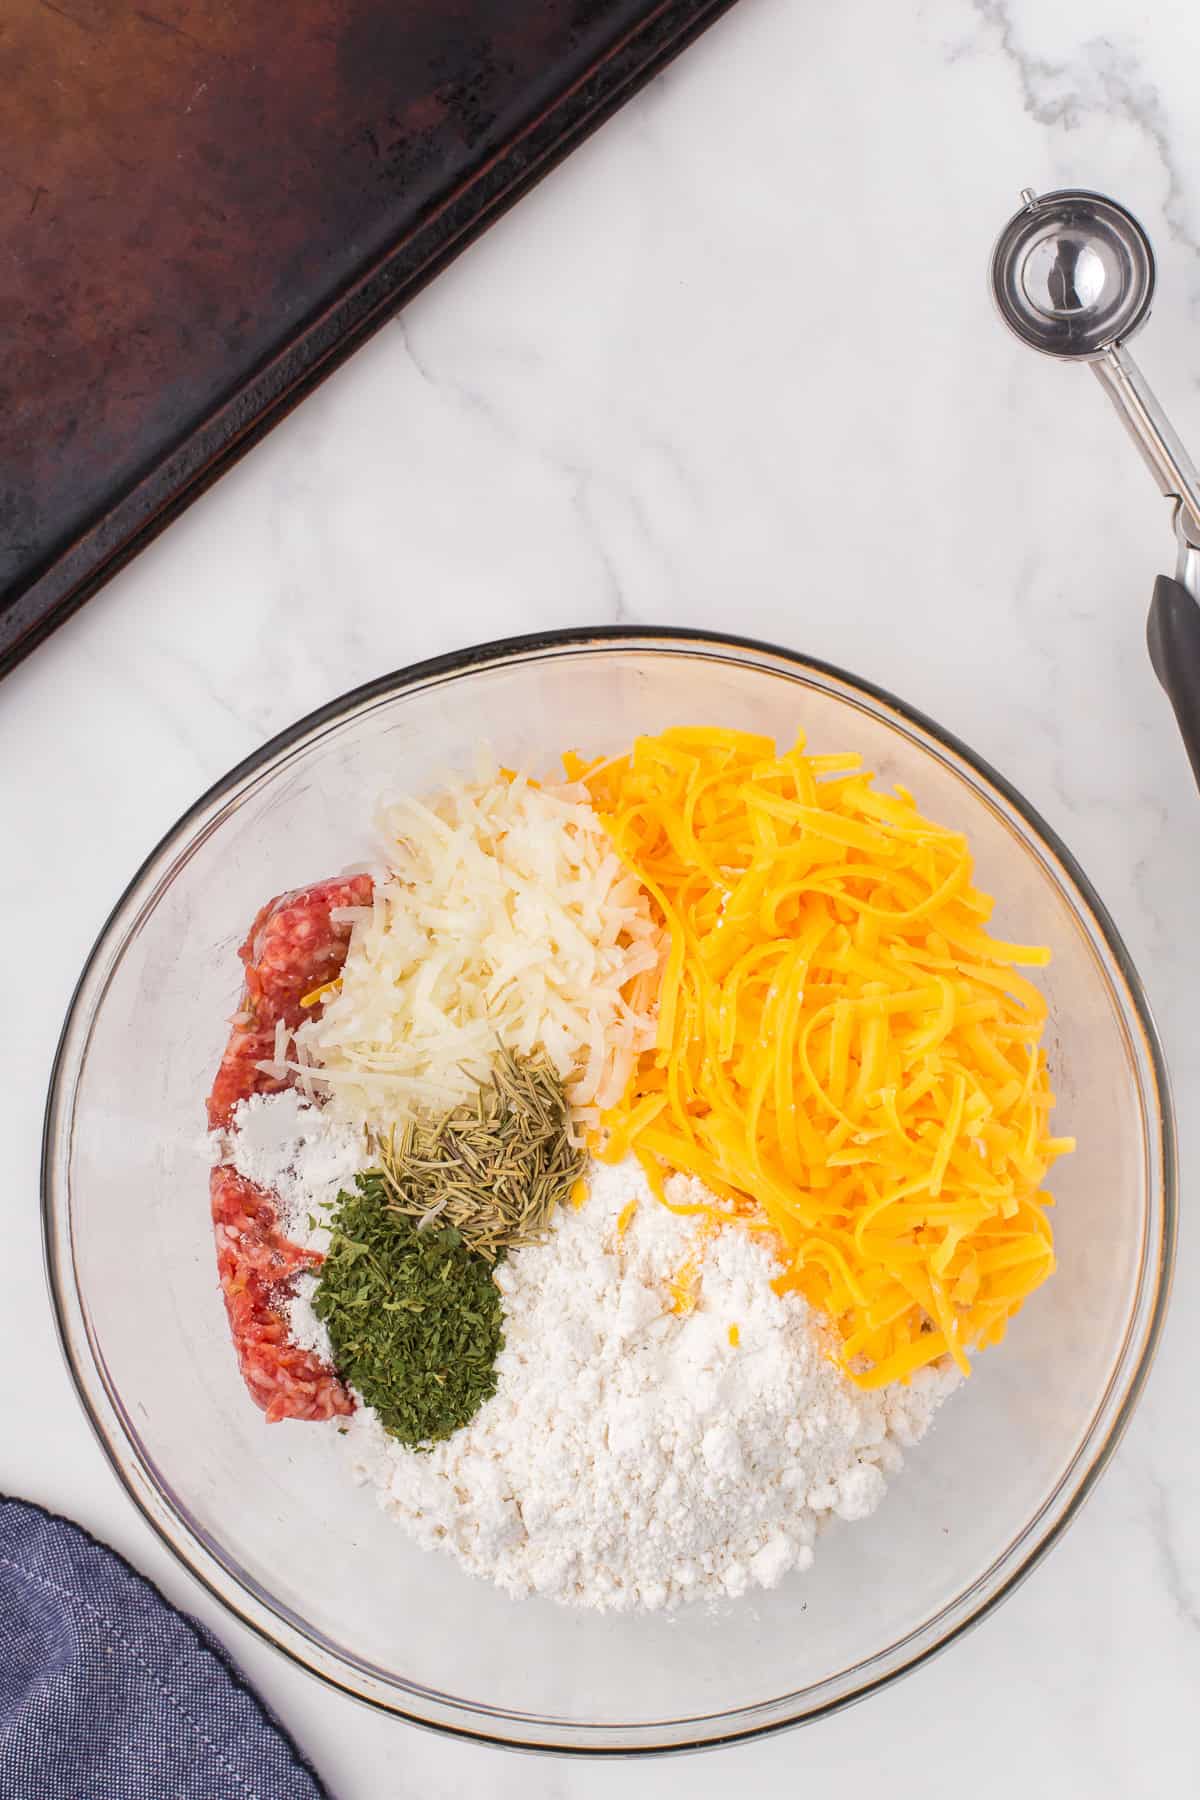
Start by adding all the ingredients to a large mixing bowl, and mix together well. I recommend mixing with your hands so as to to ensure everything is blended well.
How to Shape Sausage Cheese Balls
- Take a small chunk of the sausage mixture into your hands, and roll into little 1-inch sausage balls. Alternatively, you can also use scoop them out with a cookie scooper. Repeat with the rest of the sausage until it’s all used up.
- As you form each sausage ball, place them in rows on the un-greased jelly roll pan that you prepped in the first step.
- Bake at 350° F for 20-25 minutes, or ’til the sausage balls are cooked thru and reach an internal temperature of 165° F with a meat thermometer.
- Remove the sausage balls from the oven, and serve while warm.
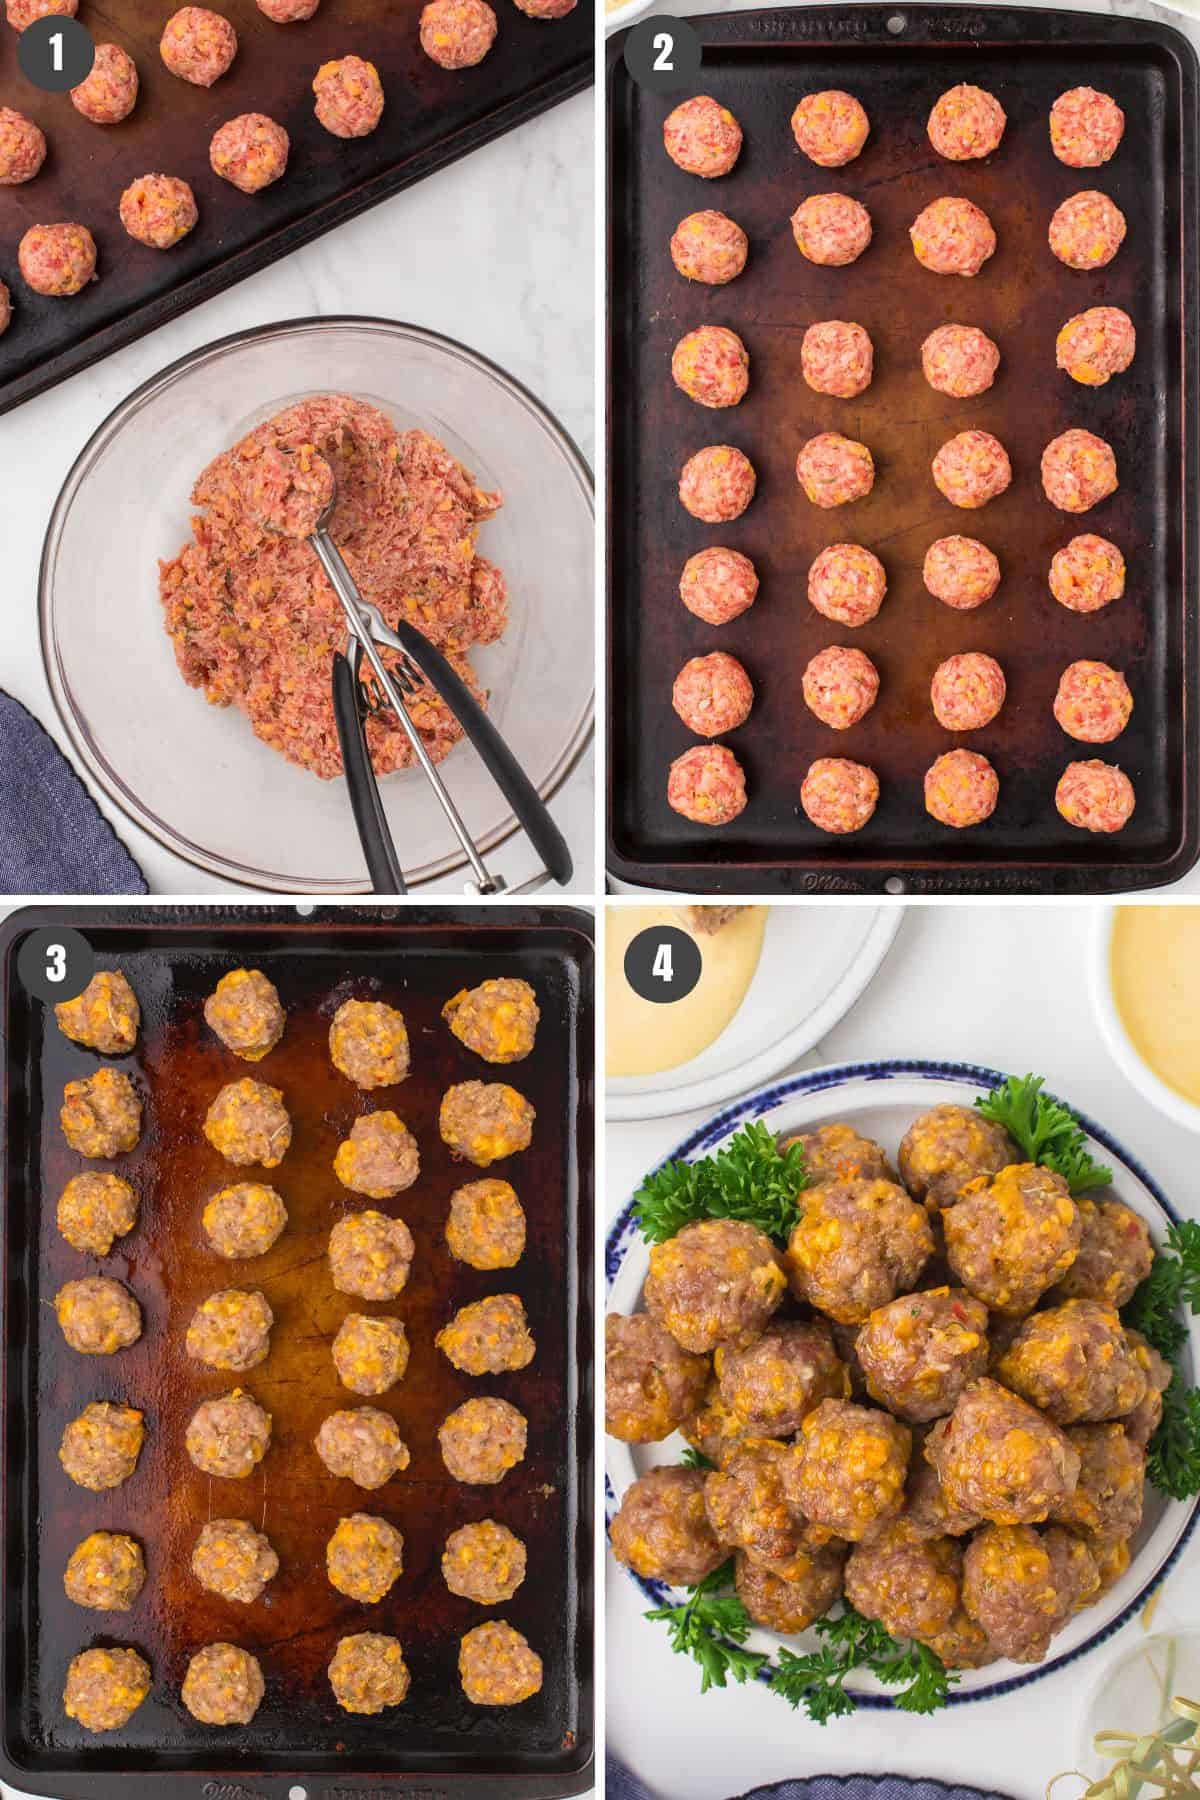
That’s it. These sausage cheese balls are best served fresh out of the oven with homemade barbecue sauce, ranch dressing, or honey mustard. They make the best party appetizer or protein-rich movie night snack!

Expert Tips and Recipe FAQ’s
Assuming that you shredded your own cheese, didn’t add too much Bisquick mix, and mixed everything together thoroughly enough, this is probably caused by either using sausage that is too lean or over-baking. If you’re using a lean sausage like turkey sausage, consider adding a couple tablespoons of butter or some cream cheese to your sausage cheese balls for a little extra fat and moisture.
Yes, this is a great snack or appetizer to make ahead. For the best texture and flavor, I recommend mixing them up and forming the sausage balls ahead of time, and then store them raw in an airtight container in the refrigerator for up to 2 days before baking as normal. That said, you can also store leftovers in the refrigerator for up to 2 days. Reheat your baked sausage cheese balls in the microwave or in an oven at 350ºF ’til warmed through.
Yes, you can freeze them. In fact, I always recommend storing your sausage balls raw in an airtight container in the freezer for up to 3 months. Pull them out ahead of time to thaw out overnight in the refrigerator, and then bake as normal.
Optional Add-Ins & Recipe Variations
- Try adding another kind of cheese, like pepper jack, Monterey jack, or Colby jack. Some people like to add cream cheese for extra richness and moisture.
- Make your sausage cheese balls with hot sausage for some spicy kick!
- Instead of making sausage balls, use these mini muffin tins to make the cutest little cheesy sausage muffins, kind of like my meatloaf muffins!

More Bite-Sized Snacks and Appetizers
- Maple Sausage Stuffed Pastry Bites
- Apple Cheese and Crackers
- Muffin Tin Taco Cups
- Garlic Parmesan Chicken Skewers, Marinated Grilled Shrimp Kabobs and Fruit Kabobs
- Dill Pickle Ham Rollups
- Chicken Dip Pinwheels
- Bacon Wrapped Apples With Cheese
- Deviled Eggs in 30 Minutes or Bacon Ranch Deviled Eggs
If you try this recipe, why not leave a star rating in the recipe card right below and/or a review in the comment section further down the page? I always appreciate your feedback. You can also follow me on Pinterest, Facebook, Instagram, and YouTube. And subscribe to my email list too!

Sausage Cheese Balls
Equipment
- Cookie Scooper optional
- Meat Therometer optional
Ingredients
- 2 pounds pork sausage
- 1 1/2 cups Bisquick baking mix
- 3 cups cheddar cheese shredded
- 1/2 cup parmesan cheese shredded
- 1 teaspoon dried rosemary leaves
- 1 teaspoon dried parsley
Instructions
- Pre-heat the oven to 350° F, and get your cheese shredded.
- Add all the ingredients to a large bowl, and mix together well. Mixing with your hands may help to ensure everything is blended well.
- Roll or shape into small 1-inch balls.
- Place the sausage balls in rows on an un-greased jelly roll pan.
- Bake at 350° F for 20-25 minutes, or 'til the sausage balls are cooked thru and reach an internal temperature of 165° F.
- Remove the sausage balls from the oven, and serve while warm.


These are so fun and super easy and a real crowd pleaser! Perfect for game day or appetizers for the holidays!