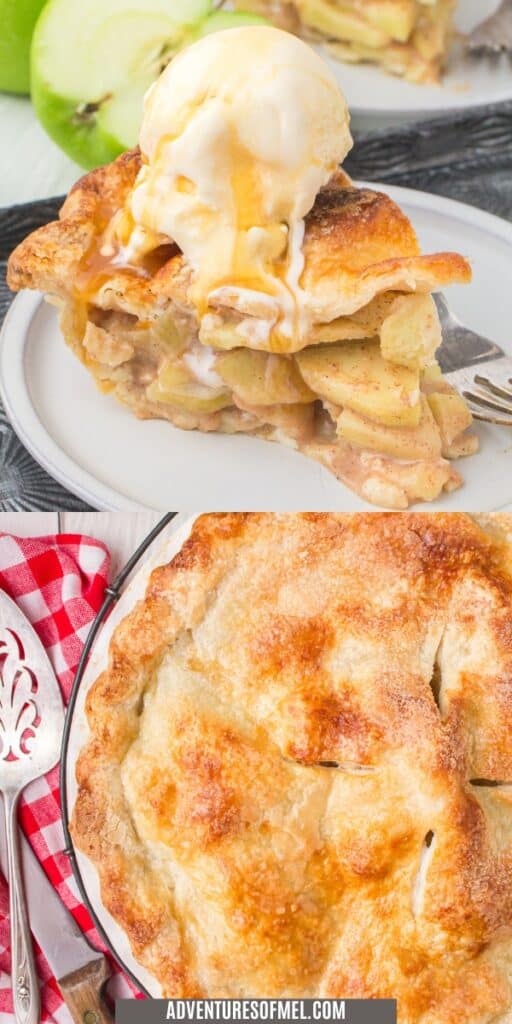
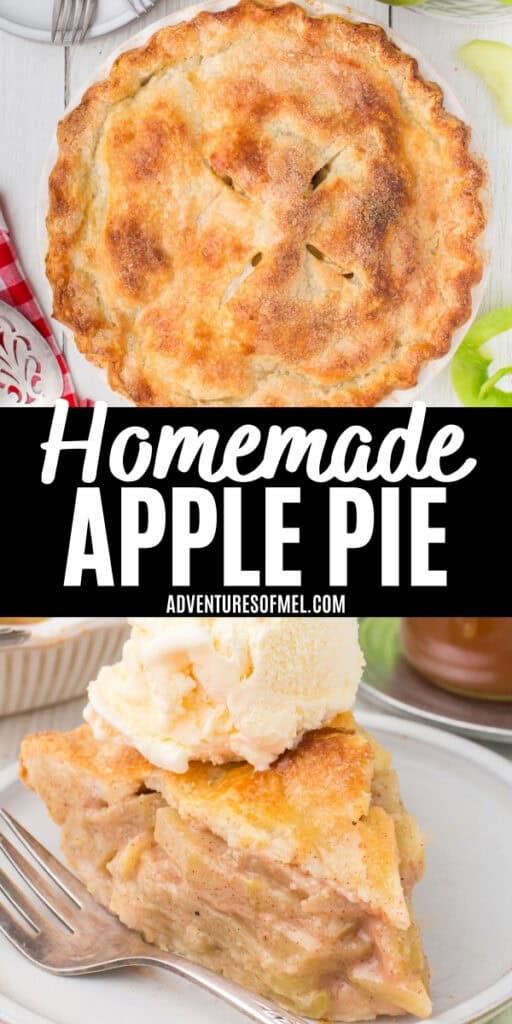
This homemade apple pie is a delicious old-fashioned dessert made with fresh apples, warm spices, and a flaky buttery crust. An easy classic apple pie recipe perfect for Thanksgiving, holidays, or anytime you’re craving a li’l comfort baking with cozy fall flavor.
When I set out to write this recipe, I wanted this to be an easy homemade apple pie recipe, kinda like my Dutch apple crumb pie (made with a crumb topping). I know how daunting pie may seem, but it actually can be one of the easiest desserts you’ll ever make.
My mom used to love making her double crust traditional apple pie. I wish I had her recipe, but I’ve searched thru all the papers and recipe cards I have and haven’t found it yet.
Everyone loved Mom’s apple pie; it was the absolute best homemade apple pie recipe. She made it year round, and especially during the fall and holiday season, because, along with pecan pie, it was a much requested dessert at family gatherings.
While my recipe isn’t Mama’s favorite apple pie recipe to an exact t, I did my best to do her proud. And I have to say, this old-fashioned apple pie from scratch turned out quite delicious and full of warm fall flavor. It really is the ultimate comfort food and such a timeless dessert.
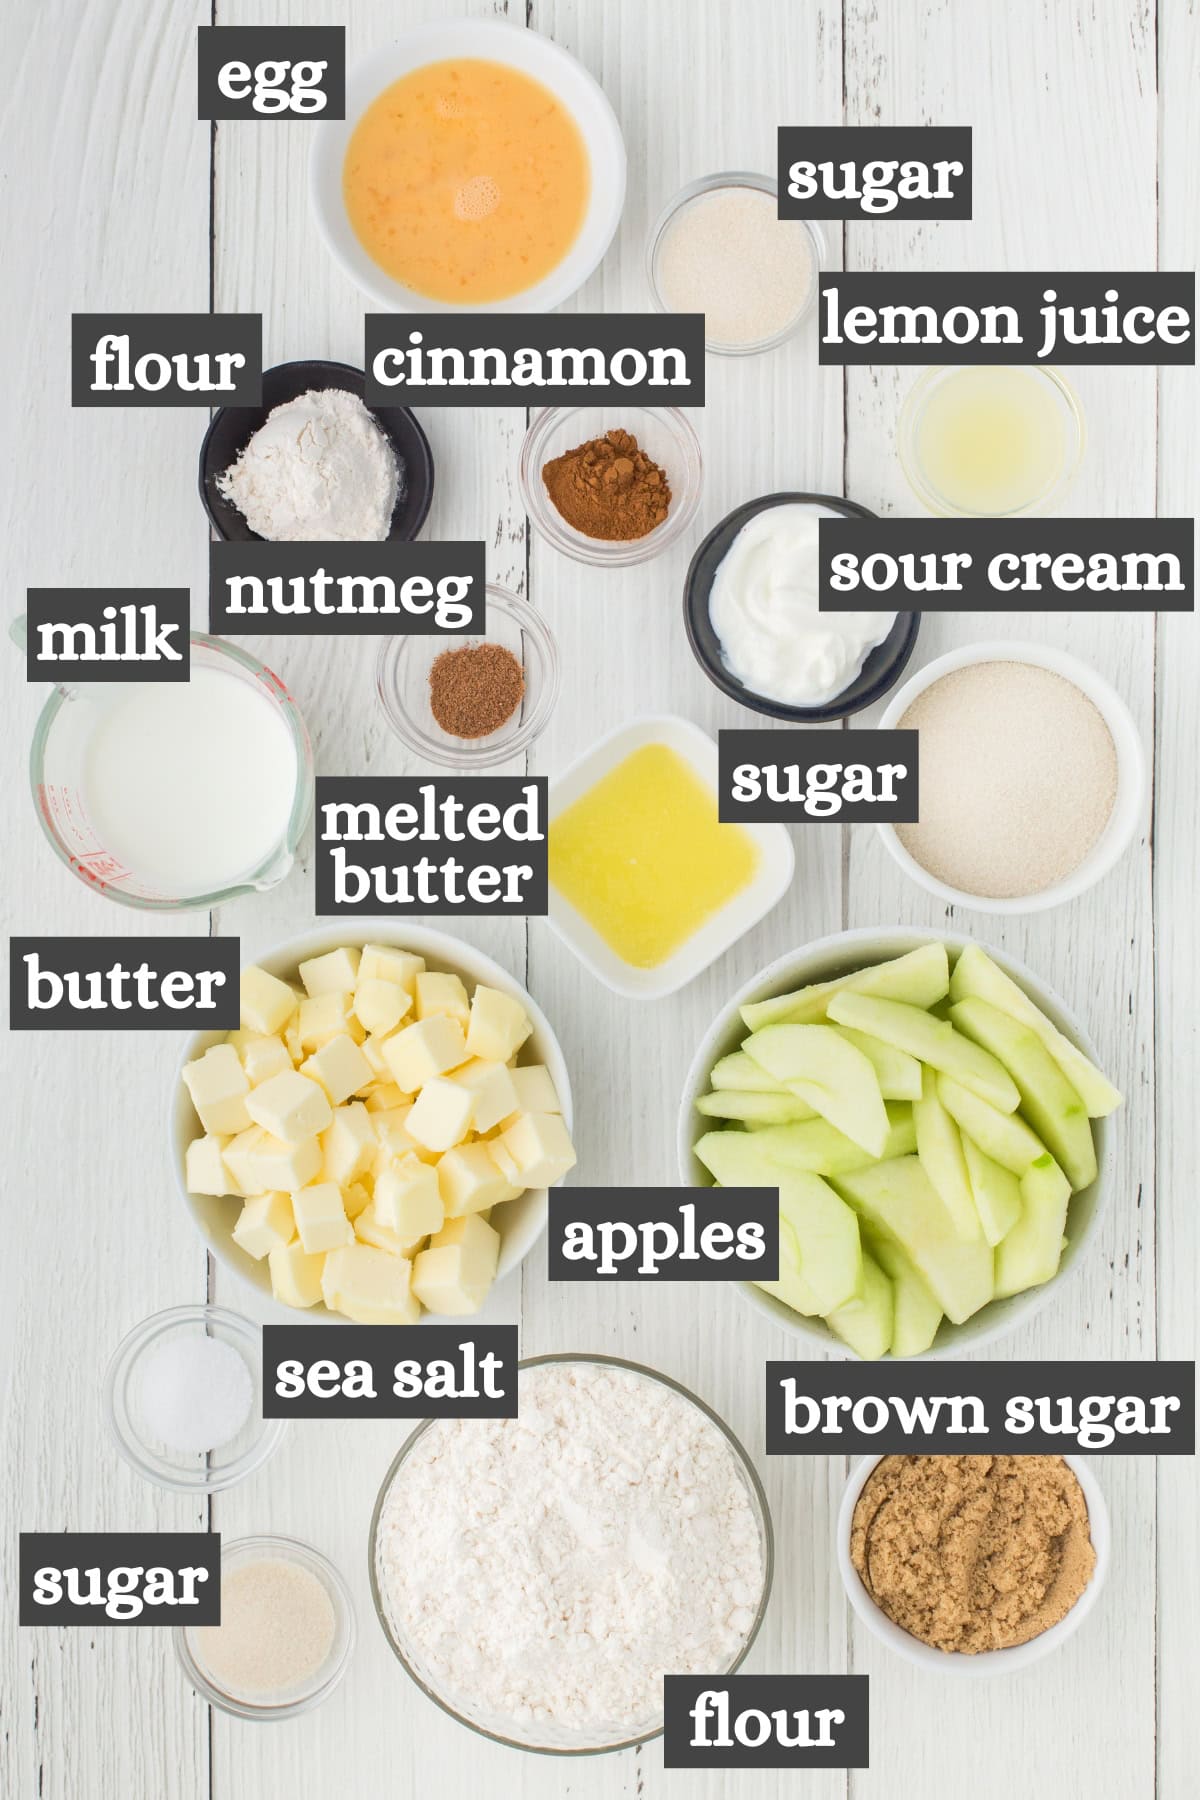
Ingredients Notes and Substitutions
First you’ll need to gather your ingredients…
Crust Ingredients (for Homemade Crust)
Now you can use a store-bought crust, but I highly recommend a homemade pie crust. I love homemade because it’s buttery, flaky, and lends even more flavor to the apple filling.
- All-Purpose Flour – You can also use gluten-free flour; I do all the time. You’ll need flour for both the crust and for rolling out the crust.
- Cane Sugar – or granulated sugar.
- Sea Salt
- Salted Butter – Don’t use margarine, as this will change the final texture of your pie crust.
- Whole Milk – Don’t skimp on the fat; use whole milk for better texture and flavor.
- Large Egg – You’ll need a beaten egg, along with a little bit of sugar, to make the egg wash for the top crust.
Apple Filling Ingredients
- Apples – Using a mix of apple types will give the best flavor, so use what you have on hand before going and buying new. However, if you don’t have any apples on hand… For any kind of apple pie, crisp, cobbler, or crumble, I love using seconds; seconds are imperfect apples you can often buy cheaper and in bulk at an orchard or farmer’s market. I prefer to use Jonathan apples or Jonagold apples. Jonagolds are a cross between Jonathans and Golden Delicious, and they are so sweet, tart, and crisp. More ideas for great apples include Granny Smith apples, Golden Delicious, Pink Lady, Honeycrisp, Braeburn, Cortland, and Northern Spy. According to Bob’s Red Mill, Northern Spy is a rare apple and hard to find; but if you love apple pie, it’s definitely one you may want to hunt down.
- Salted Butter – I prefer salted butter because the salt adds to both the flavor and the sweetness of the pie filling.
- Sour Cream – This may seem an unnecessary ingredient to some, but I find that it gives a tang and a slight creaminess to my apple pie filling. It just adds so much to the flavor.
- Lemon Juice
- Cane Sugar – You can also use granulated sugar.
- Light Brown Sugar
- Ground Cinnamon
- Ground Nutmeg
- All-Purpose Flour – You can also use cornstarch; I’ve actually used both and had great success with both.

How to Make Homemade Apple Pie
There’s a little bit of prep work involved with this recipe; just wash, core, peel, and thinly slice the apples.
Step 1 – Make the Pie Crust (If Homemade)
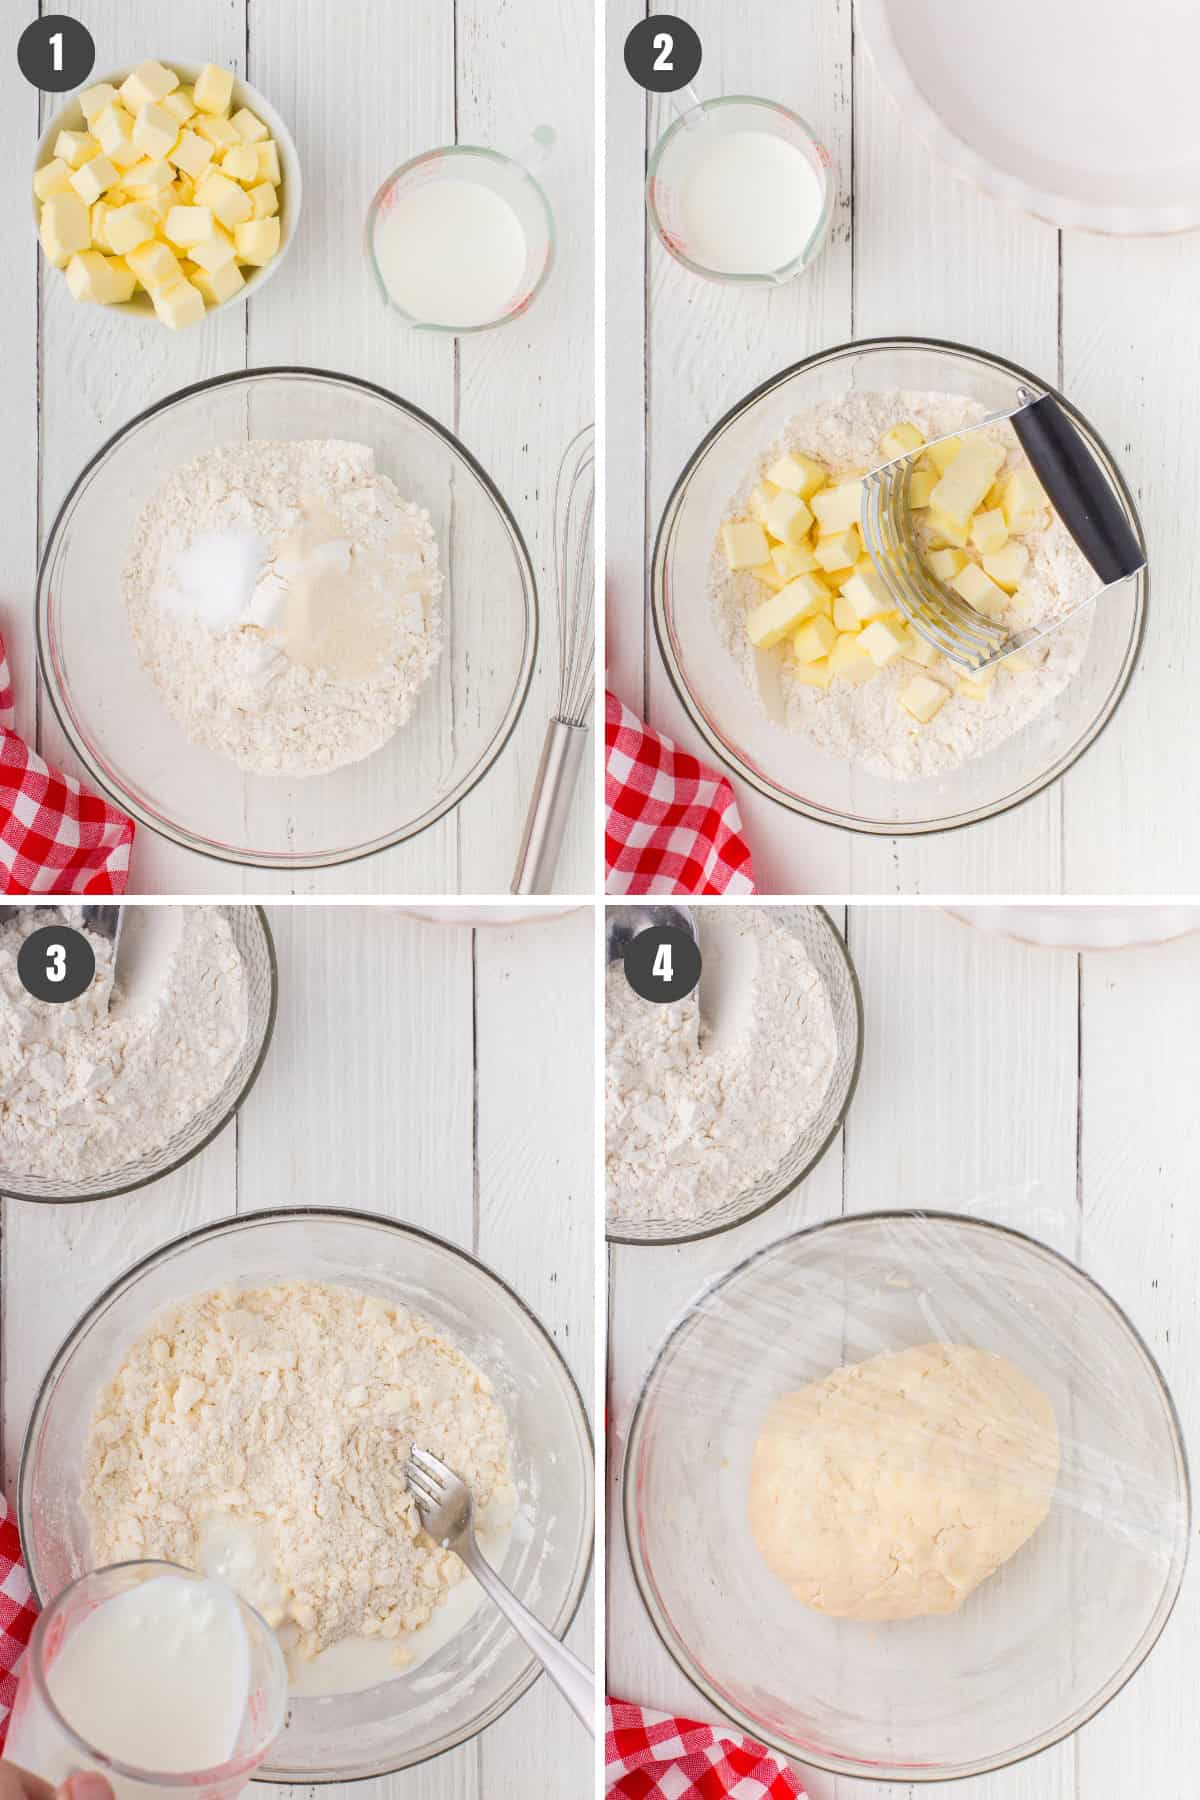
- In a large bowl, whisk together 2 cups flour with the sugar and salt.
- Slice cold butter into the flour mixture. Using a pastry blender, cut the butter into the flour mixture ’til it resembles coarse crumbs.
- Gradually add the milk to the mixture, mixing together ’til the mixture forms together well.
- Cover or wrap the pie dough in plastic wrap, and chill in the fridge for at least 30 minutes.
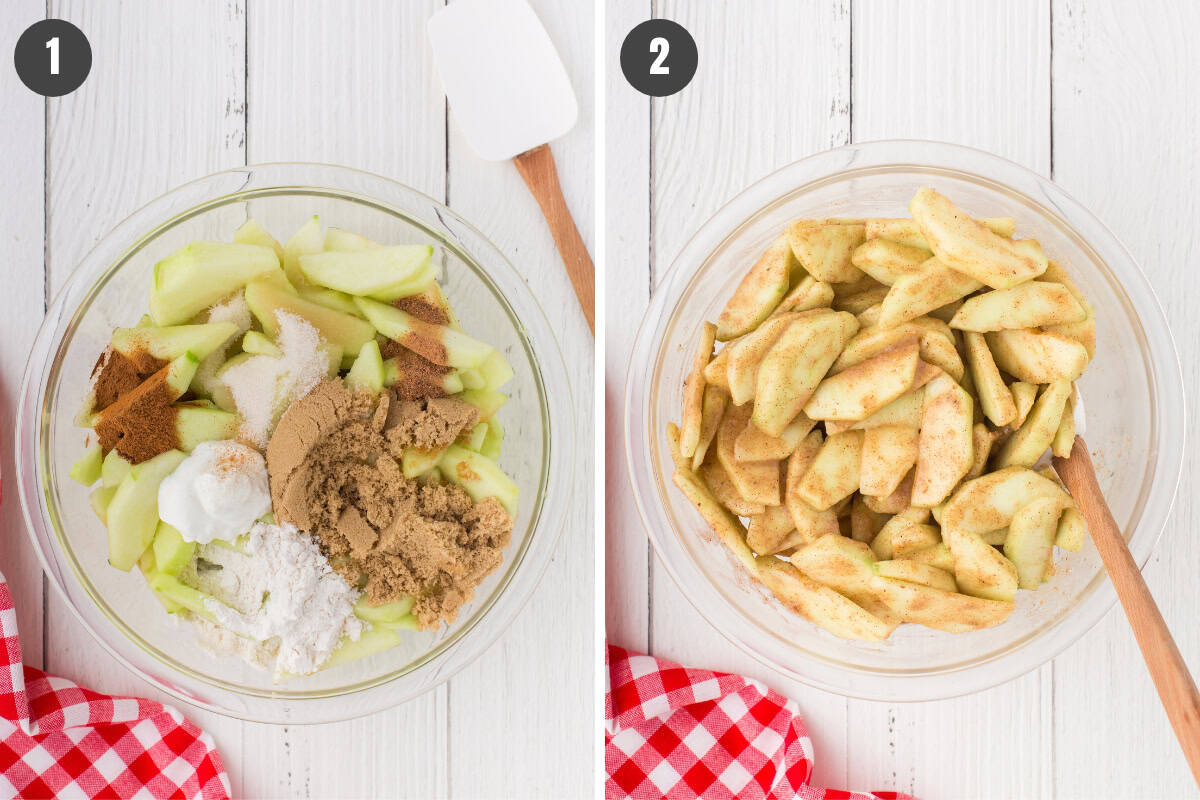
Step 2 – Prepare the Apple Pie Filling
- Meanwhile, add the sliced apples to a large mixing bowl. Then add the melted butter, sour cream, lemon juice, sugars, cinnamon, nutmeg, and flour to the apples.
- Stir everything together well.
Step 3 – Assemble the Pie
At this point, pre-heat your oven to 375° F.
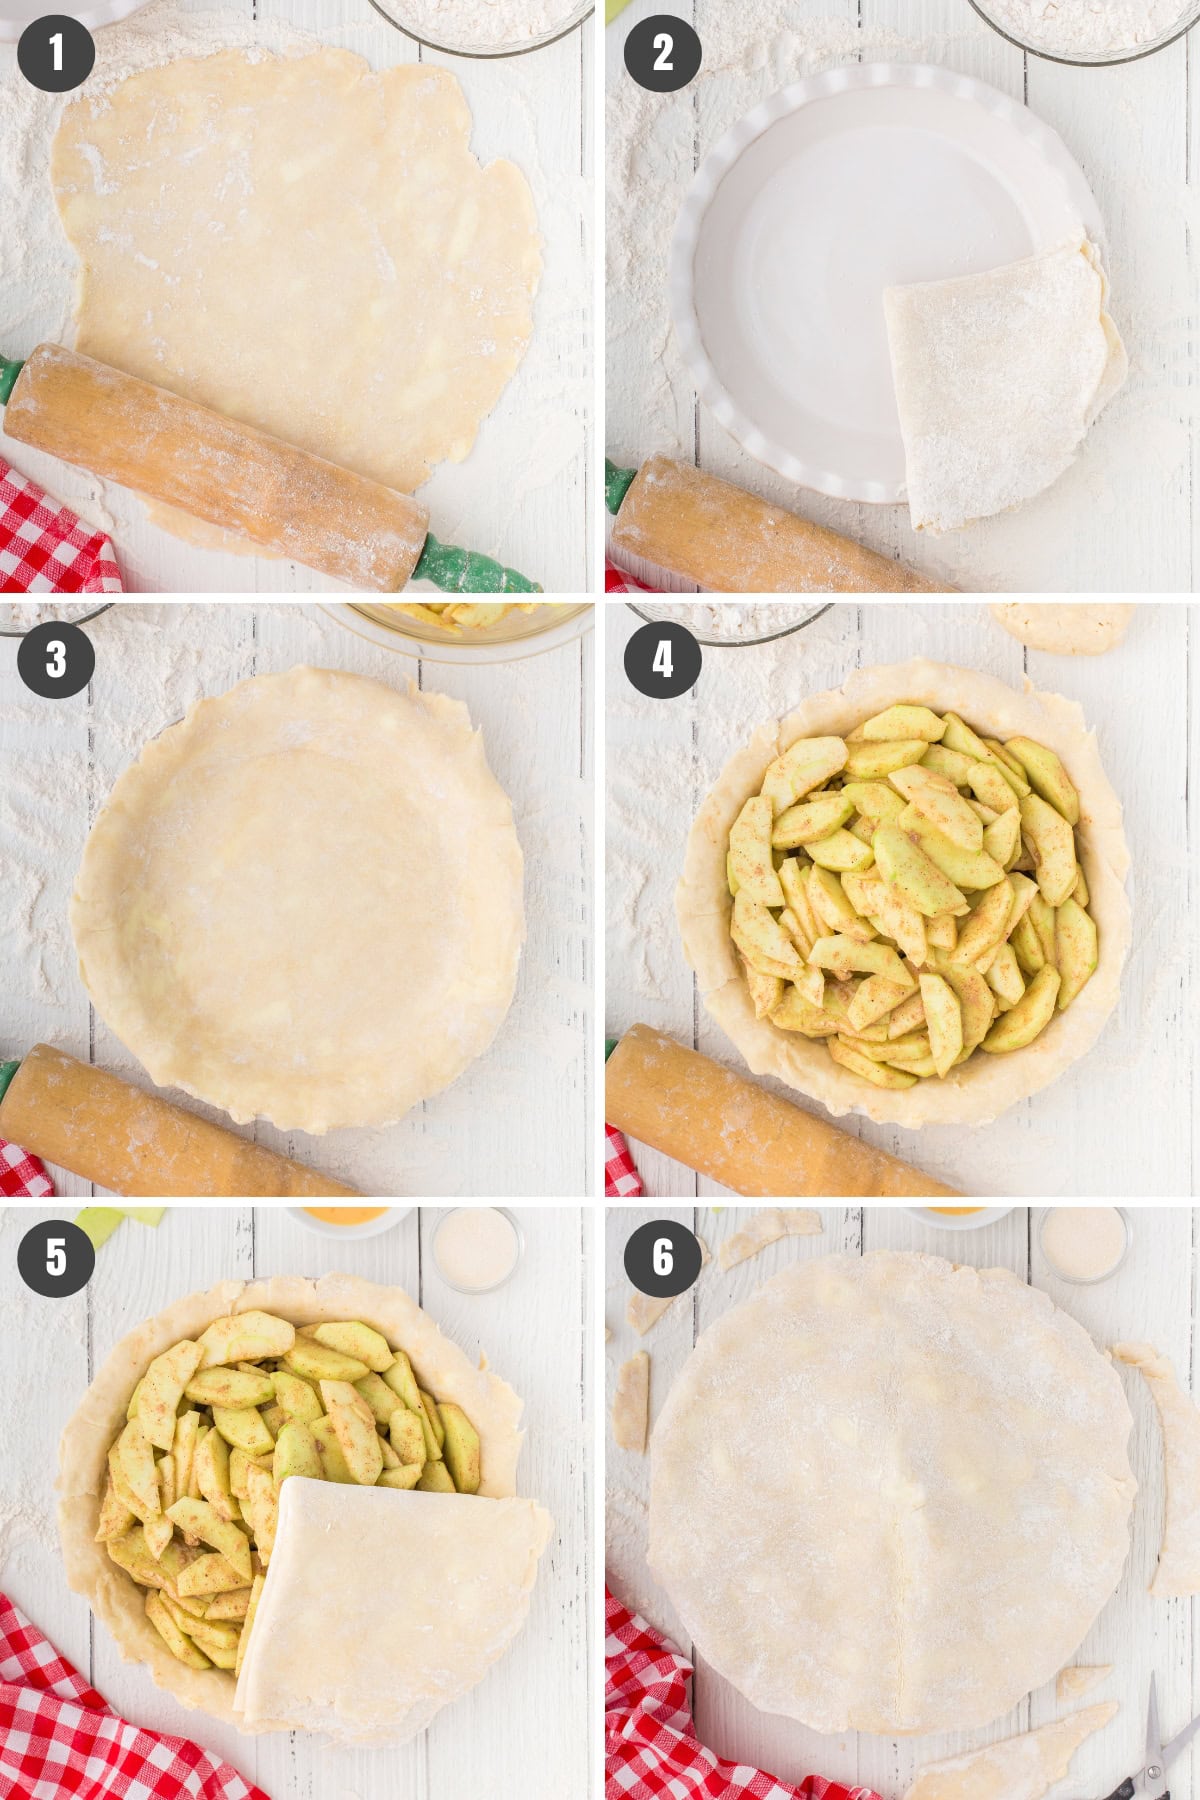
- Sprinkle a clean surface with part of the extra flour, so the dough won’t stick to the surface. Separate the dough into 2 halves, set one half aside, and roll out the other half of the dough with a rolling pin, equally rolling in all directions, ’til the dough is about 2 to 3 inches bigger around than your pie plate.
- Fold the crust in quarters; then carefully place the dough in the pie plate, unfolding it to cover the entire plate.
- Smooth it out inside the pie plate, and then trim off any overhanging edges with kitchen shears or a knife; leave enough dough (about 1/2 inch overlapping) so you can flute the edges of the crust.
- Pour the apple pie filling into the unbaked pie shell.
- Sprinkle the floured surface with more of the extra flour. Then roll out the other half of the dough with your rolling pin, ’til the dough is 2-3 inches bigger than the pie plate, allowing extra room for the filling. Fold this top crust in quarters, and carefully place over the filling and bottom crust, unfolding this top crust to cover the entire pie.
- Trim off any overhanging edges, leaving about 1/2 inch overlapping.
Finish the Top of the Pie
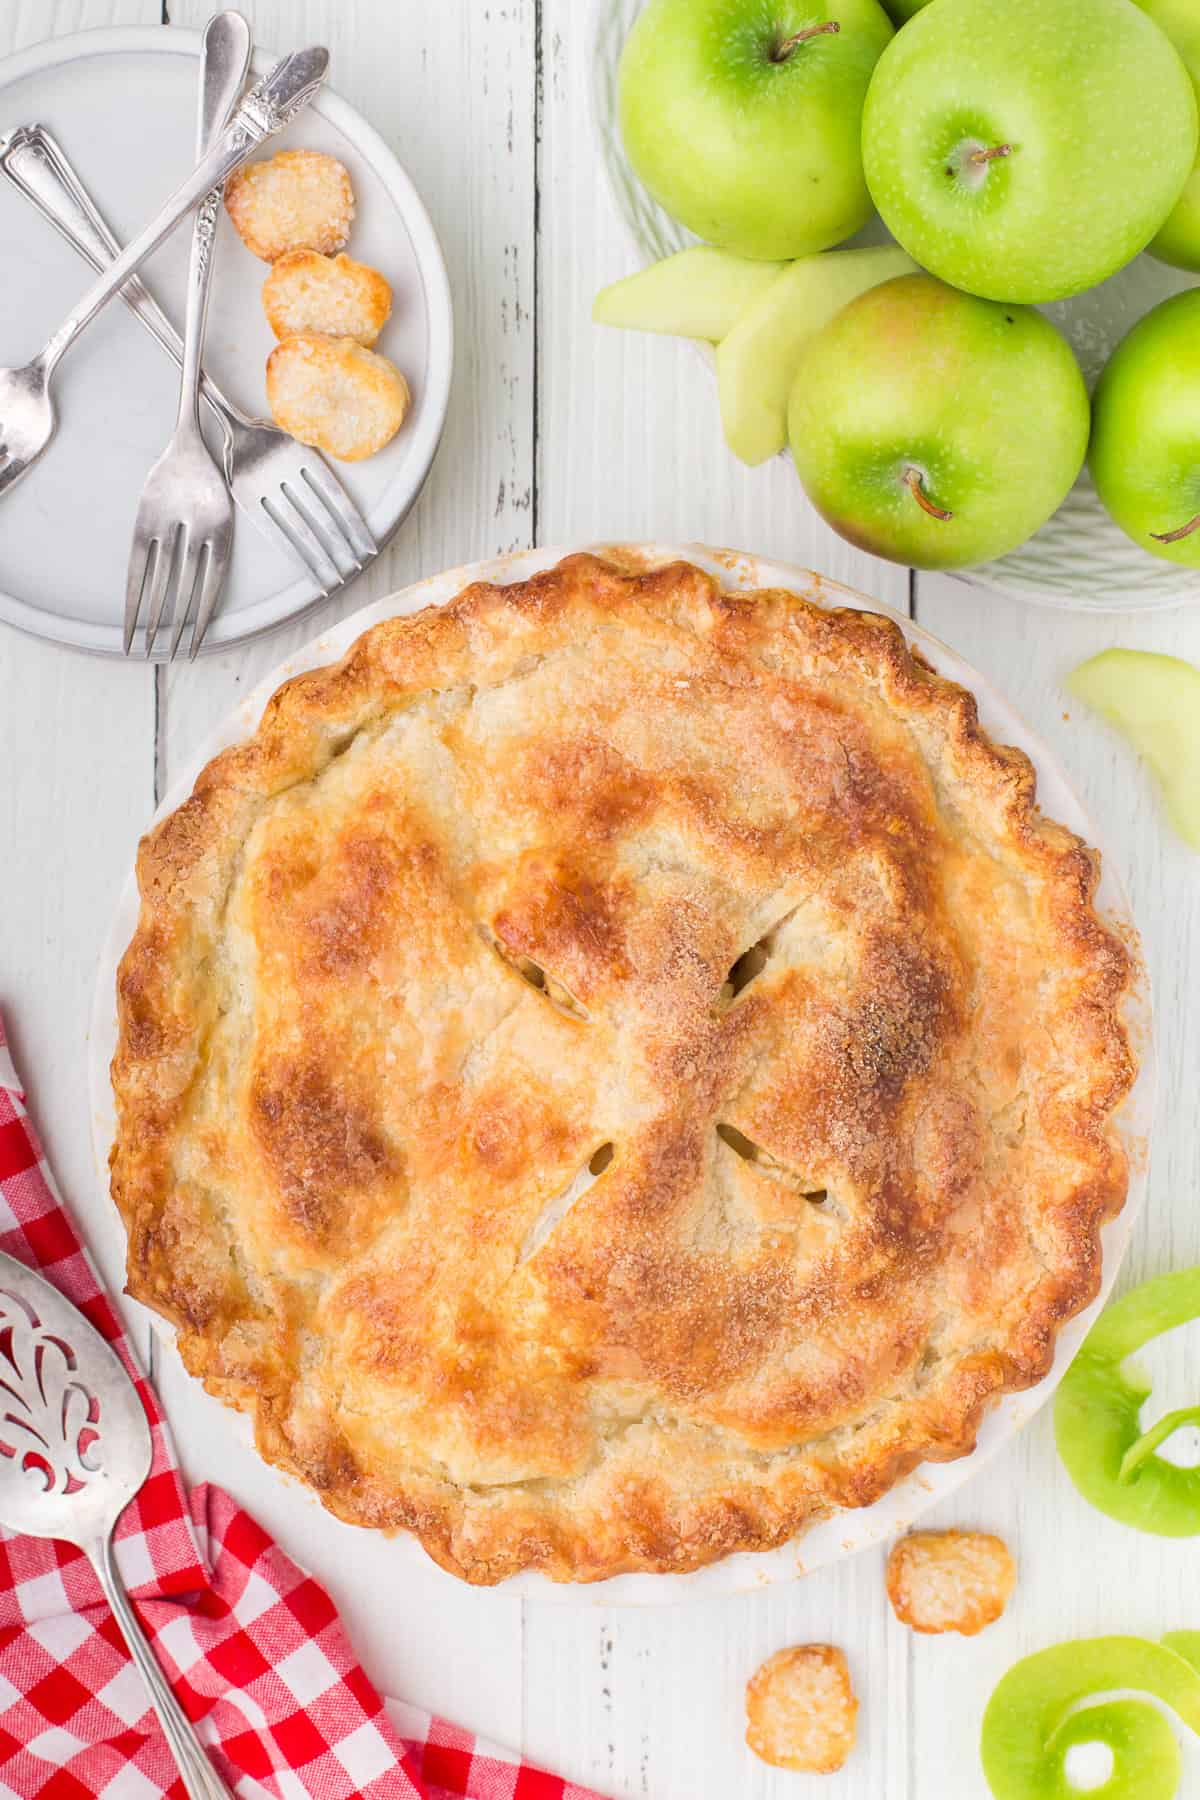
- To create a fluted edge, use your thumb and index finger, along with the tip of your opposite index finger, to flute or pinch the edge of the dough all around the pie plate. Then cut 4 slits in the top of the crust to allow it to vent and release steam.
- Lightly brush the top of the pie crust with the egg wash; then sprinkle sugar over the egg washed crust.

Step 4 – Bake the Pie
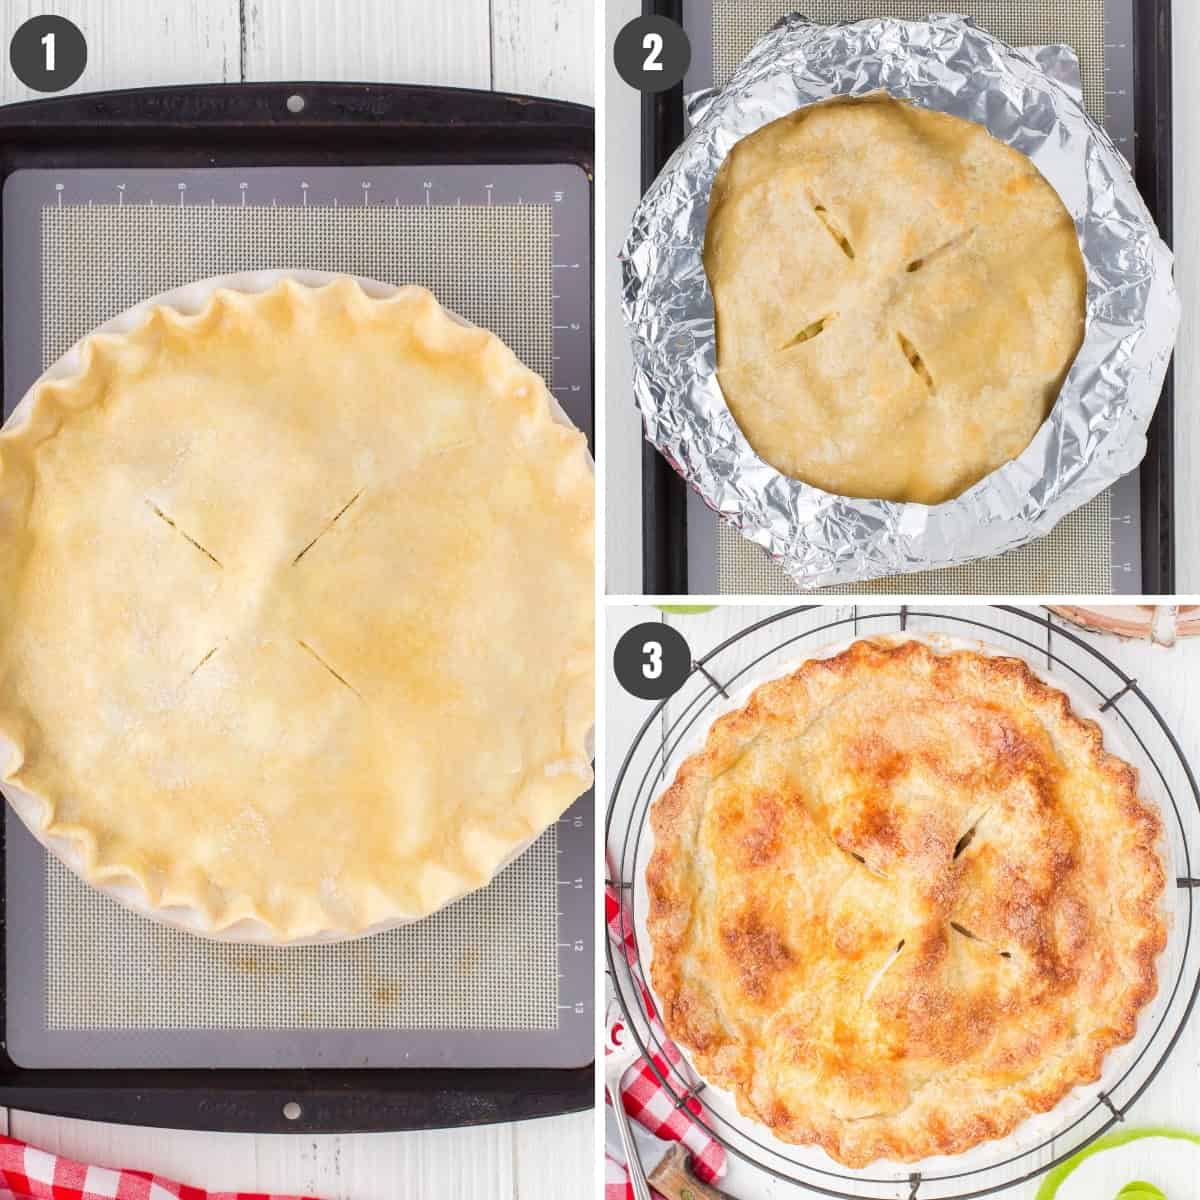
- Place the pie plate on a cookie sheet to catch any drips while baking.
- Bake the apple pie on the middle oven rack at 375° F for about 20-25 minutes. Then add a pie crust shield to prevent the edges from over-browning or burning (you can use aluminum foil for this, or a re-usable pie shield). Continue baking for another 35-45 minutes, ’til the pie is golden brown and bubbly.
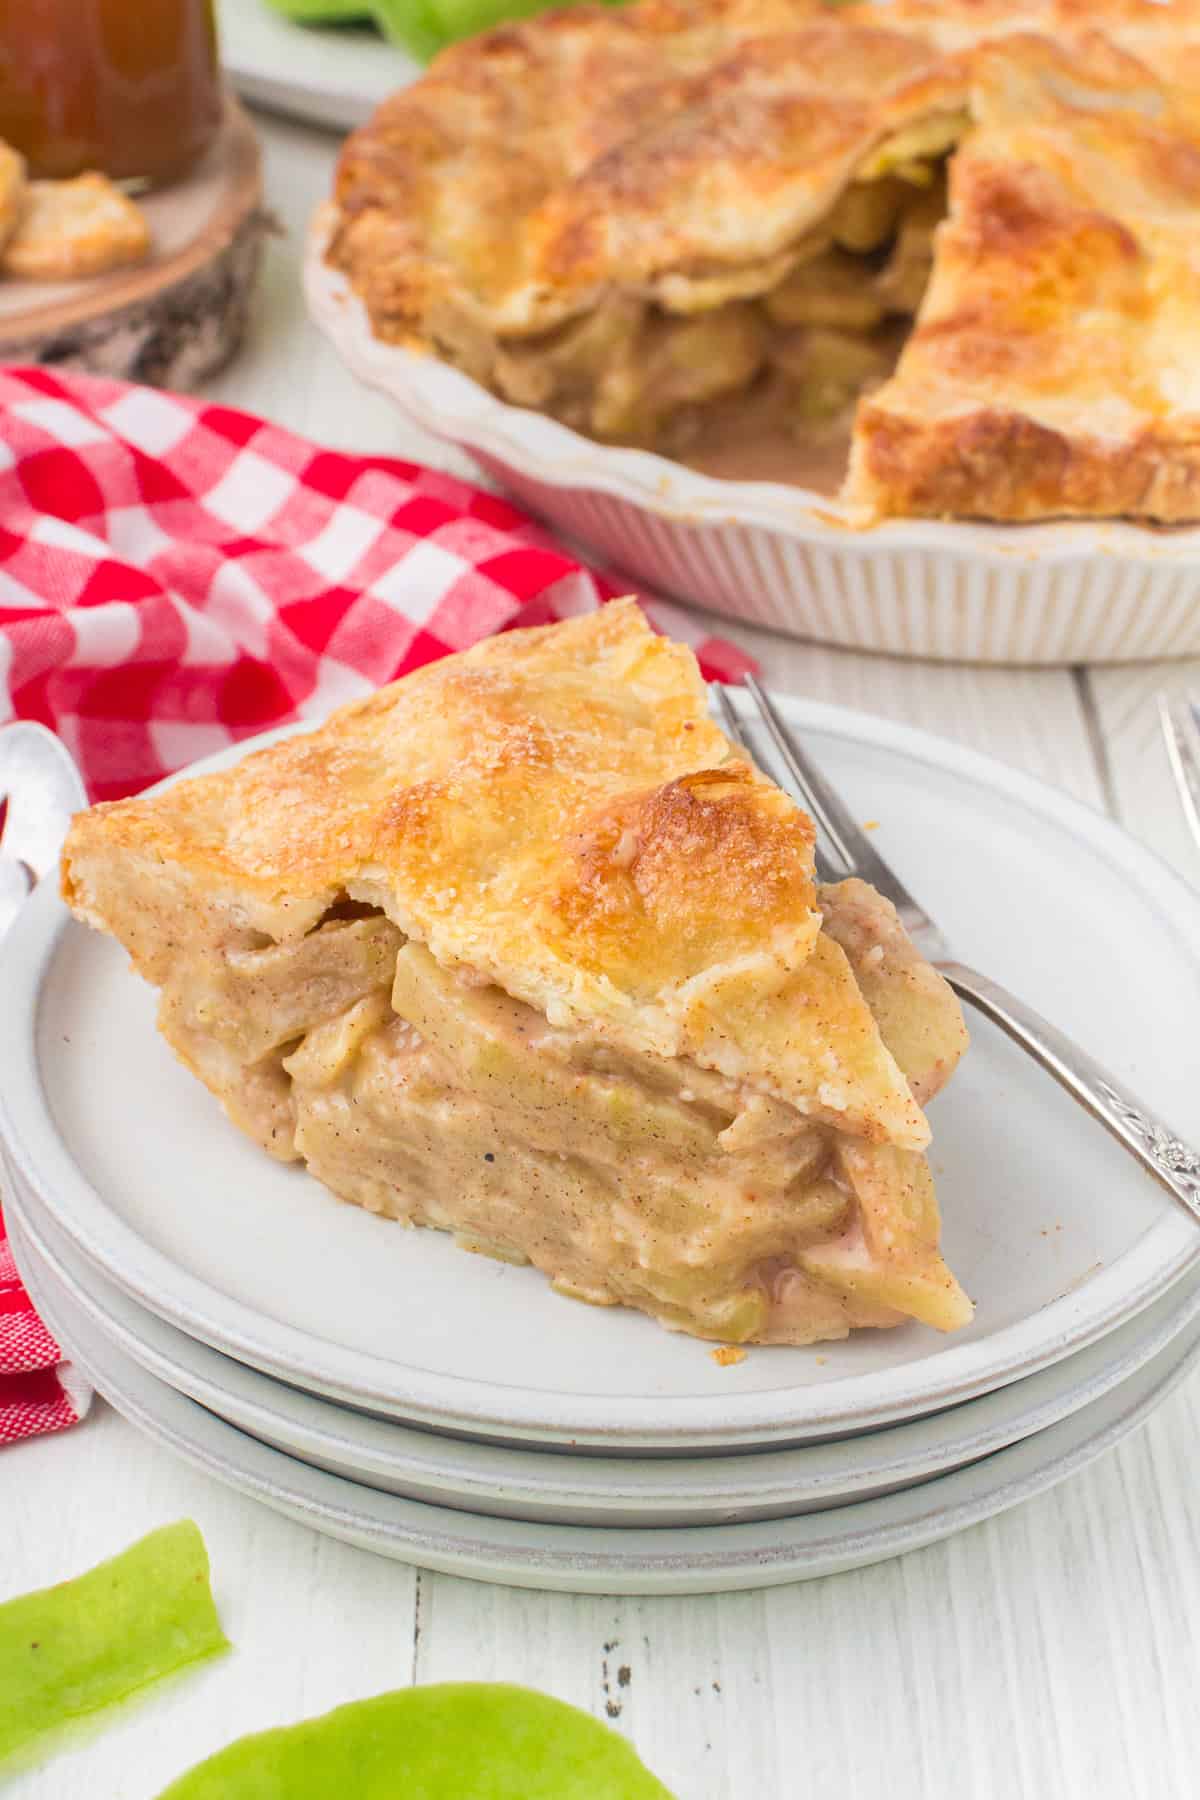
- When the pie has finished baking, remove the pie from the oven, and cool on the kitchen counter for about 3-4 hours before slicing and serving.
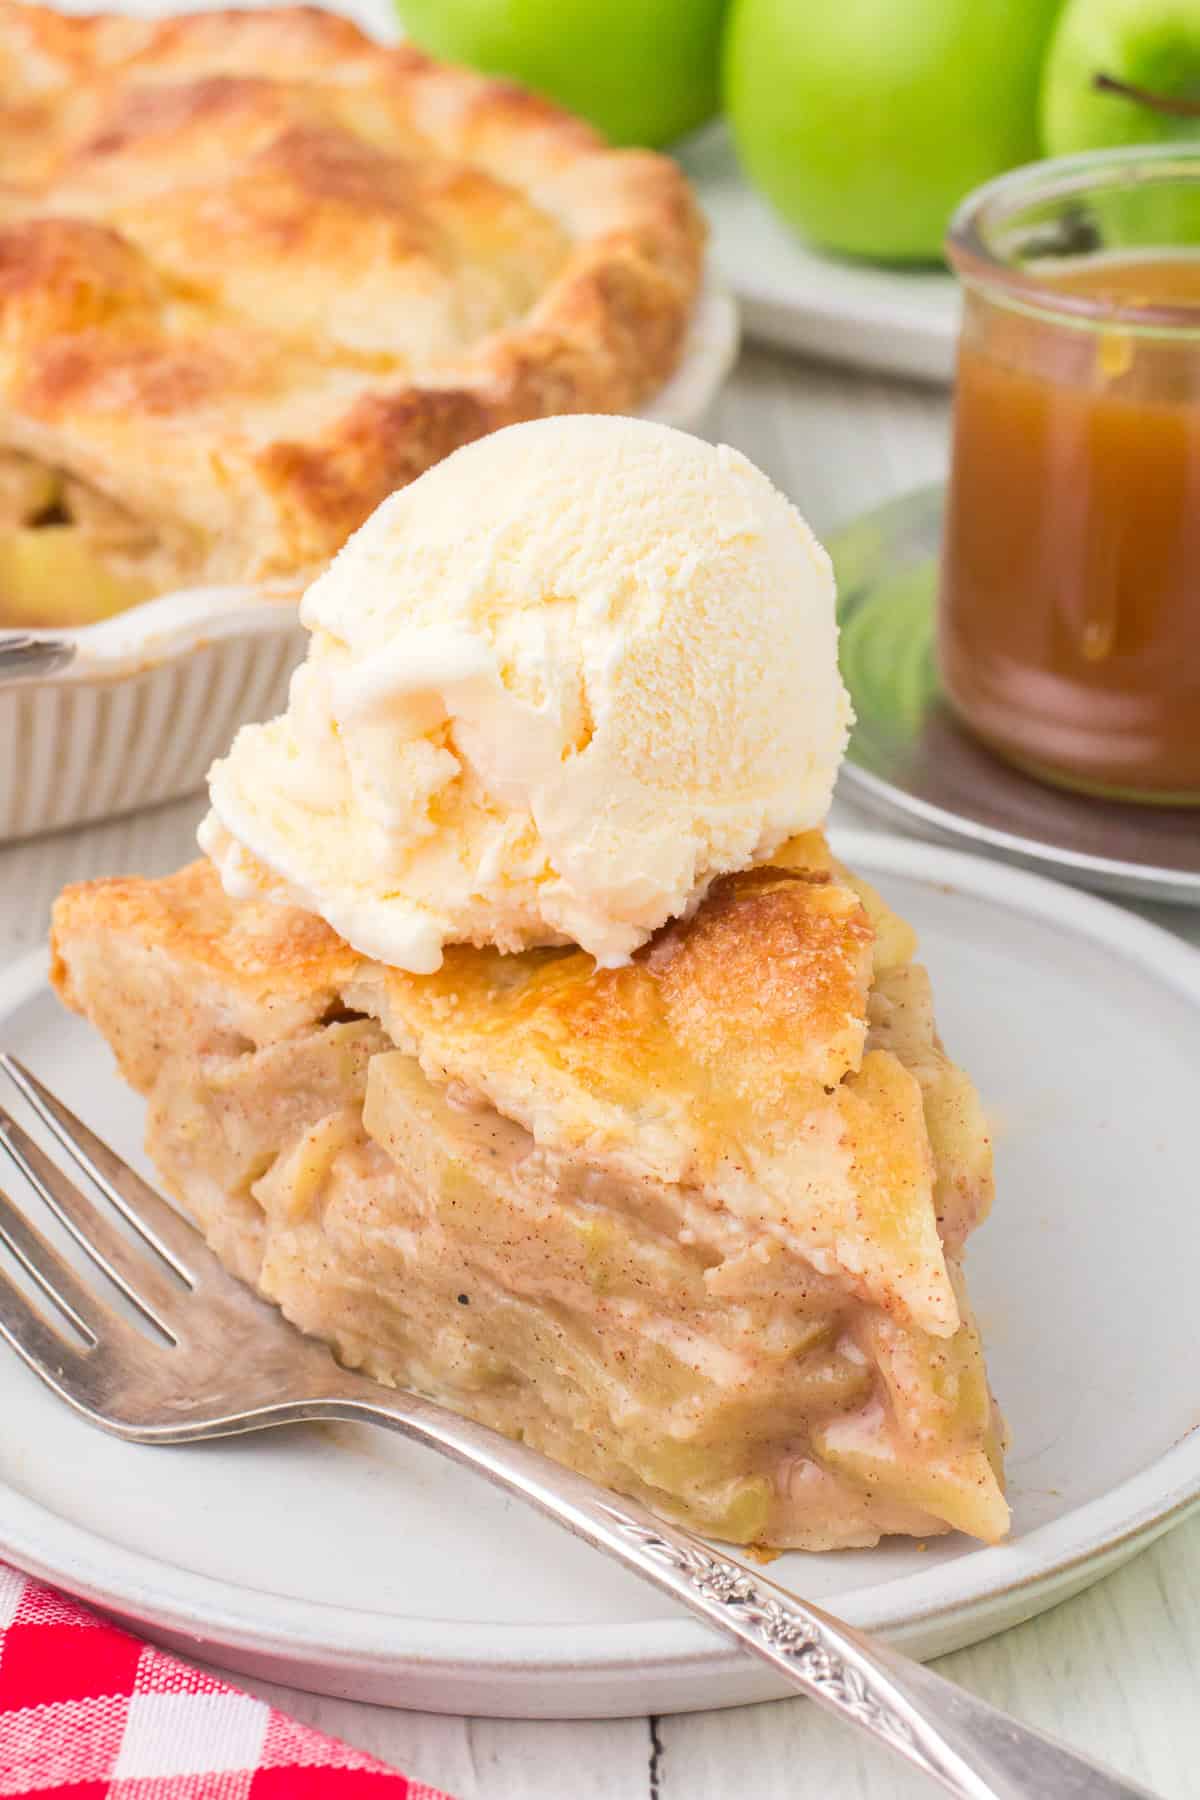
Allowing the pie to cool before slicing into it will allow it to completely set up, and you’ll get a cleaner slice without having to grab a spoon to scoop. So, so good!
What to Serve with Apple Pie
Here are a few (very scrumptious) ideas for what to serve with apple pie.
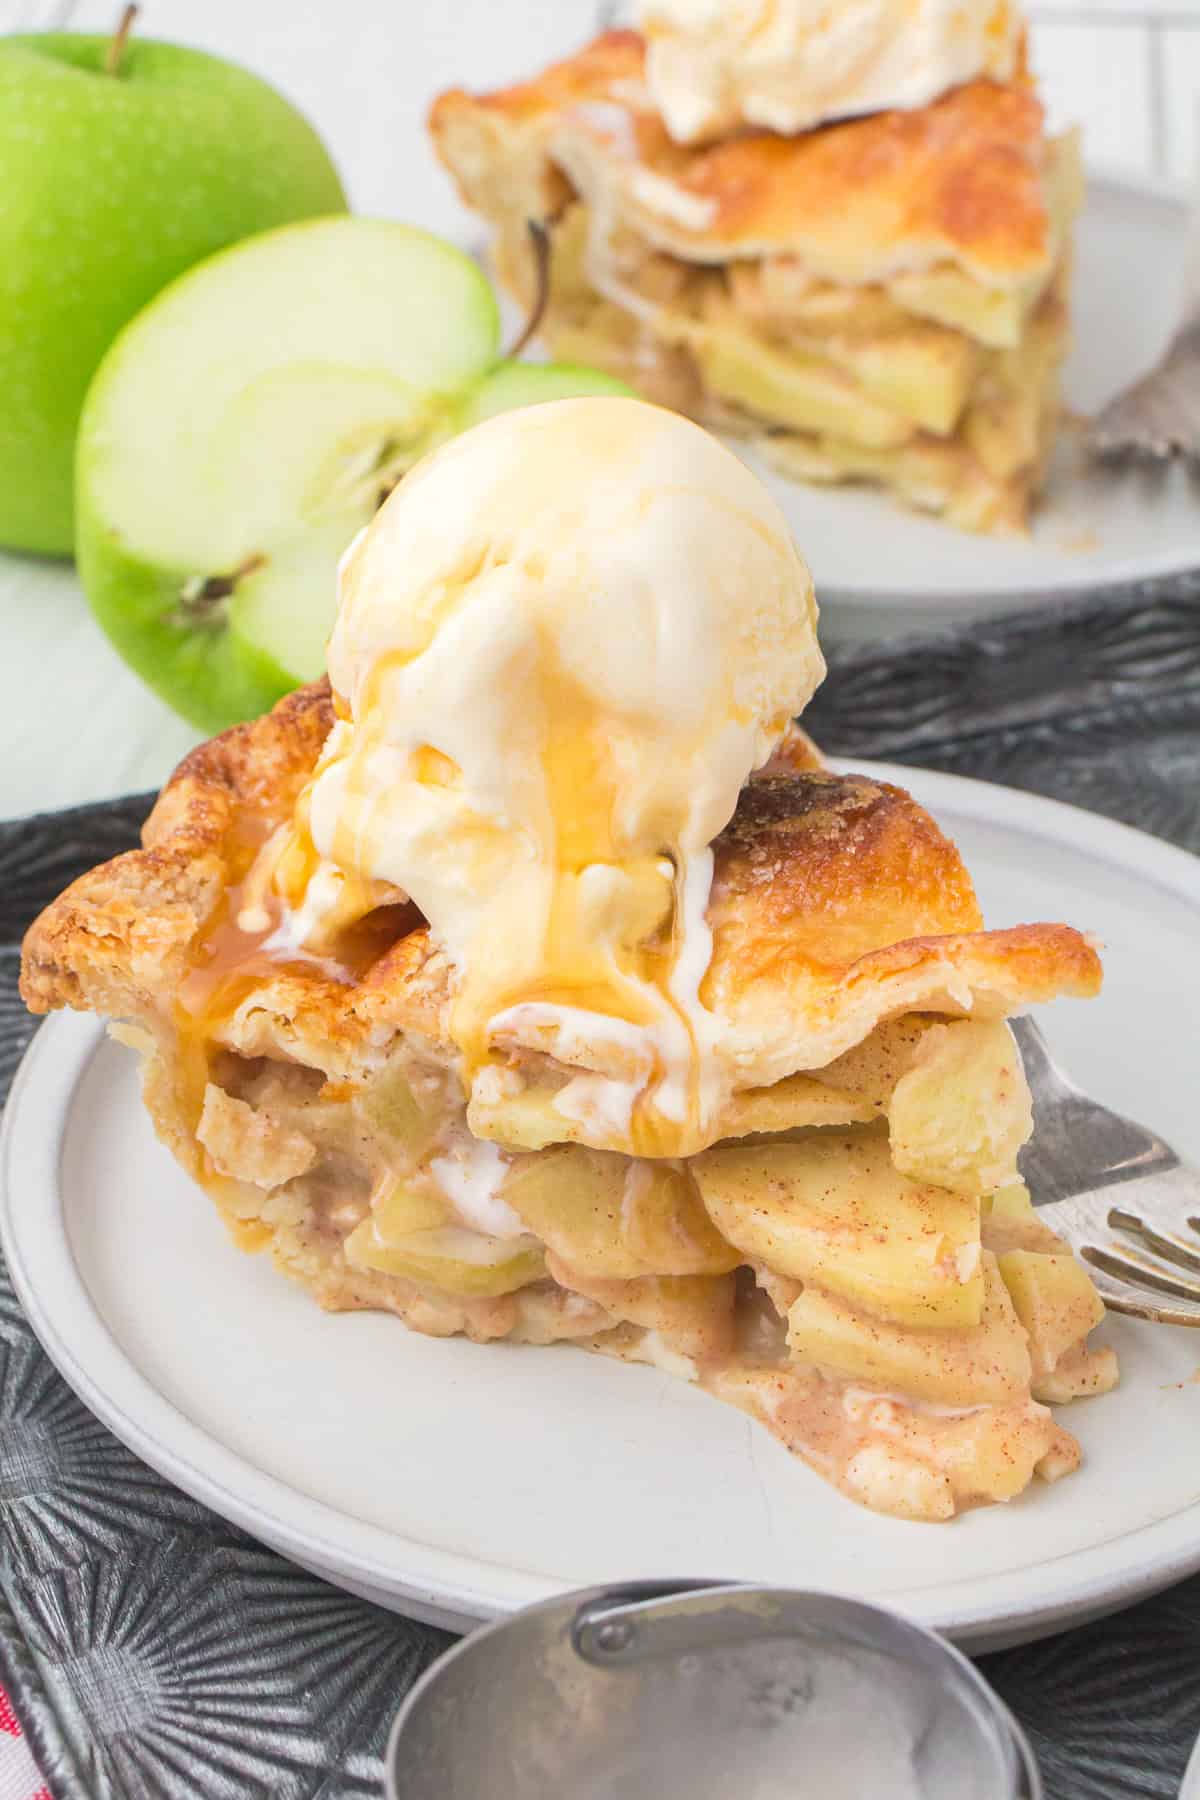
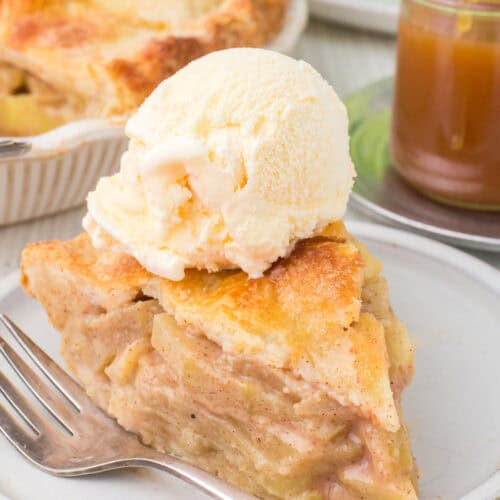
- My favorite is vanilla ice cream, or better yet, raw milk vanilla ice cream. I love adding a scoop of ice cream on top of or beside my pie, and each bite goes in with a small bit of ice cream, as well. Yum!
- Whipped cream – You can make homemade whipped cream, or you can just buy store-bought. Cool Whip is the quintessential Thanksgiving topping.
- While I’ve never tried it, I’m not gonna knock it ’til I do… Some say cheddar cheese makes a delicious topping, adding a salty flavor to the sweet.
- Caramel – Use a syrup to drizzle over a slice of pie, or you can even make a caramel glaze.
- Cinnamon ice cream – I think I need to come up with a homemade recipe because goodness gracious, how delicious this would be.
Expert Tips and Recipe FAQs
While the crust always soaks up a bit of the juice from the apples (and makes it even more delicious, in my opinion), you can prevent it from getting over-soggy by pre-cooking the apples; see my homemade apple pie filling recipe for steps on how to do this. However, cooking the apples before baking will change the final texture of the pie and may take away from the flavor of the apples.
The apple filling will be bubbly, and the crust will be golden brown. Your apples will also be tender when pricked with a fork.
You can cover it and keep it on the counter for 1-2 days; then place in the fridge, where it should keep for another 2-3 days.
Yes, you can freeze it; just make sure it’s sealed in an airtight container. It should keep for up to 6 months in the freezer.
More Fall Favorite Pie Recipes
- Grandma’s old-fashioned pumpkin pie
- Aunt Jennie’s sweet potato pie
- Caramel custard pie
- Easy apple crumble
If you try this recipe, why not leave a star rating in the recipe card right below and/or a review in the comment section further down the page? I always appreciate your feedback. You can also follow me on Pinterest, Facebook, Instagram, and YouTube. And subscribe to my email list too!
Homemade Apple Pie
Equipment
- 9" Pie Plate (or 9.5" Pie Plate)
Ingredients
Pie Crust
- 2 cups all-purpose flour
- 2 teaspoons cane sugar
- 1 teaspoon sea salt
- 1 cup salted butter cold
- 1/2 cup whole milk (may add 1-2 extra tablespoons as needed)
- 1 cup all-purpose flour (this is extra, for rolling out the dough)
Apple Pie Filling
- 6 cups apples (about 6-8 apples, depending on their size) cored, peeled, and sliced
- 2 tablespoons salted butter melted
- 2 tablespoons sour cream
- 1 tablespoon lemon juice
- 1/4 cup cane sugar
- 1/4 cup light brown sugar
- 1 teaspoon ground cinnamon
- 1/2 teaspoon ground nutmeg
- 2 tablespoons all-purpose flour
Topping
- 1 large egg beaten
- 1 tablespoon cane sugar
Instructions
Pie Crust
- In a large bowl, whisk together the 2 cups of flour, sugar, and salt.
- Slice cold butter into the flour mixture.
- Using a pastry blender, cut the butter into the flour mixture 'til it resembles coarse crumbs.
- Gradually add the milk to the mixture, stirring together 'til the mixture forms well, but isn't so wet that it's sticky; you don't want a crust that's too crumbly and hard to manage either, so make sure you add enough milk.
- Cover the pie dough, and place it in the fridge to chill for at least 30 minutes.
Pie Filling
- Meanwhile, add the sliced apples to a large mixing bowl.
- Add the melted butter, sour cream, lemon juice, sugars, cinnamon, nutmeg, and flour to the apples, and stir everything together well.
Assemble the Pie
- At this point, pre-heat your oven to 375° F.
- Sprinkle a clean surface with part of the extra flour, so the dough won't stick to the surface. Separate the dough into 2 halves, set one half aside, and roll out the other half of the dough with a rolling pin, equally rolling in all directions, 'til the dough is about 2 to 3 inches bigger around than your pie plate.
- Fold the crust in quarters; then carefully place the dough in the pie plate, unfolding it to cover the entire plate.
- Smooth it out inside the pie plate, and then trim off any overhanging edges with kitchen shears or a knife; leave enough dough (about 1/2 inch overlapping) so you can flute the edges of the crust.
- Pour the apple pie filling into the unbaked pie shell.
- Sprinkle the floured surface with more of the extra flour. Then roll out the other half of the dough with your rolling pin, 'til the dough is 2-3 inches bigger than the pie plate, allowing extra room for the filling.
- Fold this top crust in quarters, and carefully place over the filling and bottom crust, unfolding this top crust to cover the entire pie.
- Trim off any overhanging edges, leaving about 1/2 inch overlapping.
Finish the Top of the Pie
- To create a fluted edge, use your thumb and index finger, along with the tip of your opposite index finger, to flute or pinch the edge of the dough all around the pie plate.*
- Cut 4 slits in the top of the crust to allow it to vent and release steam.
- Lightly brush the top of the pie crust with the egg wash.
- Sprinkle sugar over the egg washed crust.
How to Bake Apple Pie
- Place the pie plate on a cookie sheet to catch any drips while baking.
- Bake the apple pie on the middle oven rack at 375° F for about 20-25 minutes. Then add a pie crust shield to prevent the edges from over-browning. Continue baking for another 35-45 minutes, 'til the pie is golden brown and bubbly.
- Remove the pie from the oven, and cool on the kitchen counter for about 3-4 hours before serving.
- Slice and serve with whipped cream or vanilla ice cream.
Notes
- Shape the extra trimmings into 3-5 small balls of dough.
- Roll out each dough ball, brush with the extra egg white, then sprinkle with cinnamon sugar.
- Roll up each one into a roll-up shape, and place them on the cookie sheet beside the pie to bake.
- When you go to add the pie shield, you can usually remove these little snacks from the oven and enjoy a sweet treat while your pie finishes baking!