
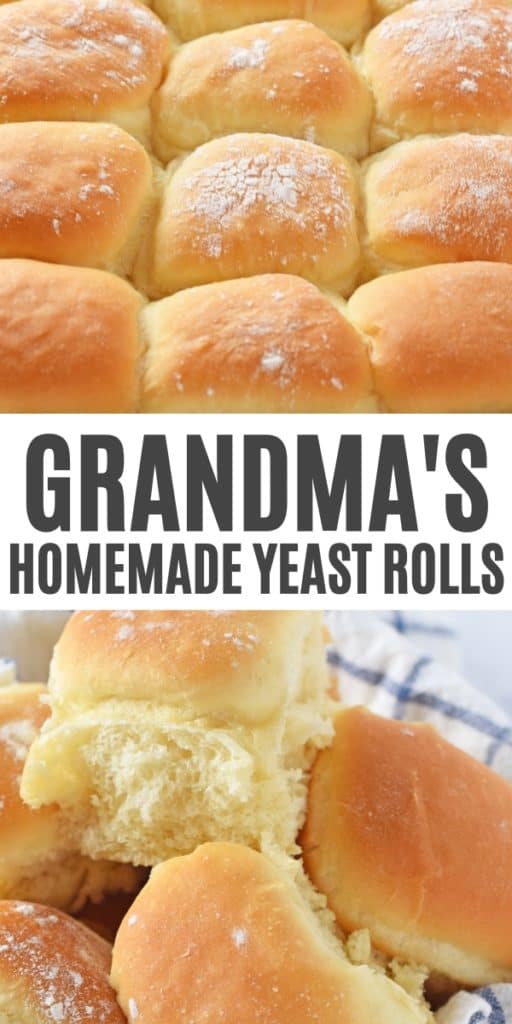
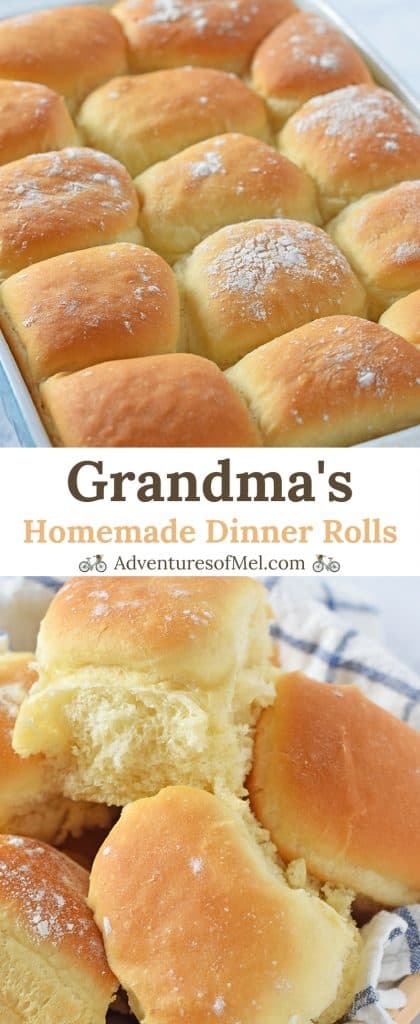
How to make Grandma’s homemade yeast rolls. Soft and buttery, these are easy yeast rolls for beginners, and a family favorite holiday dinner recipe. Enjoy fluffy dinner rolls at Thanksgiving, Christmas, and Easter!
Homemade dinner rolls are a staple for special occasions and holiday dinners in my family. My grandma made these old fashioned yeast rolls every Thanksgiving, Christmas, and Easter. Sometimes we just make them for our weekly slow cooker pork roast!

Just baking up a batch of these golden beauties brings back so many memories. I learned to make this dinner rolls recipe from my mom, just like she learned from her mom.
Why I Love Making My Grandma’s Yeast Rolls
There are loads of reasons to love Grandma’s yeast rolls…
- I’m not going to say this is a quick recipe because it’s definitely not, but I will say it’s easy. While the recipe is a bit time-consuming, and you do have the added time of waiting for the dough to rise, these are easy yeast rolls for beginners to make and a great recipe to use for learning purposes.
- It’s definitely a recipe I cherish and one I’m passing down to my own boys, so that Grandma’s legacy lives on. My oldest makes these rolls even better than I do; when he bakes them, they always turn out so light and fluffy.
- We make this recipe for dinner rolls with all our favorite Easter recipes, Thanksgiving recipes, and Christmas recipes, and sometimes in between. We have to pace ourselves, because some of us will eat rolls with every meal when we have them around.
Ingredients and Substitutions Notes
Gather your ingredients before you get started.
- Active Dry Yeast – While you can use instant yeast, I recommend using active dry yeast, which will ensure a longer rise time, and in turn, a batch of very soft, pillowy rolls. Whether you buy jars or packets of yeast, just know that 1 packet of yeast equals about 1 tablespoon.
- Cane Sugar – You can also use granulated sugar
- Warm Water – Not too hot, because you don’t want to kill the yeast. You want it slightly warm, so almost lukewarm.
- Unsalted Butter – You can also sub shortening if you don’t have unsalted butter. My grandma actually used shortening; in fact, sometimes we would use regular shortening, and sometimes butter shortening (example: butter Crisco).
- Large Eggs
- All-Purpose Flour – I recommend using a really good unbleached all-purpose flour to make these rolls. You can also use a good bread flour. We’ll talk more about the differences below.
- Sea Salt – I prefer using Redmond Fine Sea Salt.
How to Make Grandma’s Homemade Yeast Rolls
While there are a few steps to making dinner rolls from scratch, you’ll find the process is really pretty easy.
Activate the Yeast
- Stir the yeast, sugar, and warm water in a glass measuring cup or small bowl.
- Set aside in a warm place to rise. It will bubble and rise up.
Mix the Dough
- While waiting for the yeast mixture to rise, cream (or mix together) the sugar and unsalted butter in a large mixing bowl.
- Beat in the eggs, one at a time.
- Add the bubbly yeast mixture to the butter mixture, along with an additional 1 1/2 cups warm water.
- In a separate bowl, sift together the flour and salt.
- Gradually add the flour in, and mix well. For this step, I like to use the dough hook on my stand mixer.
- Turn the dough into a large greased bowl or stockpot, and let it rise to the top or almost to the top (it can take 2 to 3 hours to double in size). Keep the bowl or pan covered with a lightweight kitchen towel.
How to Shape the Dinner Rolls
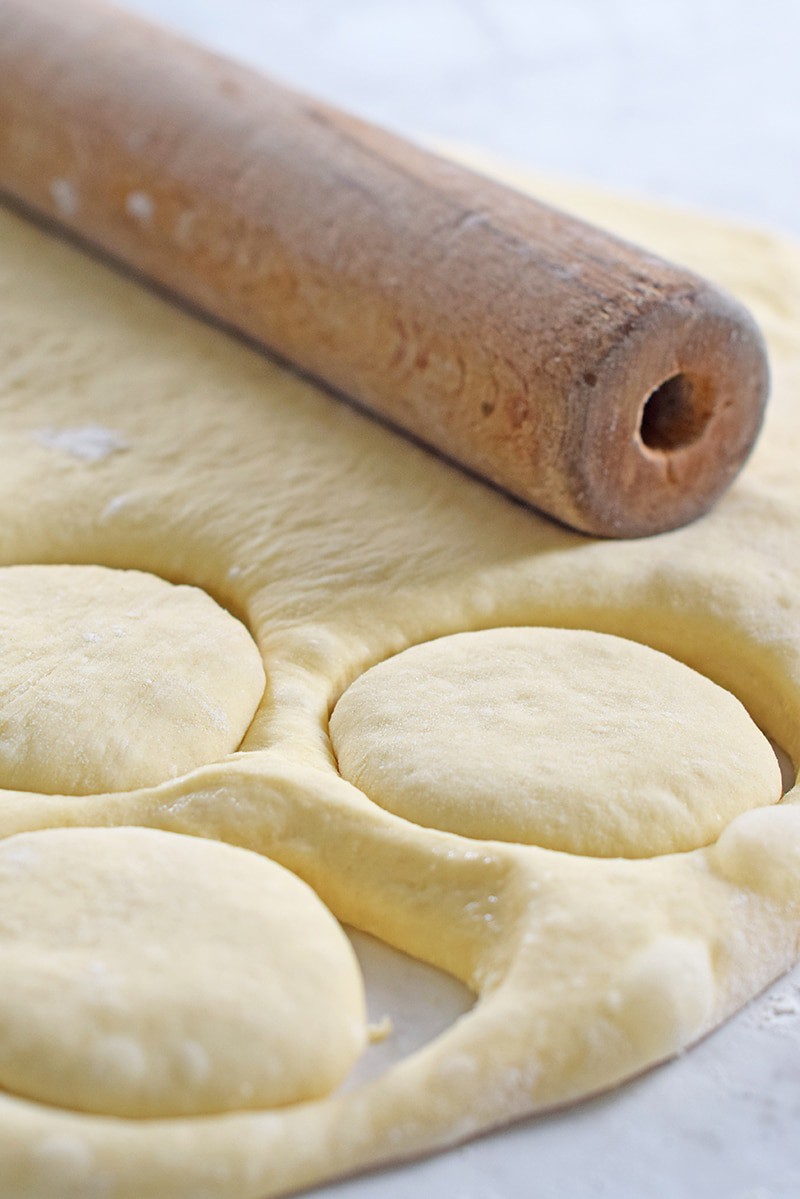
- Once the dough has risen, turn it out onto a floured surface. Coat generously with flour by turning and shaping. No kneading is necessary, though I still like to knead it a bit just for fun.
- Roll out the dough to about a 1 to 2 inch thickness.
- Then cut round rolls with a cup, glass, or biscuit cutter.
Bake the Rolls
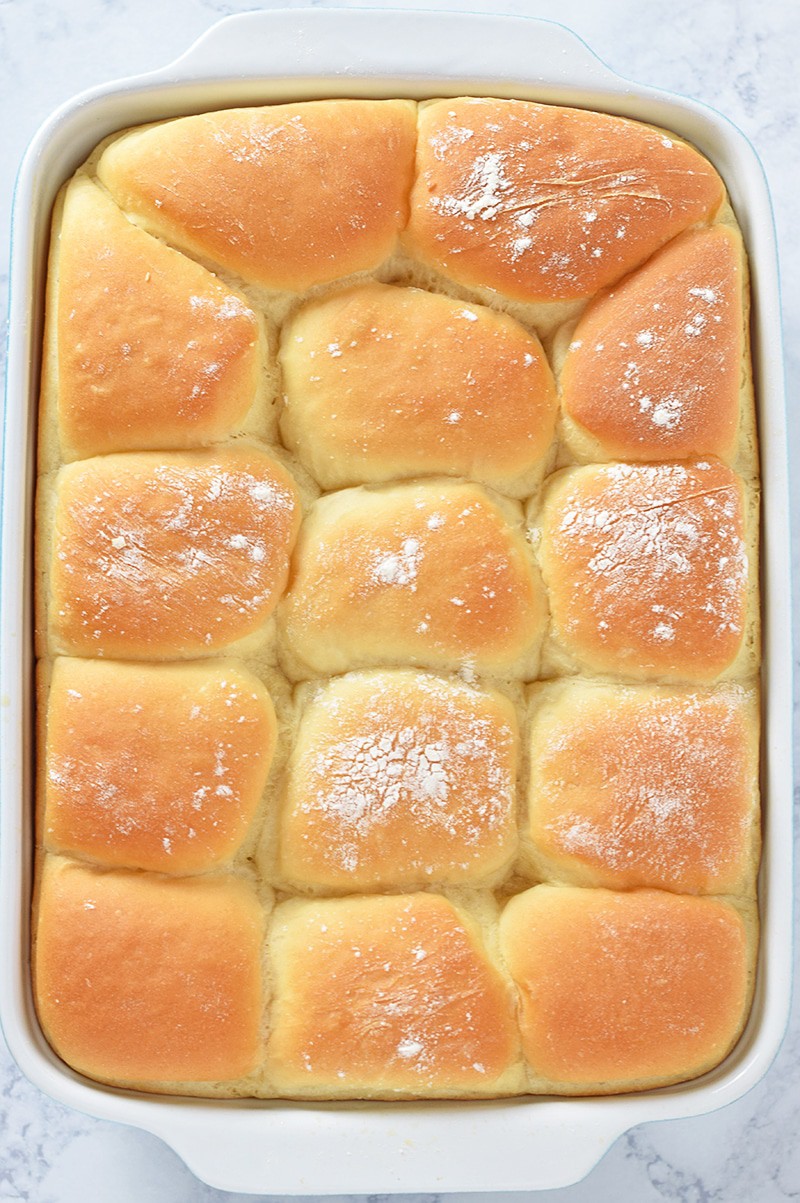
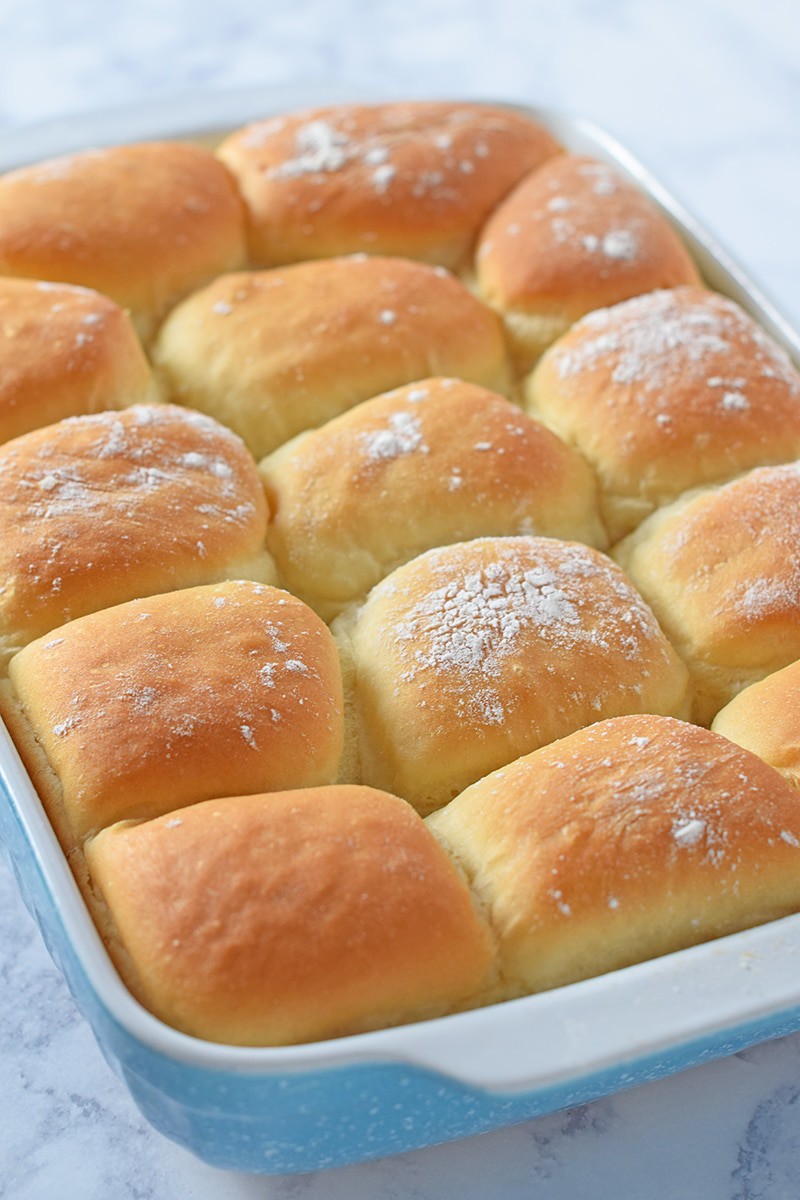
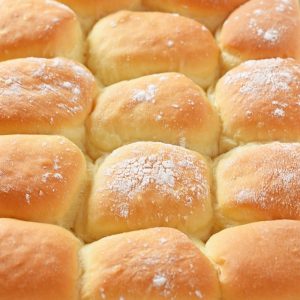
- Place the rolls, side by side against each other, in greased baking pans, and let them rise (this will probably take another 1 to 2 hours).
- Bake the rolls for about 20 minutes (maybe a little longer) at 350°F. Halfway through baking, you may need to cover the rolls with foil, so they don’t brown too much before they bake through.
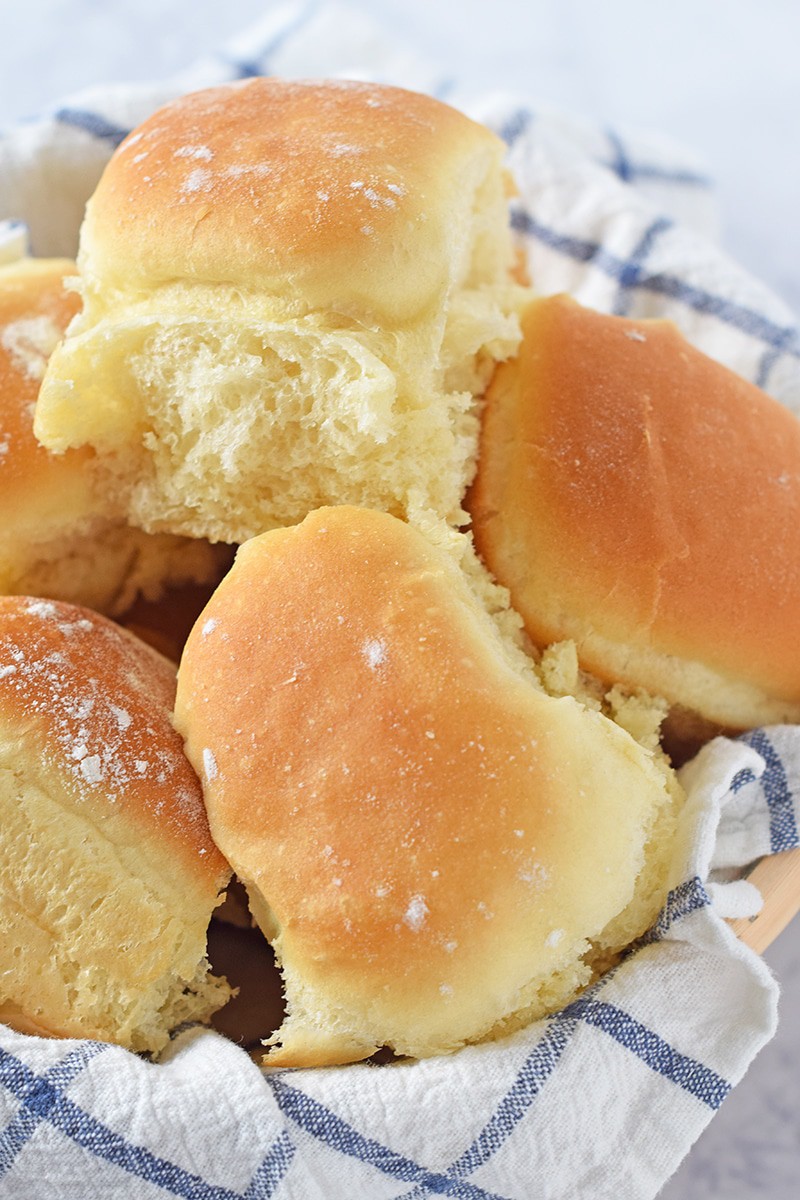
- When they’re done baking, remove the rolls from the oven and allow them to cool.
What to Serve with Yeast Rolls
Of course, I usually can’t resist enjoying a hot roll with warm melty butter. They’re so delicious, especially since I learned how to make salted butter; homemade butter is the best!
Serve your delicious bread rolls with strawberry jam, apple butter, blackberry jam, or just plain butter. Better yet, dip your rolls in a bowl of delicious Instant Pot potato soup. Grandma’s rolls also make delicious steak and cheese sliders, as well as CrockPot bbq chicken sliders.
Expert Tips and Recipe FAQ’s
We’ve used both kinds of flour, and while I’ve always used all-purpose flour, my son always uses bread flour. It’s a personal preference we both have. However, here’s the truth, so you can decide which is best for you. Bread flour contains more protein, which equals more gluten, which equals more elasticity and stretchability. It’s especially good for making actual loaves of bread, baguettes, etc. All-purpose flour will create a tighter crumb; it’s also a great choice in roll recipes that require more butter and sugar, which both make a difference in the final texture of the bread when baked. King Arthur actually has a really great article about whether bread flour really does make a difference when baking bread. I encourage you to read it if you’d like to learn more.
Dry, dense rolls can happen when we 1) add too much flour; or 2) don’t allow enough rise time. My grandma always wanted us to sift the flour at least 7 times while baking cakes and bread. While I’ve never done that, sifting does make a difference. And allowing that rise time so your rolls get big and puffy and pillowy soft makes a huge difference in the final baked bread roll.
Probably over kneading. This recipe doesn’t require any kneading at all, so there’s no need to even worry about this.
Totally up to you, but I never have with this recipe. My oldest does. He likes a shiny golden top to his bread rolls. An egg yolk will help the rolls to brown, but you really don’t need any help with these rolls browning, as the oven temp will do just fine on its own; in fact, you may have to cover with foil to avoid too much browning. Egg white will give the shine. You can even brush with melted butter after baking for added flavor and a bit of shine.
Yes, you can. You can either freeze the shaped unbaked rolls, covered in an airtight baking pan; then thaw before baking as usual. Or you can freeze the baked rolls in an airtight container; then thaw and warm before serving.
More Bread Recipes:
- Buttermilk cornbread with milled corn
- Easy homemade biscuits from scratch
- Homemade butterhorn rolls
- Quick and easy hot dog bun breadsticks
If you try this recipe, why not leave a star rating in the recipe card right below and/or a review in the comment section further down the page? I always appreciate your feedback. You can also follow me on Pinterest, Facebook, Instagram, and YouTube. And subscribe to my email list too!
Grandma’s Homemade Yeast Rolls
Equipment
Ingredients
- 1 tablespoon active dry yeast
- 1 teaspoon cane sugar
- 1/2 cup warm water
- 2/3 cup cane sugar
- 3 tablespoons unsalted butter softened
- 3 large eggs
- 1 1/2 cups warm water
- 6 cups all-purpose flour
- 3 teaspoons sea salt
Instructions
- Whisk together the yeast, sugar, and warm water in a glass measuring cup or small bowl. Set aside in a warm place to rise. It will bubble and rise up.
- While waiting for the yeast mixture to rise, cream (or mix together) the sugar and unsalted butter in a large mixing bowl.
- Beat in the eggs, one at a time.
- Add the bubbly yeast mixture to the butter mixture, along with an additional 1 1/2 cups warm water.
- In a separate bowl, sift the flour and salt together.
- Gradually add the flour mixture into the wet ingredients, and mix well. For this step, I like to use the dough hook on my stand mixer.
- Turn the dough into a large greased bowl or stockpot, and let it rise to the top or almost to the top (it can take 2 to 3 hours to double in size). Keep the bowl or pan covered with a lightweight kitchen towel.
- Once the dough has risen, turn it out onto a floured surface. Coat generously with flour by turning and shaping. No kneading is necessary, though I still like to knead it a bit just for fun.
- Roll out the dough to about a 1 to 2 inch thickness.
- Then cut round rolls with a cup, glass, or biscuit cutter.
- Place the rolls, side by side against each other, in greased baking pans, and let them rise (this will probably take another 1 to 2 hours).
- Pre-heat the oven to 350° F.
- Bake the rolls for about 20 minutes (maybe a little longer) at 350°F. Halfway through baking, you may need to cover the rolls with foil, so they don't brown too much before they bake through.
- When they're done baking, remove the rolls from the oven and allow them to cool. Of course, I usually can't resist enjoying a hot roll with warm melty butter. They're so delicious!


I just made these this afternoon with my kids and they turned out awesome!!! just wanted to say thanks for sharing this recipe – I have been looking for a good one, and this is the best! And I only managed to burn the bottom a teenie bit. LOL…. :)
Crystal, so glad you enjoyed them! Thanks so much for letting me know; that means so much. I’m kinda craving some rolls myself right now…. may have to make a batch.
Thanks for sharing at Pinworthy Projects! I am always on the hunt for good homemade bread :).
Thank you for providing the link-up, Carrie! And thanks for stopping by.:)
Oh Mel, these look unbelievable! I just pinned them, homemade bread is my weakness. :)
Isra, thank you!! It’s our weakness too; that’s why we don’t make them very often. lol :)
These look absolutely amazing! Pinning to try soon, thanks. :)
Thanks so much, Kelly! Thank you for pinning! You’ll have to let me know how they turn out when you try them. Have a great weekend!
What type of flour should you use? self rising/plain flour? Thank You
Alma, I normally just use all-purpose unbleached flour.
These rolls are beautiful Mel! Just pinned them and will be sharing on Facebook too! Thanks for sharing at Mom On Timeout!
Thanks so much, Trish! Thank you for providing the linky.
I featured these today on memoriesbythemile.com
Hope to see you tomorrow at the party.
Wanda Ann @ Memories by the Mile
Thank you so much, Wanda Ann! I’ll be visiting your party.:)
And this is why I need a mixer.
Meghan, we went to my mom’s a couple weeks ago, and I was a little lost without my mixer.:) I’ve gotten so used to it. Thanks so much for stopping by.
Mel,
Thank you so much for coming and supporting my at my first link party. I hope you’ll come back each week. These rolls llook delicious and you make it look so easy.
Hugs,
Wanda Ann @ Memories by the Mile
Thank you, Wanda Ann! Thank you for visiting my recipe and for providing the linky.
These look amazing!!
Thanks Jenn! I’m thinking I need to make some more.:)
LOOKS DELICIOUS CANT WAIT TO TRY THESE LOVE HOMEMADE ROLLS.
Thank you, Kim! Hope you enjoy them as much as we do.