

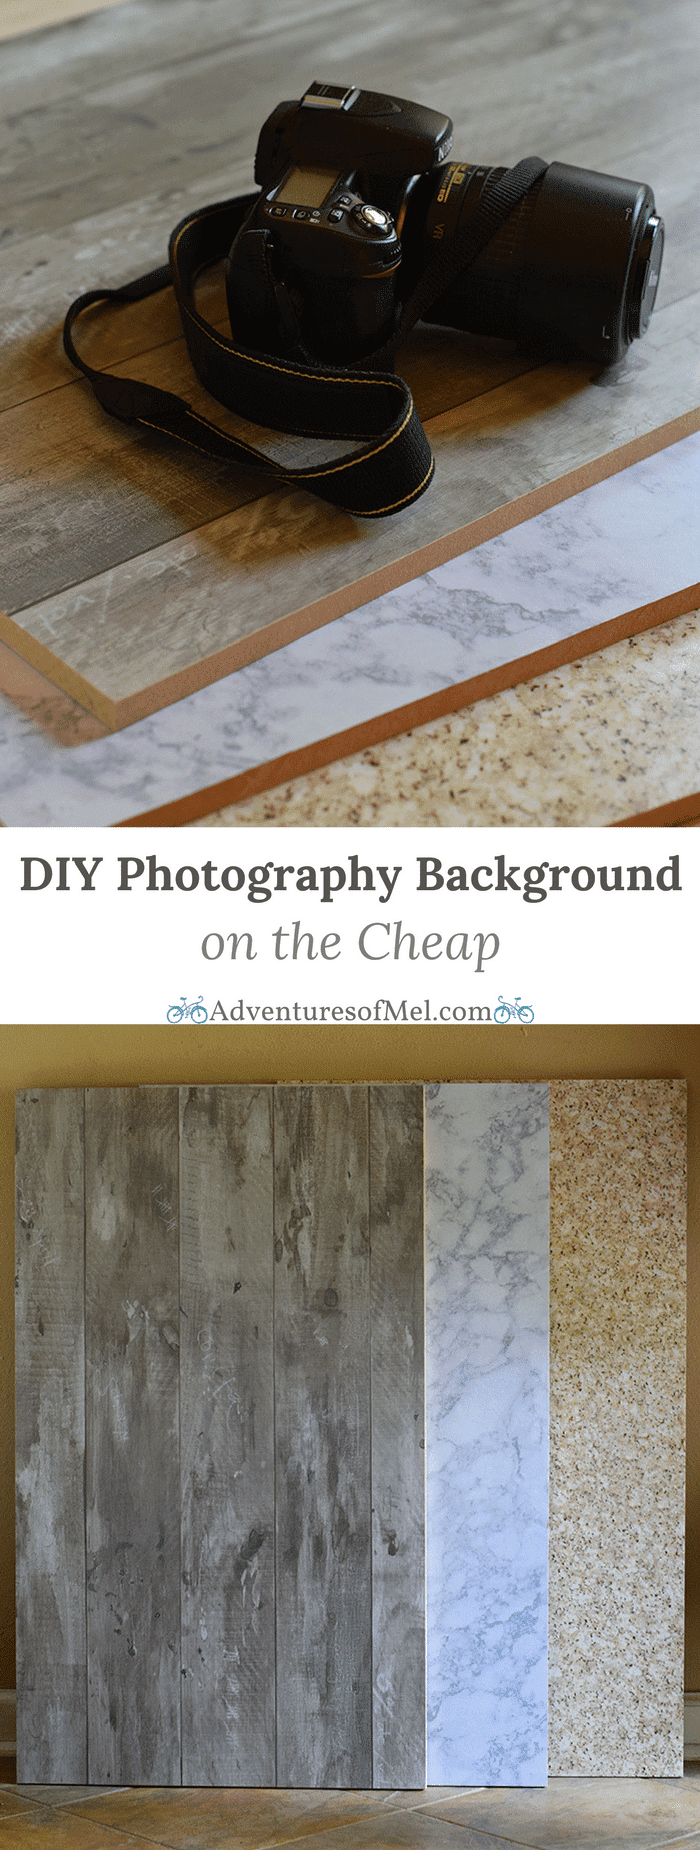
This year has brought a need to simplify certain ways I have of doing things, certain everyday responsibilities. I’m realizing that it’s ok to change things up and do things differently. And you know the funny thing? It’s making my life easier, including photography with something as simple as a DIY photography background.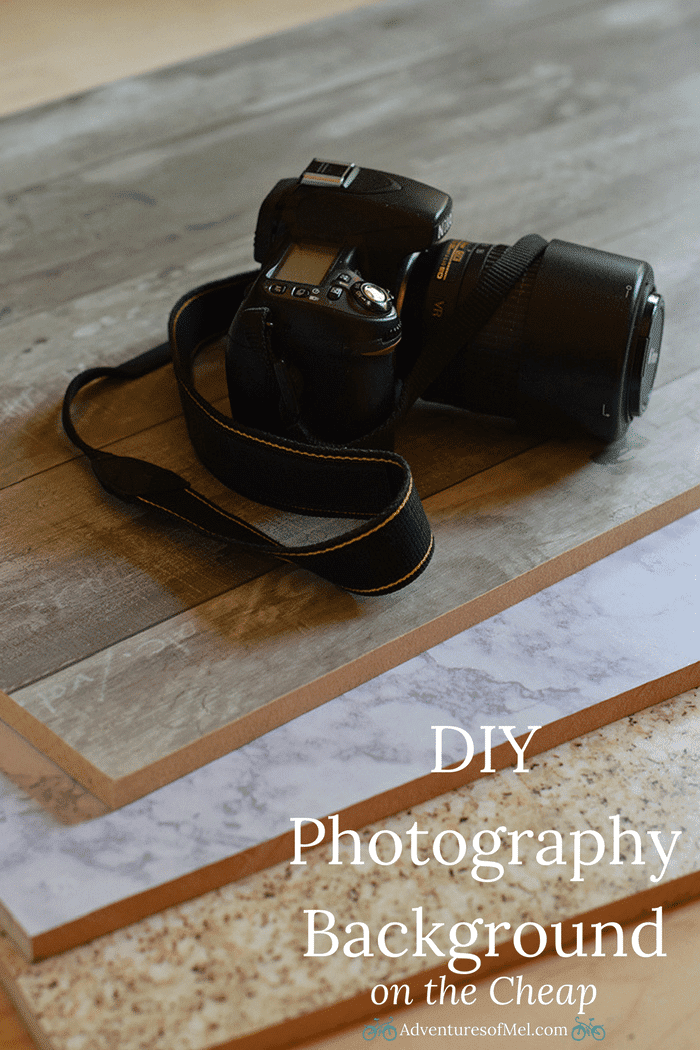
I’ve shared loads of recipes, along with home projects. And I’m not gonna lie… The photography part of each project hasn’t always been a piece of cake. A friend recently shared her process for taking photos, and it really motivated me to learn more and get my butt in gear on making this part of my life easier.
So for the sake of simplifying, I’ve purchased a couple of things, but I’ve also made these amazing photography backgrounds on the cheap. They have completely changed my photo taking life. I’m not even kidding. No more clearing surfaces to take photos. With a house full of boys, you know how epic this is for me.
I have a couple more tongue and groove boards to make, but for now I want to share how to make your own beautiful DIY photography backgrounds on the cheap, using Contact Paper or self-adhesive vinyl.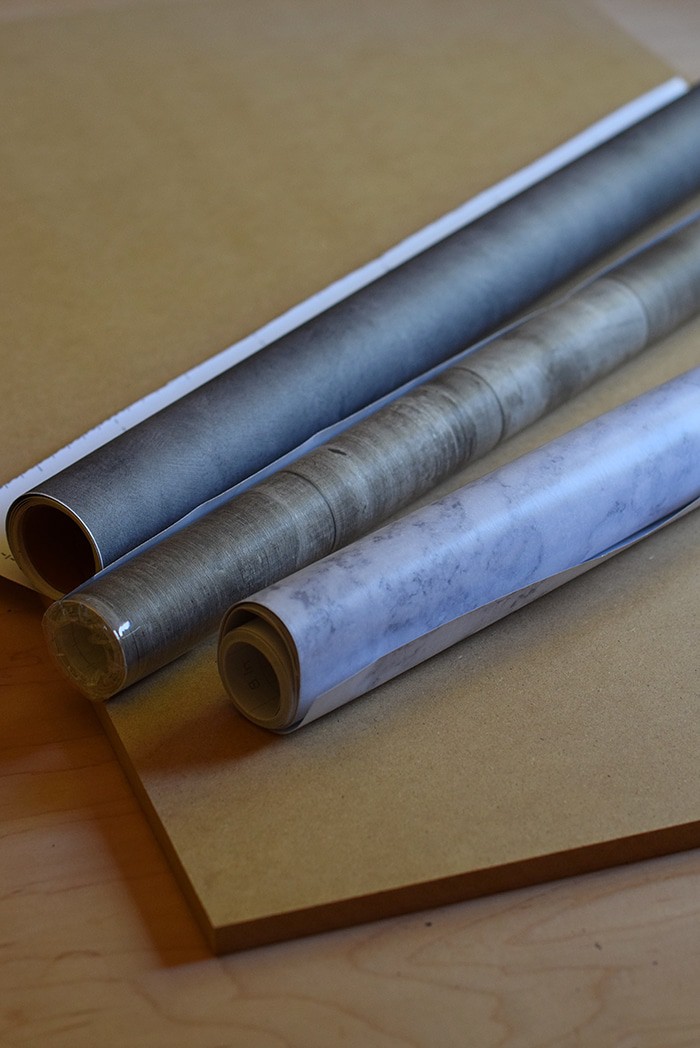
Supplies You Need to Make a Simple DIY Photography Background
You’ll need just a few supplies for this, and I’ve listed them below…
- MDF board – I purchased a large sheet of this at Lowe’s and had them cut it into several 20″ x 34″ boards. It was so much more affordable than purchasing already cut boards right off the shelf, plus I got several boards out of the deal.
- Dust cloth
- Contact Paper, Self-Adhesive Vinyl, or Self-Adhesive Wallpaper – Wood Panel, Stone Pattern, and Marble Granite are a few designs I prefer because of their sturdiness and the fact they are either water proof or water resistant. (Make sure your roll is 20″ or more so you won’t have a seam.)
- Scissors
- Craft Knife
Instructions for How to Make a DIY Photography Background
This is such a simple project and so much more affordable than purchasing already made boards. I made my boards double-sided, so I could make the best use of each board and have several different backgrounds to choose from. Here’s how to do it.
Once your boards are cut, wipe them with a dry cloth that will remove all dust. You’re prepping it to apply the Contact Paper or vinyl. I used several different kinds of Contact paper, self-adhesive vinyl, and self-adhesive wallpaper. And let me just say again, the vinyl and wallpaper are my preferred choices because they are so sturdy; they’re also water proof or water resistant, depending on what you get. It really looks very professional when all is said and done.
Cut your Contact Paper or adhesive vinyl to the length you need for your board, leaving a little extra room.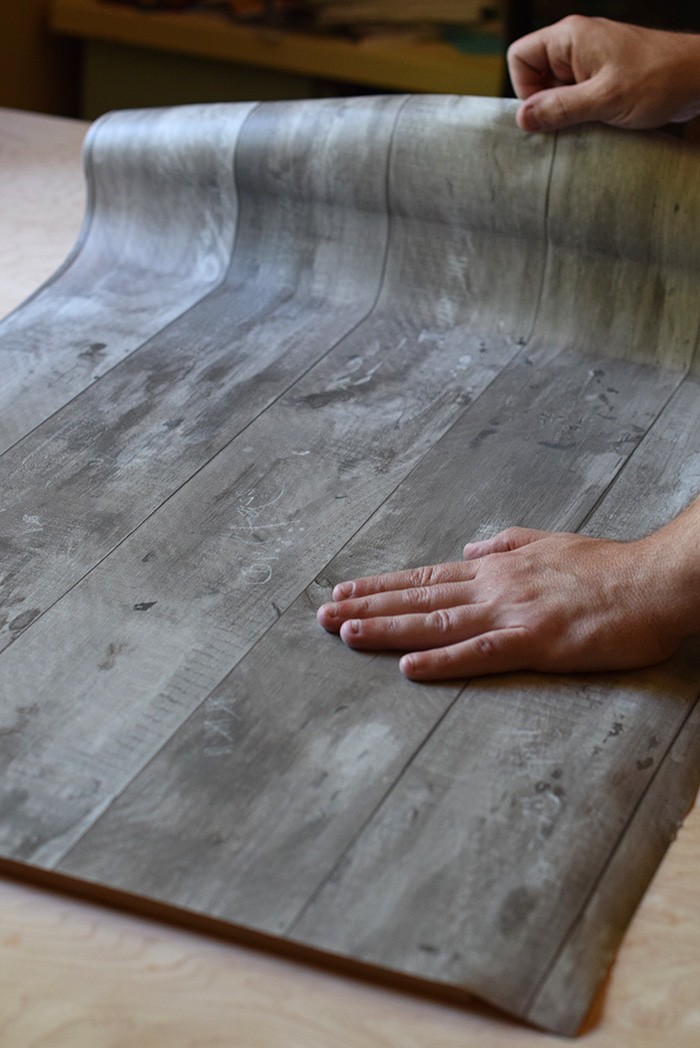 When you’re ready to apply, slowly peel back the paper from the adhesive and apply it to your board, making sure to smooth out any bubbles that may form. Keep smoothing as you go, peeling the backing until your adhesive is fully applied to your board. It may help to have two people working together.
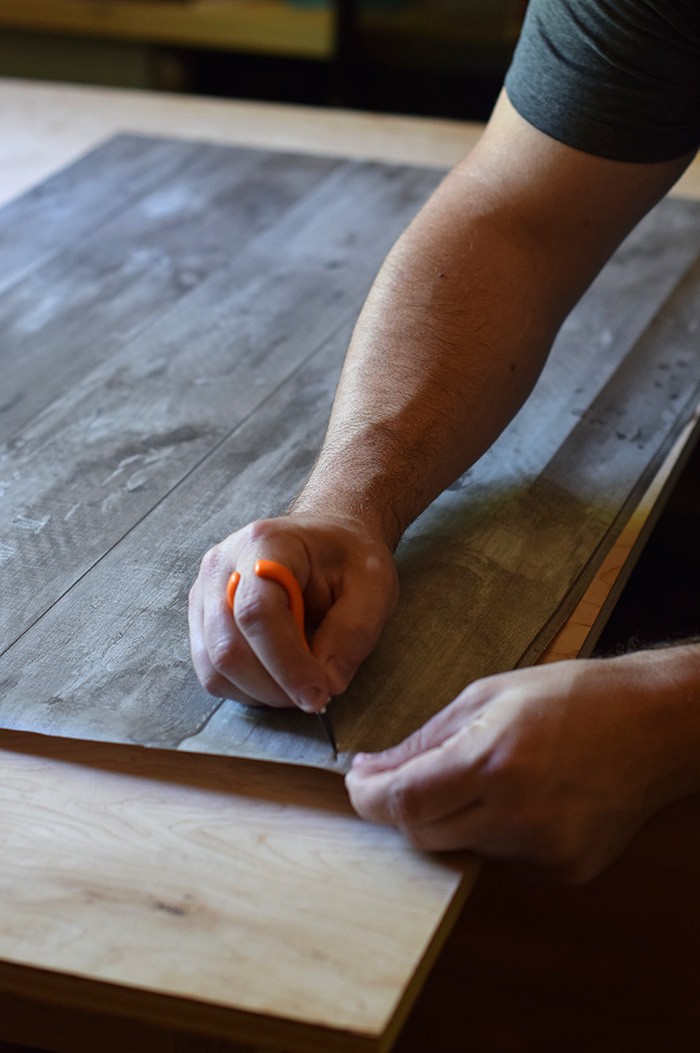 The last step is to cut off any excess edges with the craft knife. And that’s it!
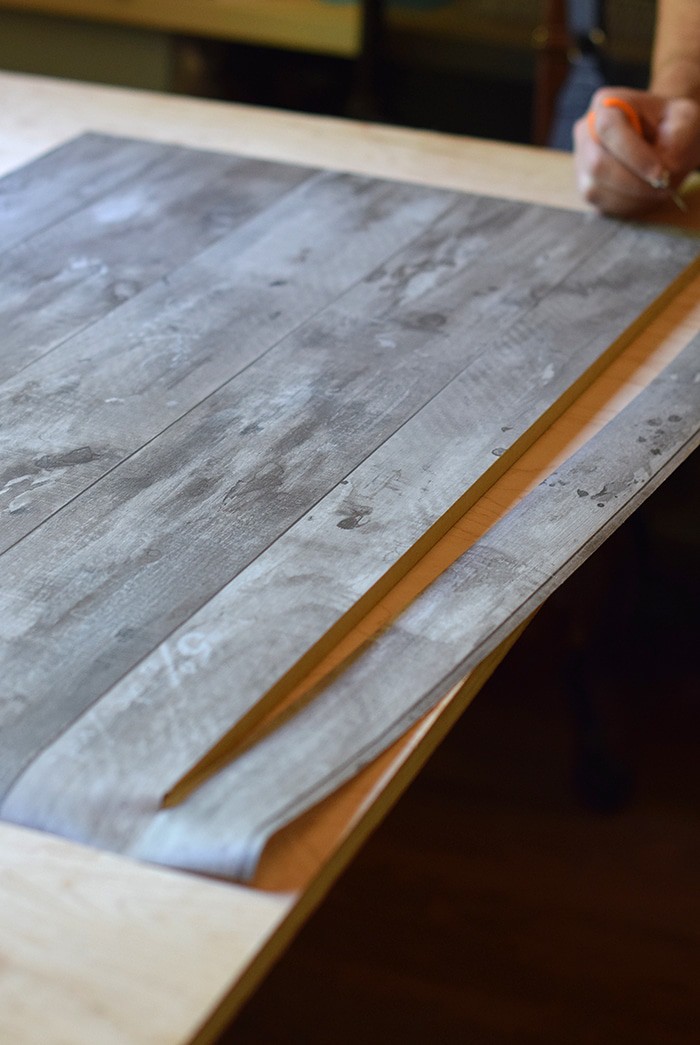
You can apply another design to the other side of your board if you wish. Then you’ve got 2 boards in 1!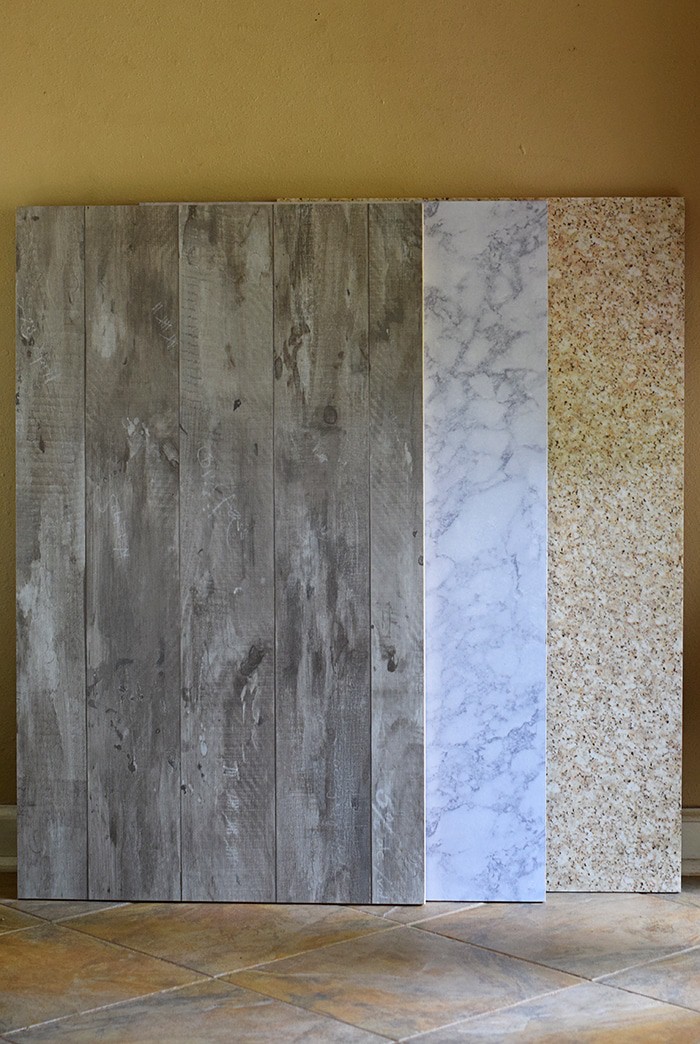 I chose to do this so I’d get more bang for my buck.
Now you’ve got a beautiful DIY photo background you can use for food photography, still life photos, crafts, and more.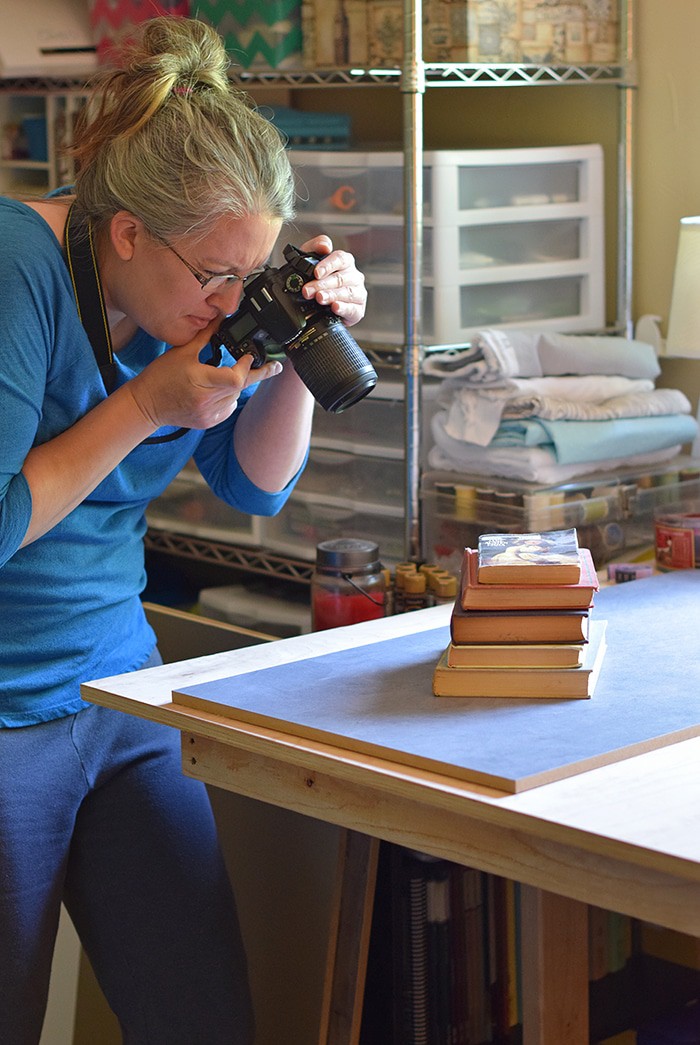
Here’s an example of a food photo I’ve taken with one of my new boards! (FYI, click here to get my Strawberry Shortcake recipe.)
I’m off to create a few more boards! Happy DIY’ing!
Looking for more thrifty DIY project inspiration?
- 11 Free or Super Cheap DIY Planner Supplies and Printables
- Beautiful DIY Earrings with Mod Podge
- How to Upcycle Vintage Cake Tins to DIY Light Fixtures
- Build Suitcase Shelves, Easy Step By Step
- DIY Changing Table
Can’t make it just yet? Pin it for later!


Ha!!
This is brilliant, i never thought this simple trick can be use for background change. Although, as i am not a professional photograph so it was also expected from me.
Thanks, Mike!
So helpful! This new blogger thanks you!
Thank you, Robyn! You’re very welcome!
Do you have any issues with glare or the gloss finish on the vinyl when shooting with flashes?
Melissa, no, I don’t. I use my boards for every single shoot, and I haven’t had a single problem with glare with the types of contact paper I used. They are a life saver.
wow never thought of that way :O thanks I was facing a problem with setting up in my studio now I have a plan which I can implement thanks, mam
You’re very welcome! Thank you!
hey Mel Lockcuff, thanks for your great idea you know what because of lack of enough i wouldn’t able to build a studio now i can work with this thanks mam :)
You’re very welcome, David. Thank you! Yeah, I just didn’t have the cash to buy expensive boards, so DIY it was.:) Use them every day.
Hi Melissa…I’ll have to show my daughter this idea. Thanks! Sherri
Hey Sherri! Thank you! And you’re welcome.