

Learn how to make campfire coffee in a percolator pot over a campfire. Plus find the best percolator pots for the job, along with what to look for when choosing the right coffee pot.
Just because you’re away from home doesn’t mean you have to surrender your morning cup of coffee. In fact, campfire coffee can often be some of the best coffee around!
Of course, you don’t have to be on the road to make campfire coffee. You can apply everything in this recipe for how to make coffee over a fire, right in your own backyard!
This recipe uses a camping percolator. While the final result is similar to cowboy coffee, it’s not the same. Cowboy coffee is usually boiled in an open pot; it’s not traditionally made with a percolator.
Why Make This Recipe
- Campfire coffee is the best. There’s nothing better than waking up to a piping hot cup of coffee over the fire on a cold morning in the great outdoors.
- It’s ridiculously easy. There’s no need to surrender that morning cup of joe every time you go camping.
- It’s fun! By making camp coffee, you’ll get first-hand experience how our ancestors made their daily cup of coffee. Whether they made it on an outdoor campfire or even on the fireplace hearth, it all worked the same.
Choosing the Best Campfire Coffee Percolators
Here are a few tips for how to choose the best camping percolator…
- Durability – In the long run, it’s often cheaper to spend slightly more on higher quality products. A coffee percolator is no exception to this rule. It’s always best to buy a coffee pot made of stainless steel– no aluminum! I also prefer a glass knob so that I can see the color of the coffee and subsequently how it’s progressing. I also highly recommend getting one with a metal hanging handle or bail wire for hanging the pot over the campfire.
- Versatility – Some people like a strong cup of joe; others prefer a weaker brew. Whatever your preference, be sure to get a coffee pot that allows you to easily adjust the brew accordingly.
- Portability – For obvious reasons, it’s important that a camping percolator be easily portable. Keep it simple!
- Clean-up – As I stated above, this is for camping. It needs to be portable, and it also needs to clean up easy! Again, keep it simple.
Once you’ve found the best coffee pot for your needs, it’s time to get started.
Best Campfire Coffee Pots (Percolator Style)
Based on the above recommendations, here are a few of my favorite camping percolators…
- Coleman 12-Cup Stainless Steel Coffee Percolator – This is my favorite camp coffee pot, in terms of affordability, durability, and functionality. Plus it makes 12 cups, perfect if you want a few cups yourself or like to share with other campers.
- GSI Outdoors Glacier Stainless Steel Percolator Coffee Pot – This pot has a sturdy hanging handle, as well as an ability to withstand a drop on the ground.
- Coghlan’s 12-Cup Stainless Steel Coffee Pot – One nice feature of this camp coffee maker is its “stay cool permawood handle,” no need for a hot pad with this one.
- Stanley Stainless Steel Camp Coffee Percolator – Stanley is a campsite classic, and their percolator has a removable silicone grip, again no need for a hot pad with this beauty of a pot. It’s also lightweight (important for backpackers) and comes with a lifetime warranty.
- Ozark Trail Stainless Steel 12-Cup Percolator – Again a nice carry handle, comes with a wooden grip, and it’s ideal for both tea and coffee.
Ingredient Notes
Let’s talk about the ingredients…
- Ground Coffee – Although I much prefer the aromatic flavor of freshly-ground coffee with a grinder, you’ll probably want to keep it simple with pre-ground coffee, and that will work just fine. If you’re using a coffee percolator, be sure to look for a coarser coffee grind. A finer grind will usually fall through the holes in the basket and into your water. Nobody likes grounds in their coffee!
- Water – I won’t drink coffee unless it’s made with the crystal clear bottled spring water sourced in the ancient valleys of the Himalayan Mountains– just kidding. Just use clean, cold water. Nothing fancy here!
How to Make Campfire Coffee
1. Build a Fire
For campfire coffee, you need a fire that’s hot but also small. Think of it as if you were cooking food. A big fire can get way too hot way too quickly, resulting in charred, overcooked food. Campfire coffee is no different.
The best way to achieve this is by building your campfire, then separating hot coals from the actual flame, lining them up in a wide circle to efficiently heat the water. It takes a little bit of trial and error.
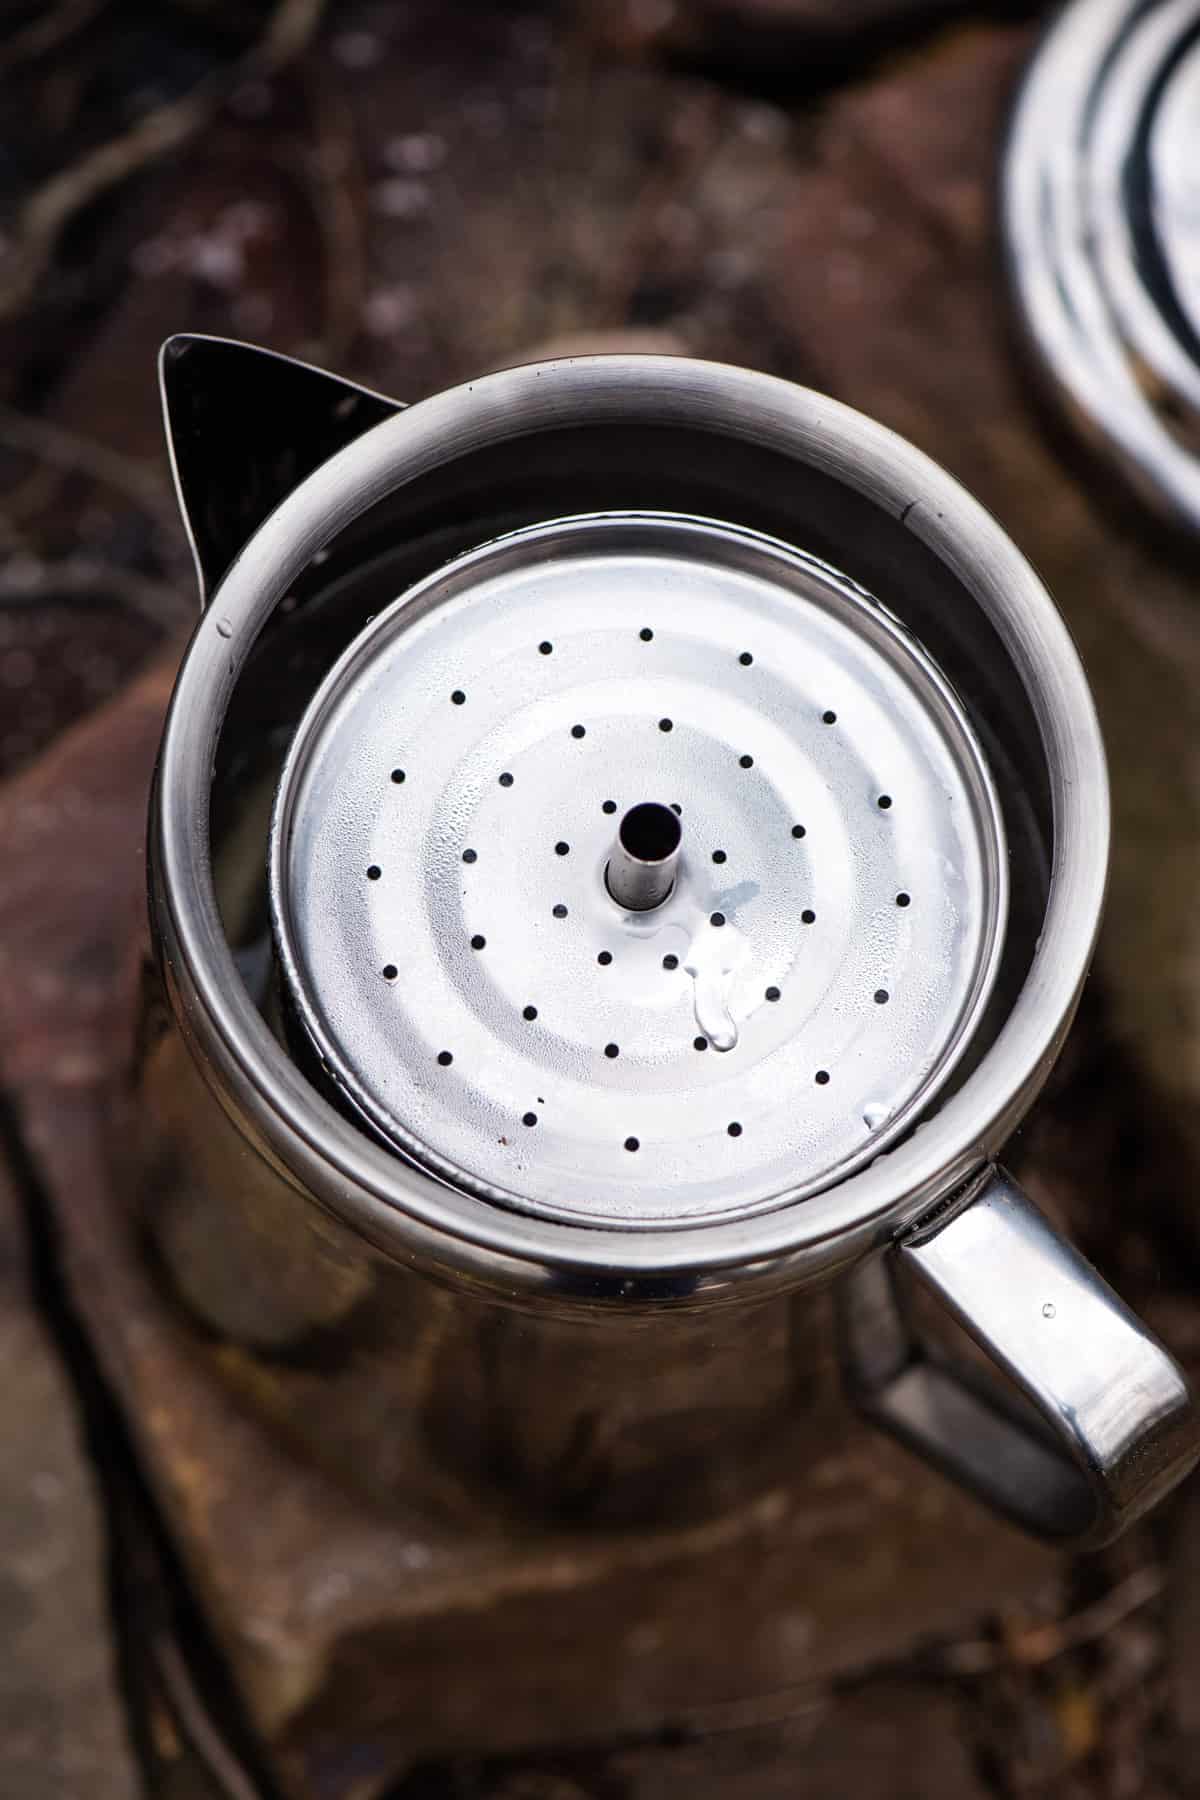
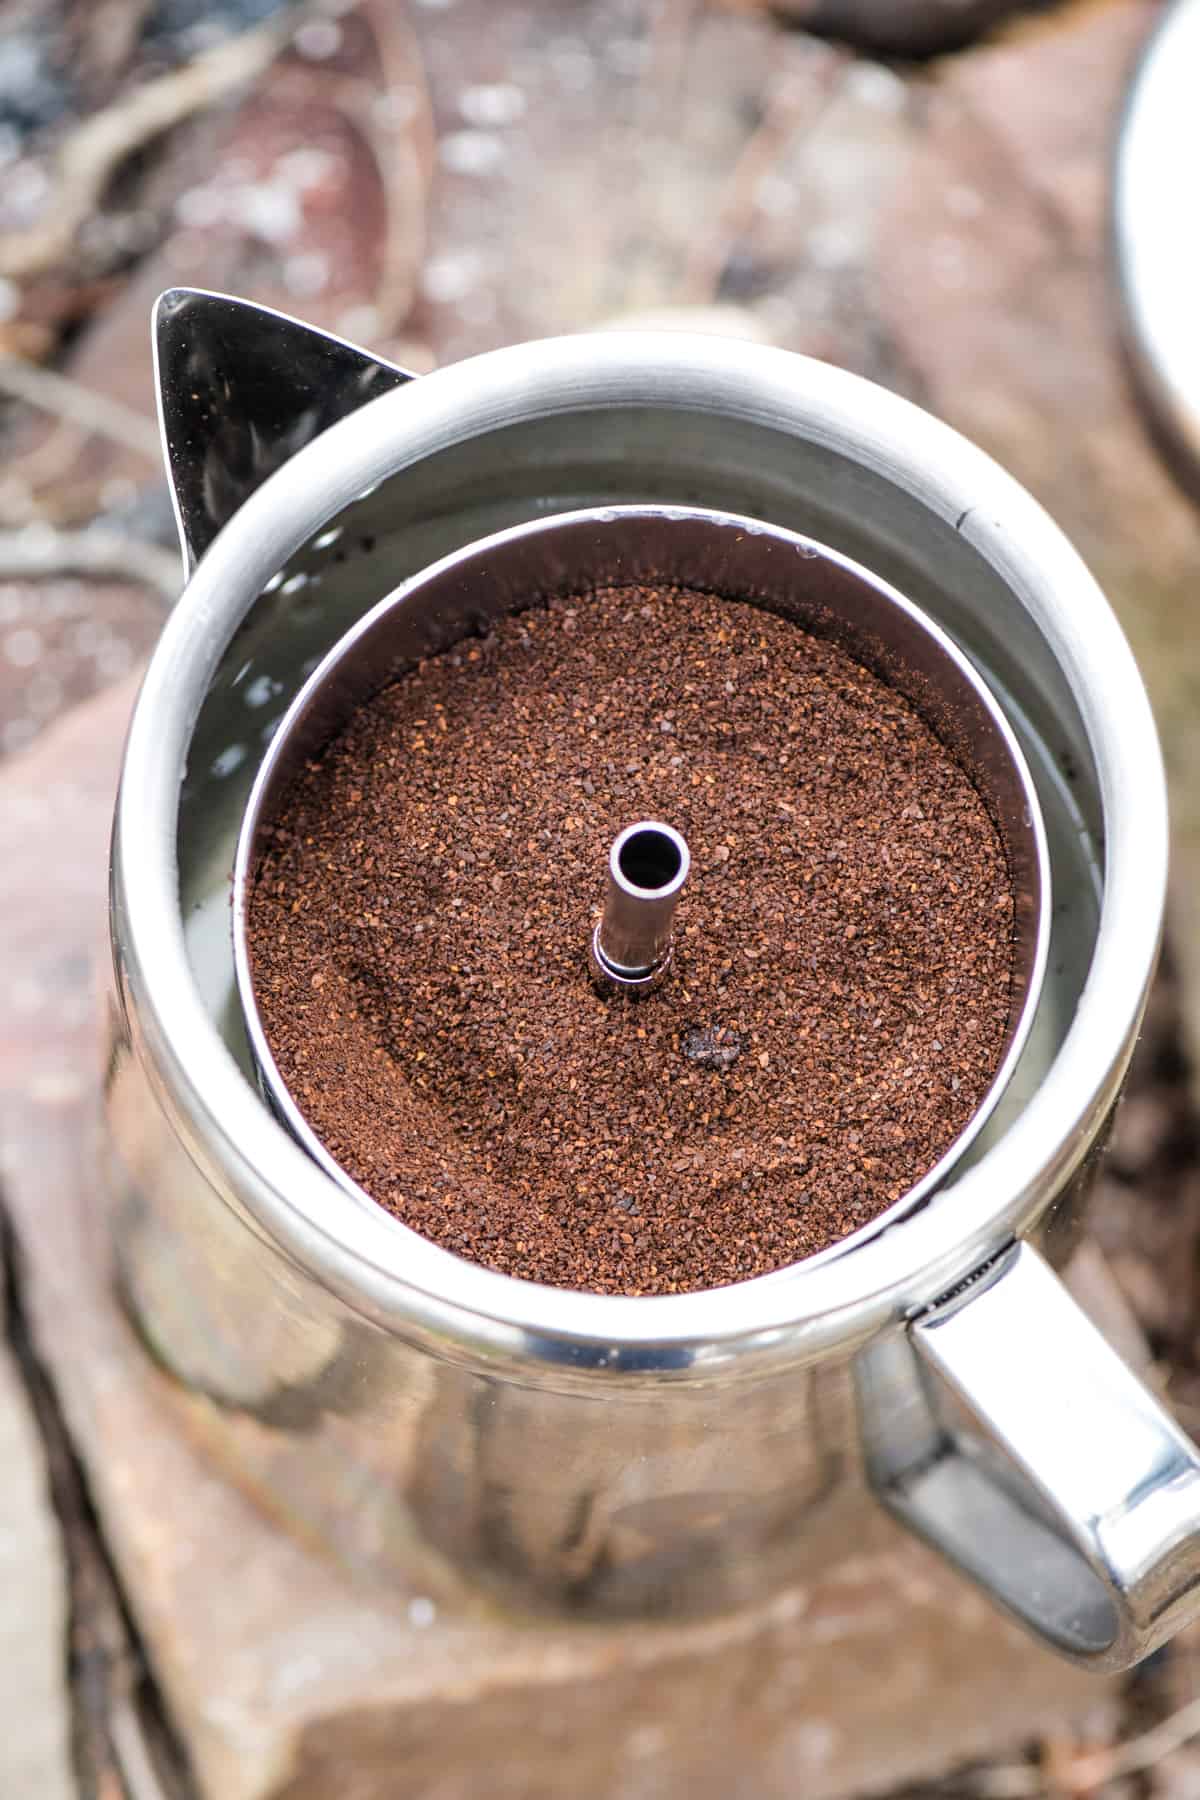
Some people prefer to add a coffee filter before this step, but I don’t bother. I use a coarser grind of coffee, so it’s unnecessary.
That said, if you’re using a fine grind, it might be worthwhile to add a coffee filter to the basket. Nobody likes grounds in their coffee!
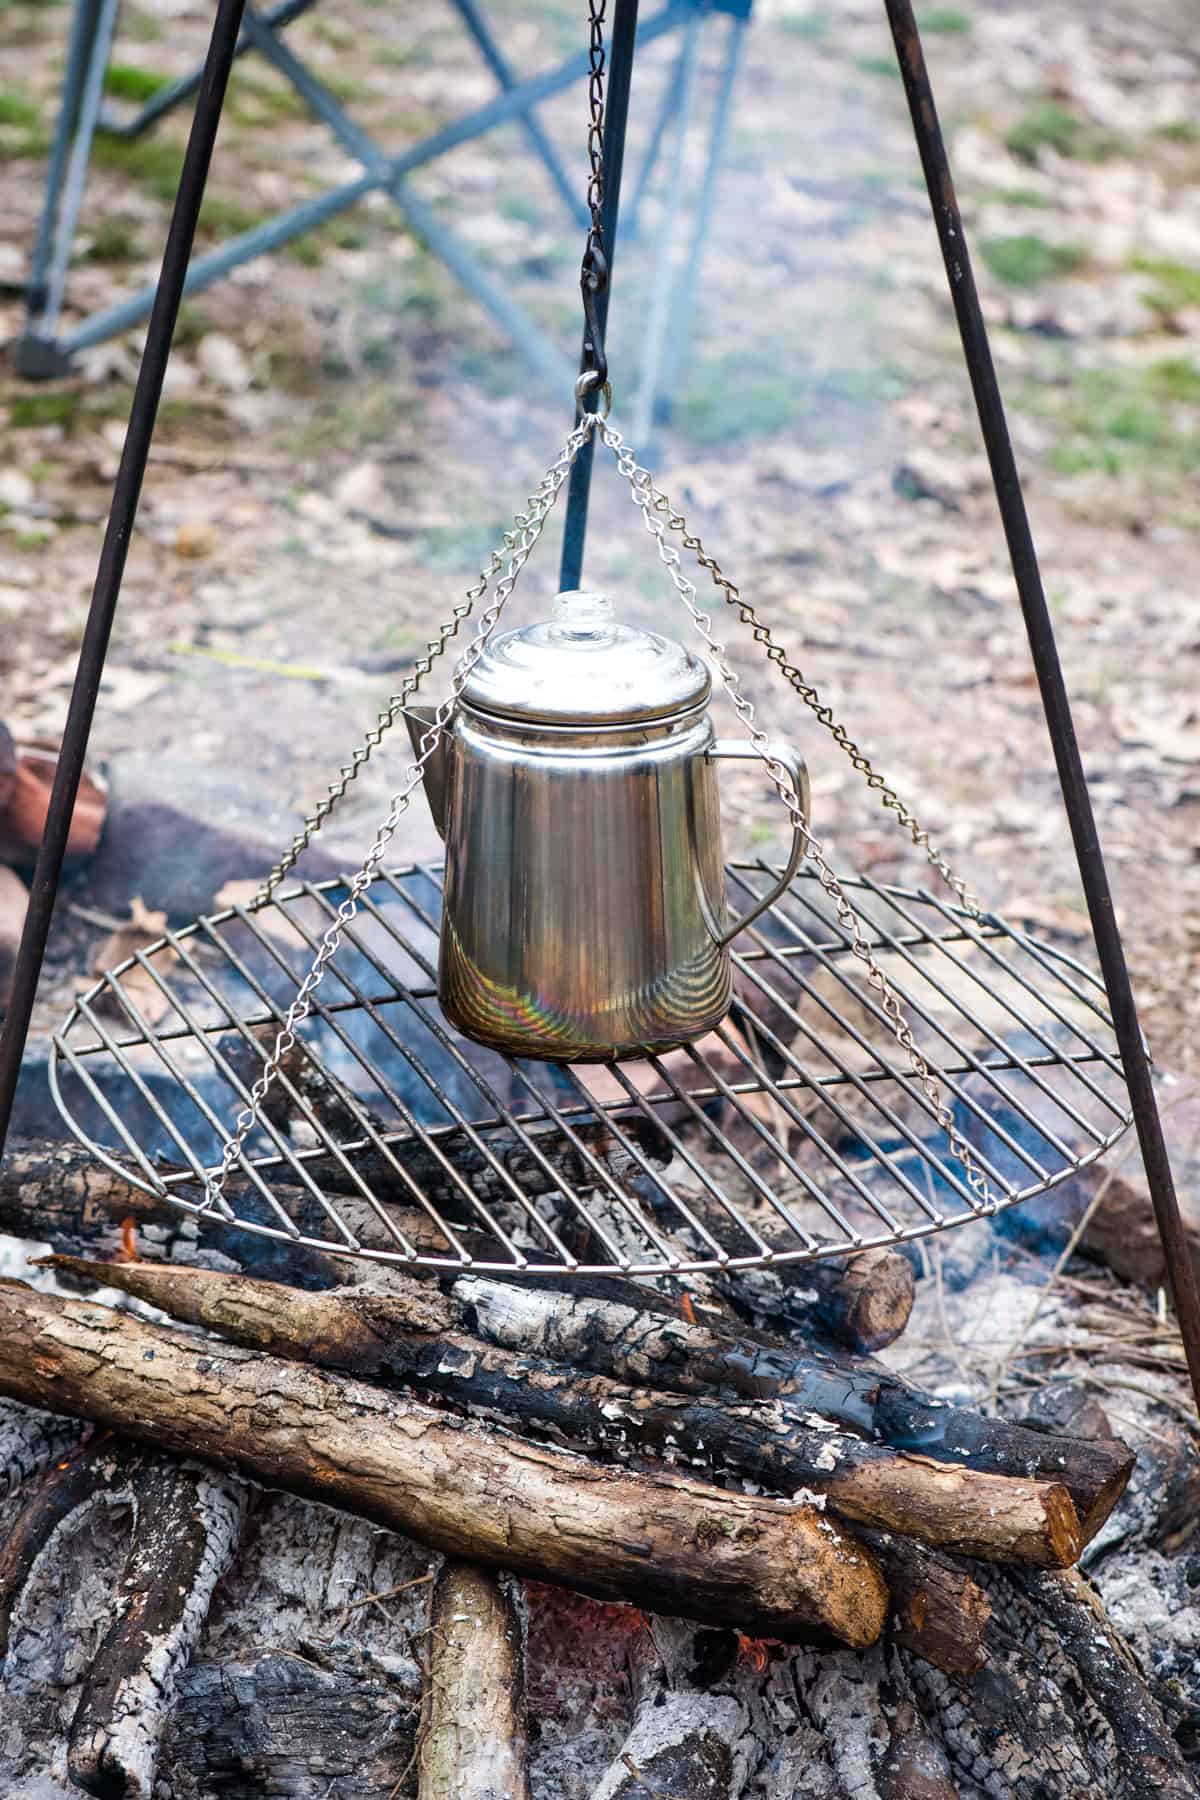
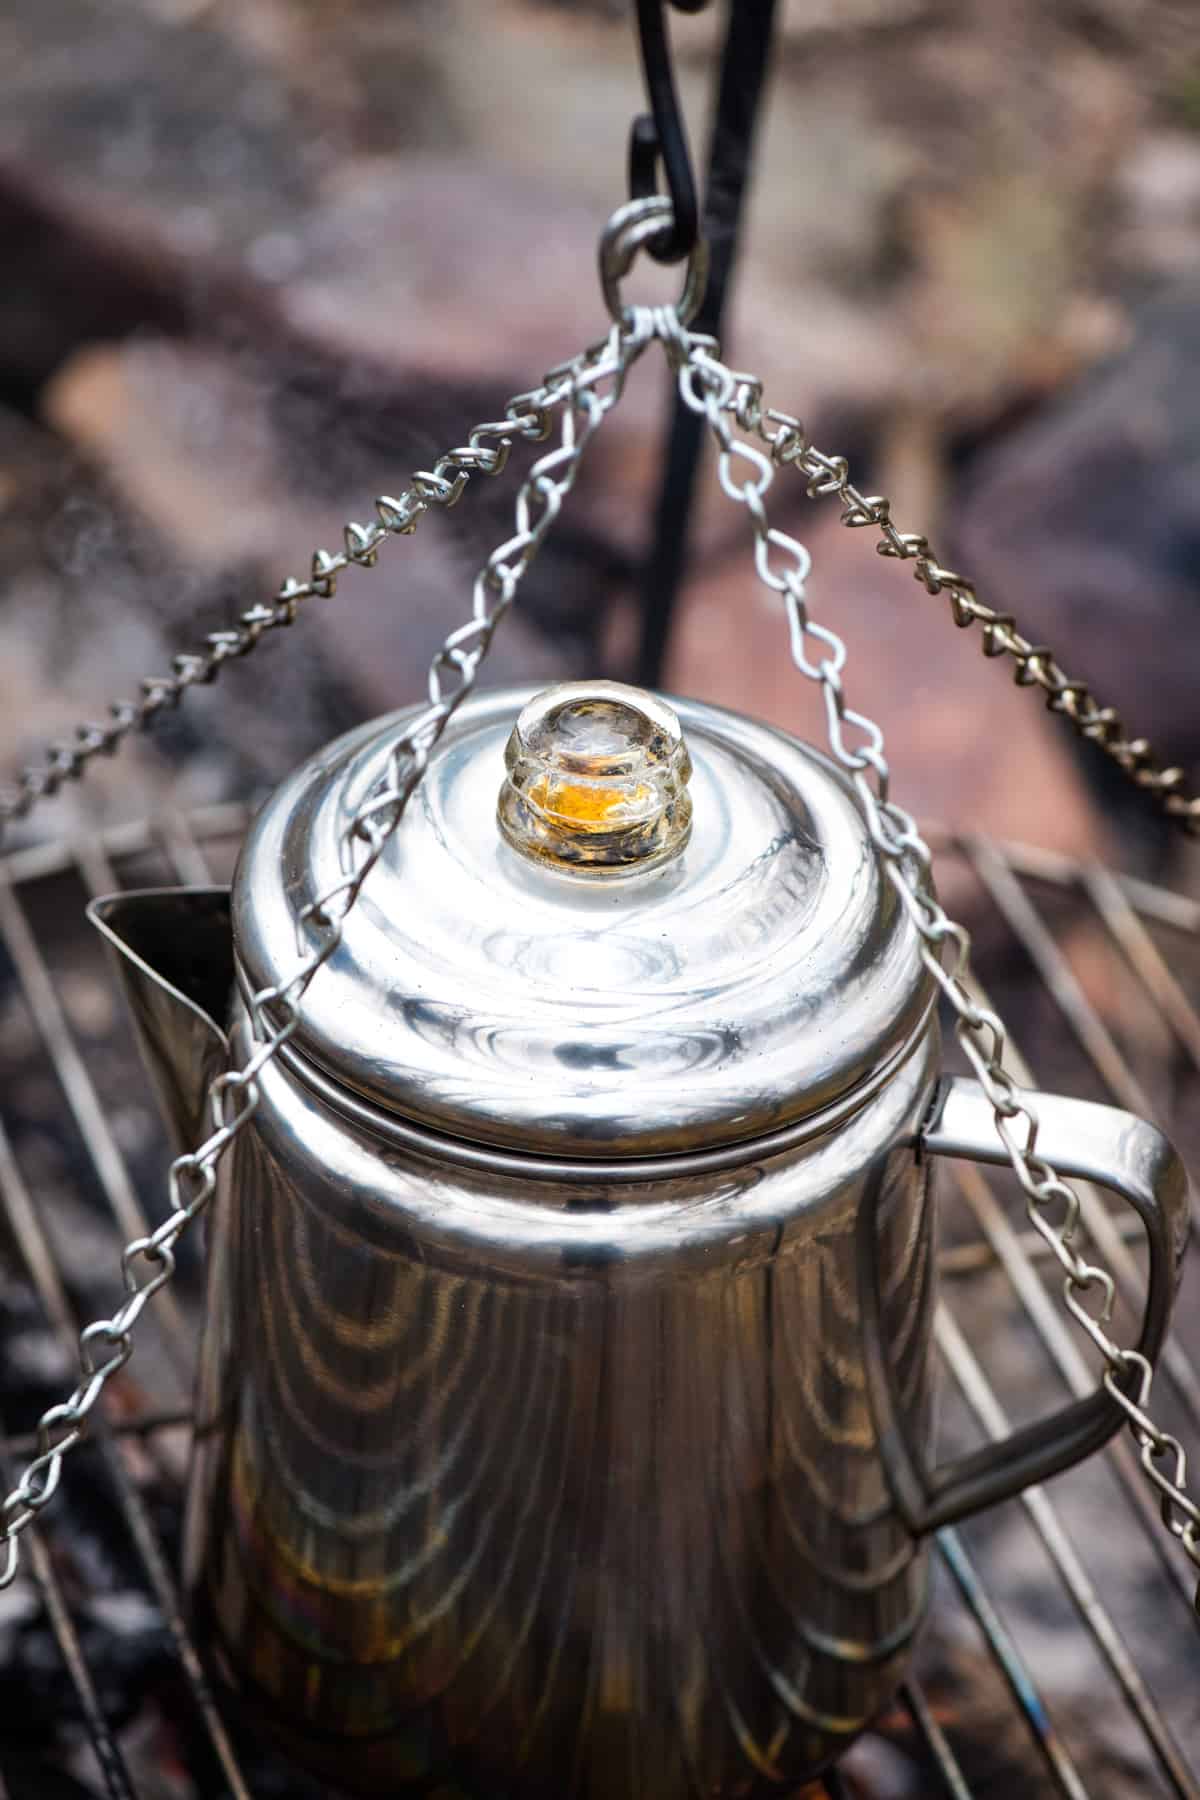
5. Let it Percolate
Watch and listen for the water to come up to temperature. Once this happens, it’s best to move it away from direct flame, after which you will let it percolate for 5-10 minutes before removing from the heat entirely.

It’s important that you never let your coffee boil. You want to see a water temperature just below the boiling point of 212ºF. This will allow the coffee to percolate without taking on a burnt flavor. Boiled coffee tastes more like burnt bread than coffee!
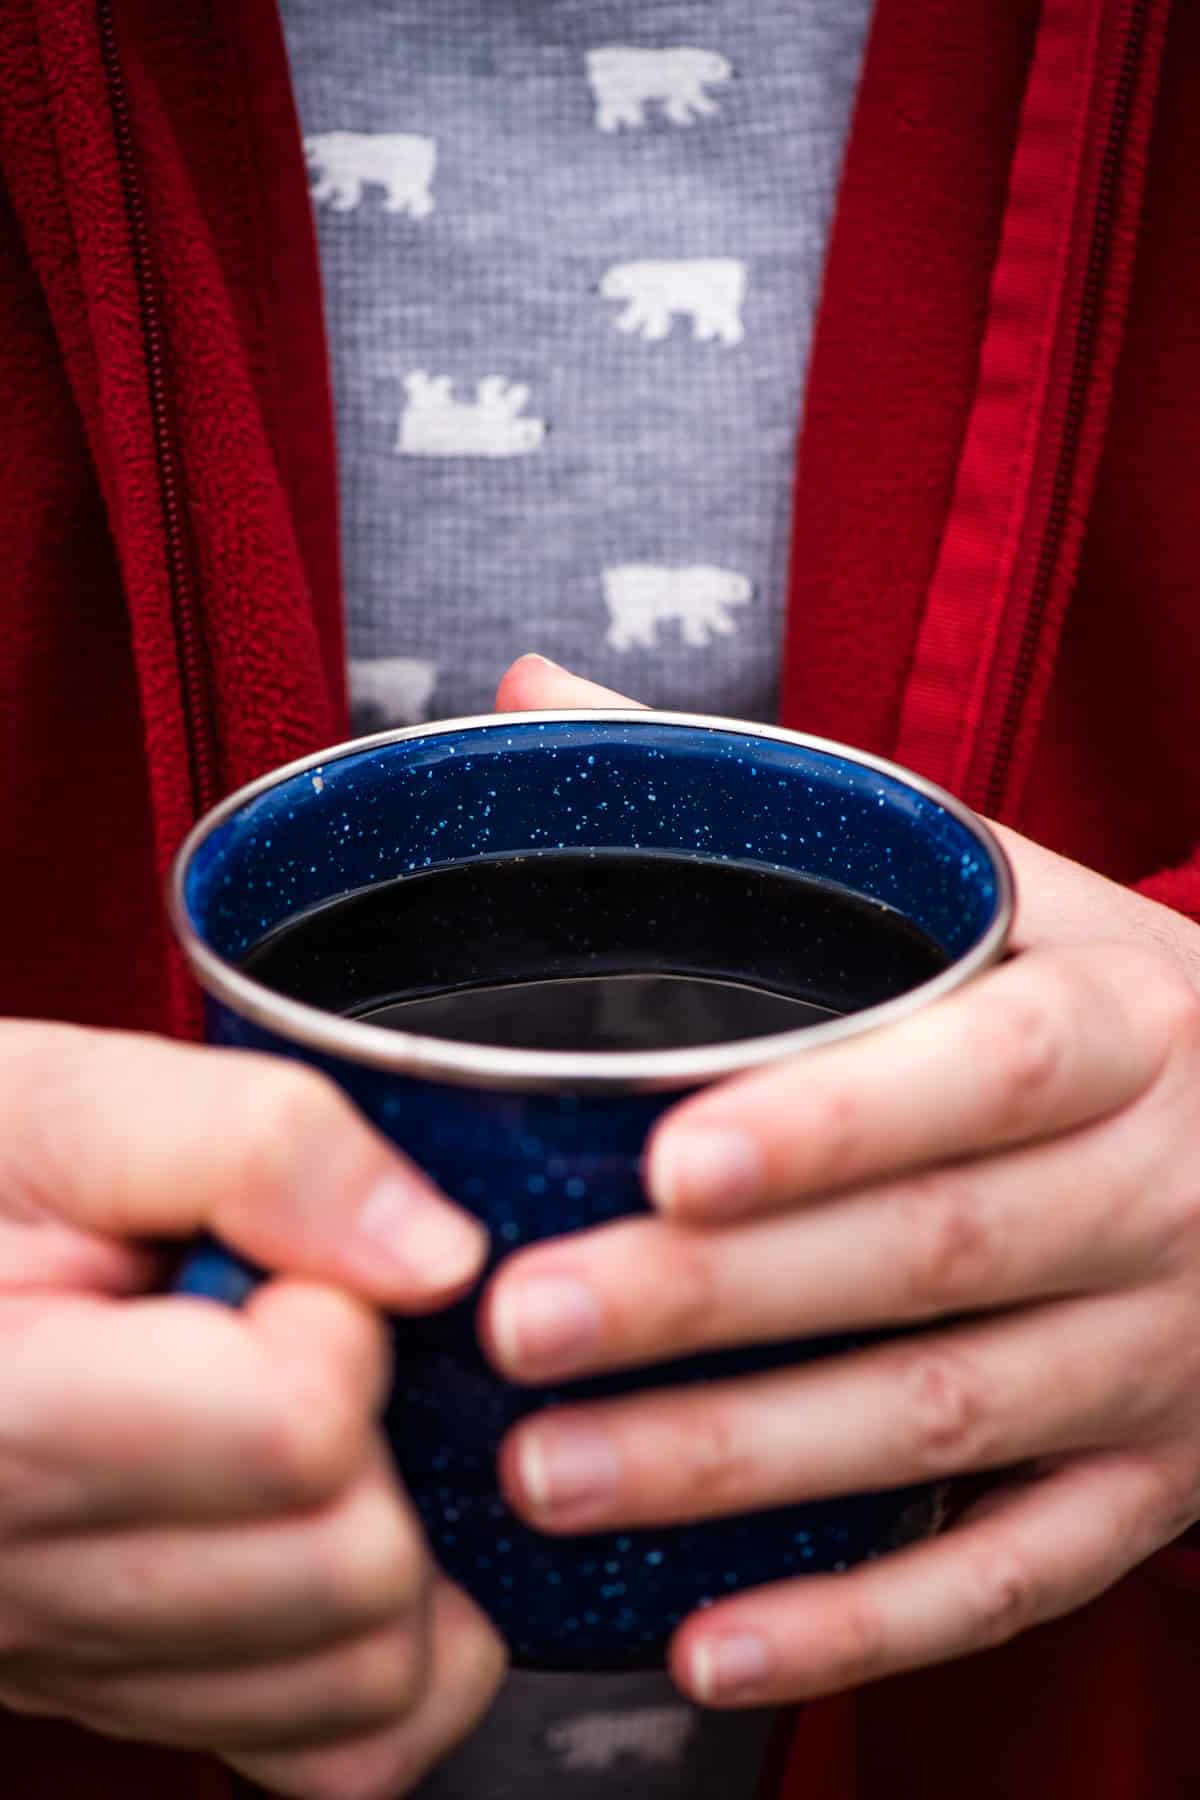
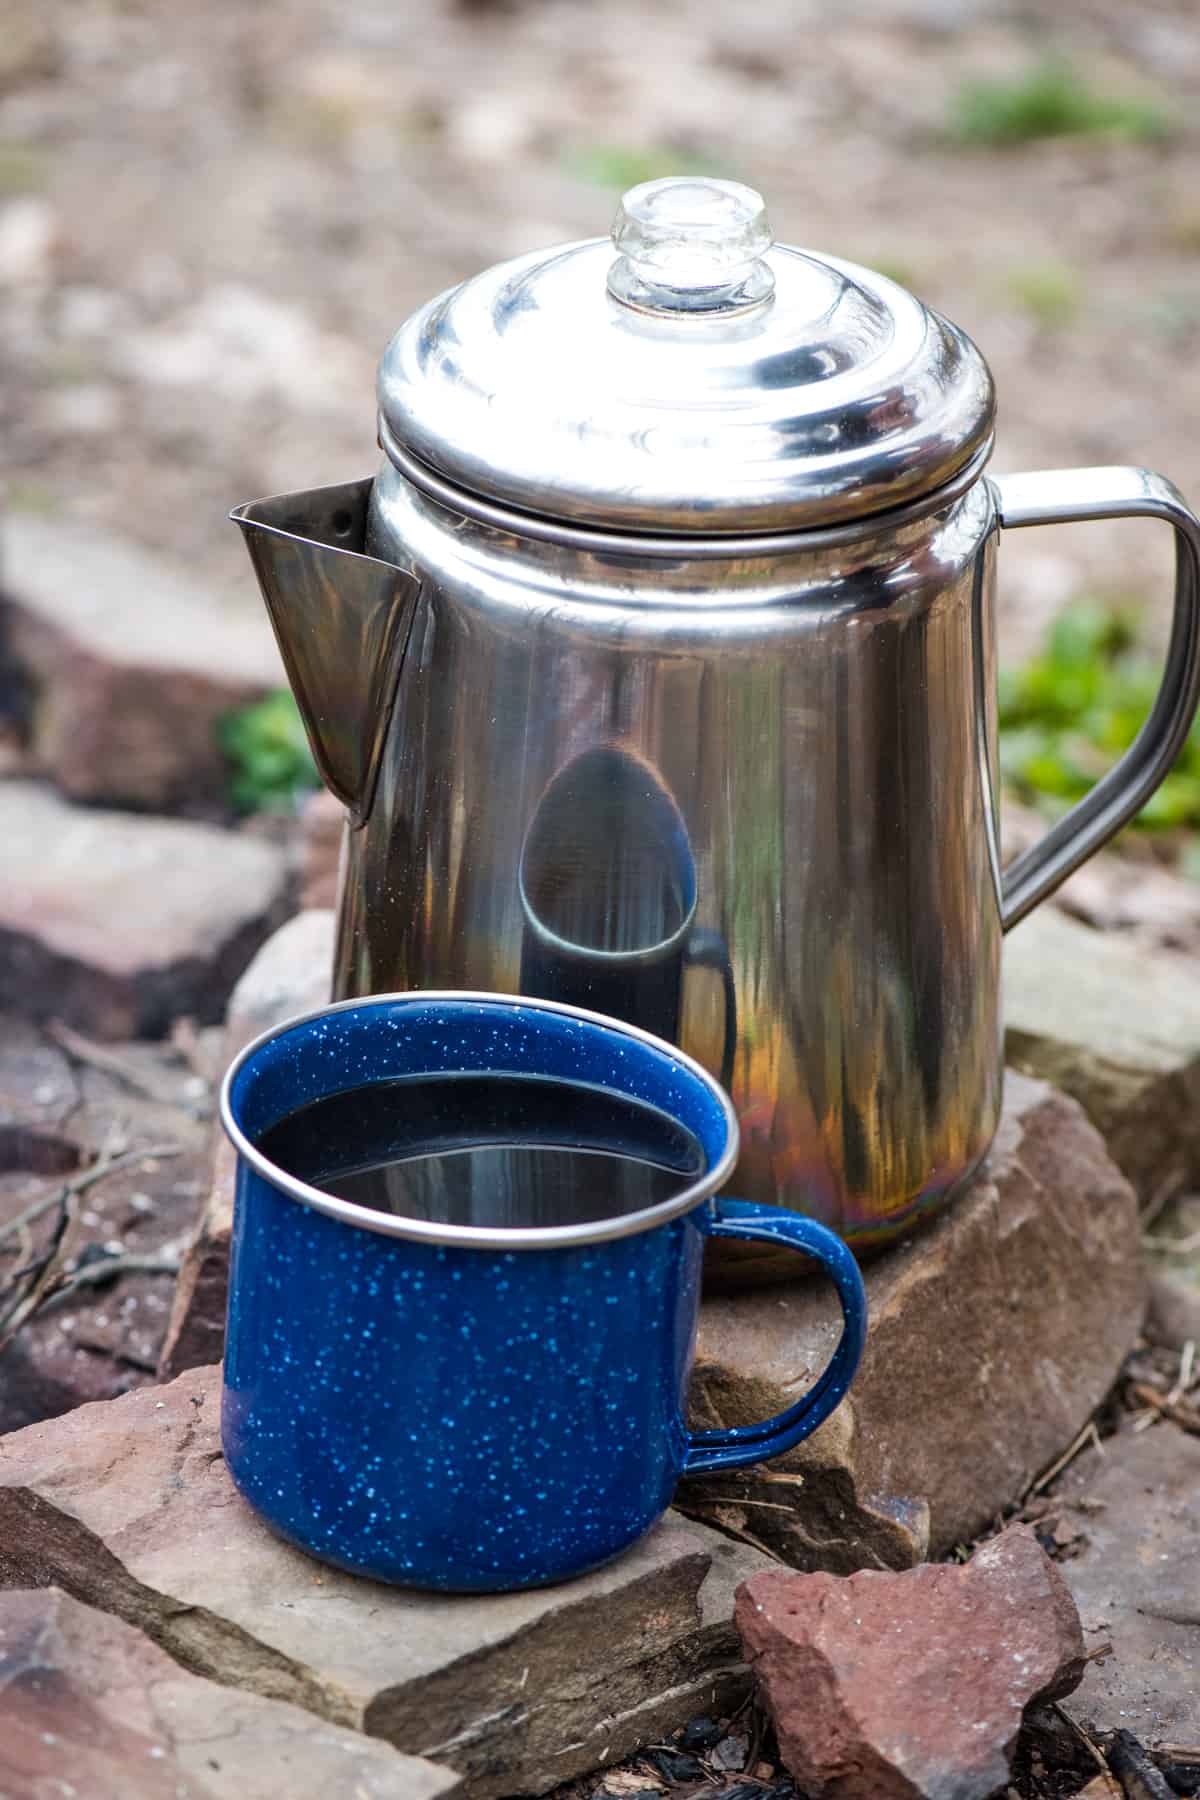
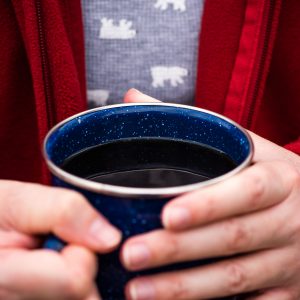
6. Serve and Enjoy!
That’s it. Take it easy, this might just be the best cup of coffee you’ll ever experience!

Expert Tips and Recipe FAQ’s
Most often this is due to one of two reasons. One is that you might be using too fine of a grind of coffee. If this is the case, simply use a paper coffee filter in the percolator basket for the coffee grounds. It’s also possible that you’re letting the coffee boil over, which can be resolved by taking your coffee off the heat sooner.
You can easily get rid of most of the grounds by running your coffee back through a paper coffee filter. Transfer the finished coffee from your coffee pot into a large bowl or other container. Rinse out the pot and all of its parts; add a paper filter to the basket. You can now slowly pour your coffee back through this coffee filter to fill the pot back up. That’s it. Do keep in mind that during this process, your coffee is likely to get cold, so reheating it may be necessary!
This usually means that you’ve let the coffee get too hot. It is important that you never let your coffee boil. You want to see a water temperature just below the boiling point of 212ºF. This will allow the coffee to percolate without taking on a burnt flavor. Boiled coffee tastes more like burnt bread than coffee!
The best way to clean any coffee percolator is by filling it 1/3 of the way full with vinegar and the rest of the way with water. After a few shakes to thoroughly mix the solution, run the percolator over the heat as normal, allowing it to force the solution into every nook and cranny. Be sure to rinse your coffee pot well before using again.
What to Serve with Camp Coffee
- There’s nothing better than a hot cup of coffee with breakfast, and camping breakfast burritos pair wonderfully well with a hot cup of joe.
- Enjoy a batch of Dutch oven cinnamon rolls with your morning coffee.
- Warm a couple campfire drop biscuits over the fire with your coffee, spread a little jam on them, and every bite will taste even better with coffee to wash it down.
- Who says it has to be breakfast? My family has always enjoyed a cup of coffee with desserts, like Dutch oven blueberry cobbler, campfire peach cobbler and even Dutch oven cherry cobbler.
- I’m sure you can find something delicious to pair with your coffee in this collection of easy camping recipes for breakfast, lunch, dinner. or dessert.
More Ways to Make Camping Coffee
Don’t like percolator-style coffee? Here are a few other ways that you can make coffee over the fire…
- Instant Coffee – Perhaps the easiest way to make coffee while camping is by using Instant Coffee. It’s fast, cheap, and easy. Simply dissolve the instant coffee powder into hot water, that’s it! Despite its advantages, the flavor of instant coffee just doesn’t compare to that of coffee that’s actually brewed using other methods. Instant coffee basically gives convenience over quality.
- Cowboy Coffee – This is one of my favorite methods of brewing coffee regardless of where I am. Simply put, cowboy coffee is brewed by pouring grounds into the open water of a coffee pot, brewing, and pouring into a cup once the grounds have settled. This method requires a bit more time, care, and attention, but the unmatched flavor is worth it.
- Aeropress – The Aeropress is another one of my favorite coffee brewing devices. It’s essentially a piston-style press that pushes the finished coffee through a thin paper filter and into a cup. In my opinion, the Aeropress produces the best-flavored coffee. However, the one limiting factor of this brewing method is that you can only make 1 cup of coffee at a time. If you like to drink more than 1 cup of coffee per day, this method gets old very quick.
- French Press – The French Press is similar to the Aeropress in that both methods are full-immersion, and both are methods of pressing coffee. The French Press basically consists of a tall carafe and metal mesh filter attached to a long stem. You pour hot water over your grounds and let it brew. When it’s done, you press the mesh filter all the way to the bottom to separate the grounds from the finished coffee. The Aeropress is different in that its paper filter holds many undesirable oils back from the final product. The porous metal mesh filter used in the French Press allows just about everything except the grounds into the final product. This makes for a very strong, robust, and sometimes slightly bitter cup of coffee. Some people like it, and some people don’t.
- Expresso Maker/Moka Pot – If you really want to get fancy, make an espresso-style coffee with the Moka Pot. This three-chambered pot uses pressure that is produced by its own steam. As this builds up in the lower chamber of the coffee pot, it eventually starts pushing water up through the coffee grounds. This makes for a very hearty cup of coffee!
If you try this recipe, why not leave a star rating in the recipe card right below and/or a review in the comment section further down the page? I always appreciate your feedback. You can also follow me on Pinterest, Facebook, Instagram, and YouTube. And subscribe to my email list too!
How to Make Campfire Coffee in a Percolator
Equipment
Ingredients
- 12 tablespoons ground coffee coarse coffee grounds
- 8 cups cold water
Instructions
- Build your fire*, and then separate hot coals from the actual flame, lining them up in a wide circle to efficiently heat the water.
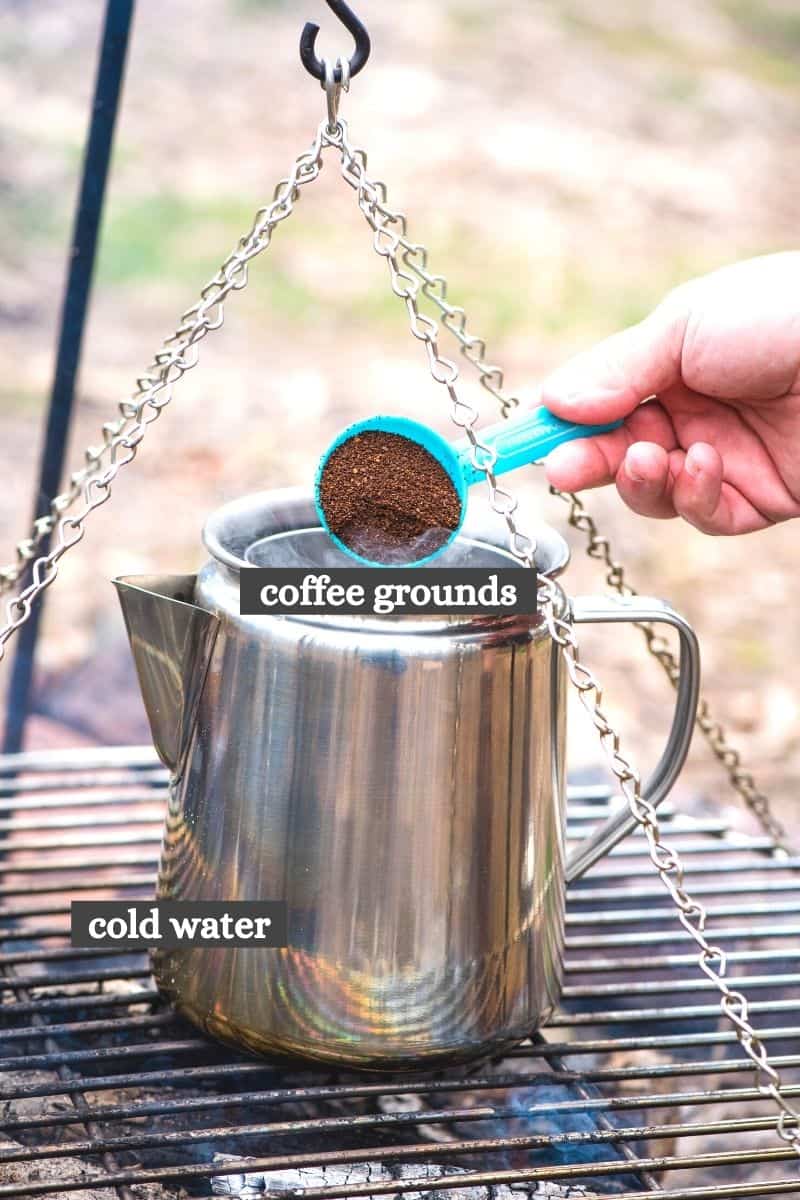
- Add the water to your coffee pot and assemble the basket.
- Place your coffee pot directly above the hot coals. Bring it to just under a boil.
- Once your coffee pot has come up to temperature, it's best to move it away from direct flame, after which you will let it percolate for 5-10 minutes before removing from the heat entirely. Keep it at just under the boiling point.*
- That's it. Serve and Enjoy!
Notes
Most often this is due to one of two reasons. One is that you might be using too fine of a grind of coffee. If this is the case, simply use a paper coffee filter in the percolator basket for the coffee grounds. It’s also possible that you’re letting the coffee boil over, which can be resolved by taking your coffee off the heat sooner. How do I get the grounds out of my coffee?
You can easily get rid of most of the grounds by running your coffee back through a paper coffee filter. Transfer the finished coffee from your coffee pot into a large bowl or other container. Rinse out the pot and all of its parts; add a paper filter to the basket. You can now slowly pour your coffee back through this coffee filter to fill the pot back up. That’s it. Do keep in mind that during this process, your coffee is likely to get cold, so reheating it may be necessary!


We found that if we used the coffee filter that you fold over the grounds and the top with the round filter and we haven’t had any grounds. My hubby was the one who tried different ways to eliminate the grounds and this works great!
That is a great idea, Tammiann! I may have to try that sometime.
I’m still learning from you, as I’m making my way to the top as well. I certainly enjoy reading everything that is posted on your site.Keep the tips coming. I loved it!
I’m so glad, Jeremiah! Thanks for the feedback.
Regards for helping out, great info. “You must do the things you think you cannot do.” by Eleanor Roosevelt.
That’s very good advice, Alejandra!
I in addition to my pals appeared to be analyzing the best guidelines found on the website and so quickly I had a horrible feeling I never expressed respect to the web blog owner for those techniques. My young men appeared to be so happy to learn them and have in effect very much been enjoying these things. Appreciate your getting indeed helpful and also for utilizing this kind of smart useful guides most people are really eager to know about. Our own sincere apologies for not saying thanks to you sooner.
Thank You, Leila!