
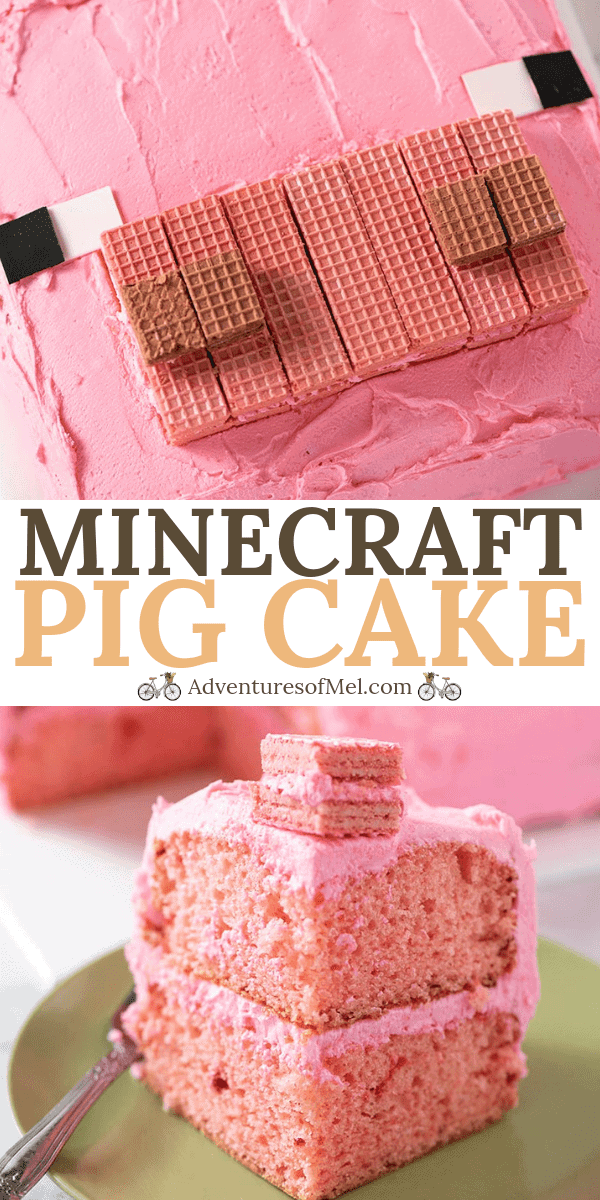
Easy, no fail, Minecraft pig cake tutorial, made with buttercream, wafer cookies, and sugar paper (no fondant). Awesome birthday party idea for kids!
Out of all the Minecraft characters, I have to say the pig was the first one to come to mind when I started to think about different Minecraft cake ideas.
While I mulled this idea over and even experimented with cupcakes in the beginning, I knew I wanted this particular Minecraft cake to be as easy as possible.
And let me just say that anything with fondant just isn’t that easy (at least for me). We much prefer the taste of buttercream frosting over fondant any day.
So I came up with an idea for how to decorate this Minecraft birthday cake without any fondant and without any cake tips. It’s as simple as spreading the icing on and adding the finishing touches.
Related Recipes: Minecraft grass block cake and actual Minecraft cake. Or make easy Minecraft cupcakes instead!

WHERE CAN I FIND THE ACTUAL RECIPE CARD?
If you’d rather skip all of my cake decorating tips, important info for this recipe, and similar recipe ideas – and get straight to the easy Minecraft cake recipe – just scroll down to the bottom, where you’ll find a printable recipe card.
SHOP KITCHEN TOOLS TO MAKE A MINECRAFT PIG CAKE:
- 10-inch Square Cake Pan – Since you’re creating a square cake, you’ll want 2 square shaped pans.
- Cake Board and Freezer Paper – You’ll place the baked cake on a cake board wrapped in freezer paper for decorating.
- Stand Mixer or Hand Mixer
- Icing Spatula – This comes in handy for spreading the icing between cake layers and around the sides of the cake.
- Cutting Board with Knife – for cutting the wafer cookies and the sugar paper.
- Candles – If you’re making a birthday cake, add candles or whatever other decorations you want.
THE TROUBLE WITH FONDANT
If you’re trying to figure out how to make a Minecraft cake without fondant, you’ve come to the right place.
There is no fondant whatsoever in this recipe. In fact, I have a love/hate relationship with fondant, and in my opinion (and my family’s opinions), it just never tastes as good as frosting.
Plus I want this recipe to be easy. Anyone can make it, regardless of creative ability or time constraints.
TIPS FOR HOW TO MAKE THIS MINECRAFT CAKE RECIPE
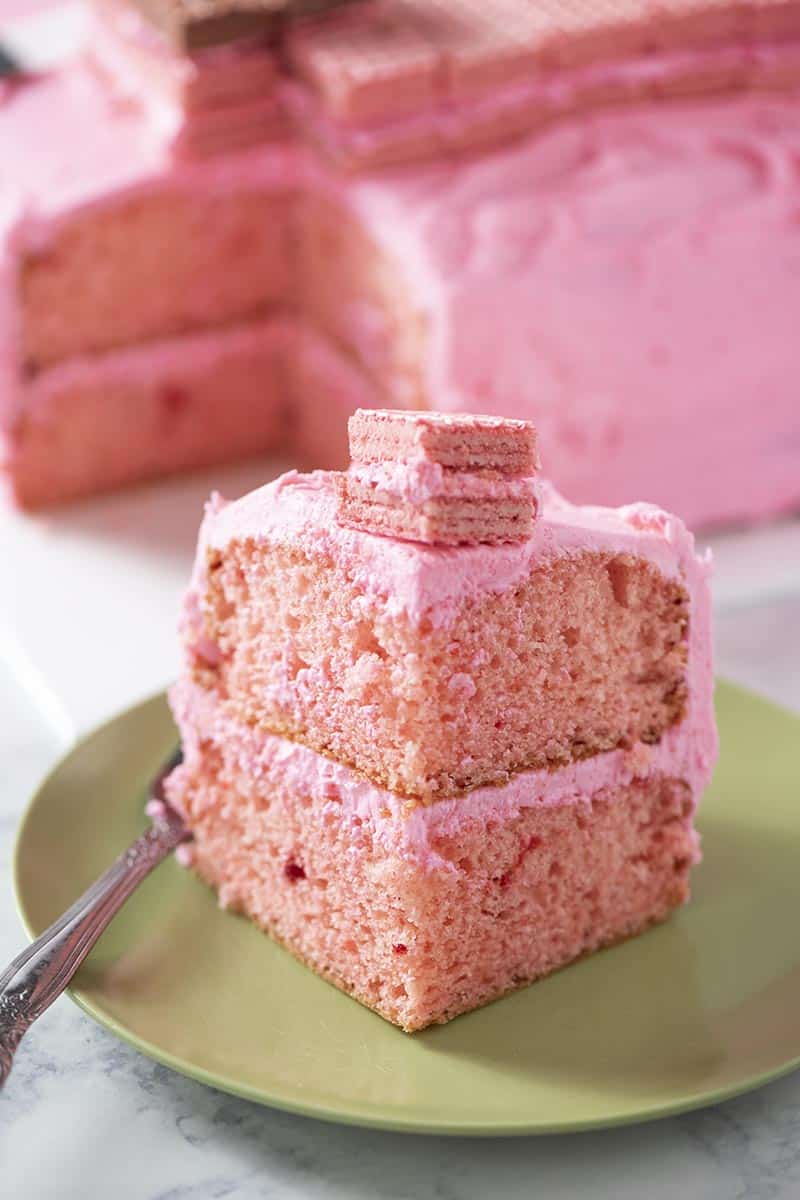
Before you can decorate, you need to bake and cool 2 10-inch square cakes (I just used strawberry cake mixes).
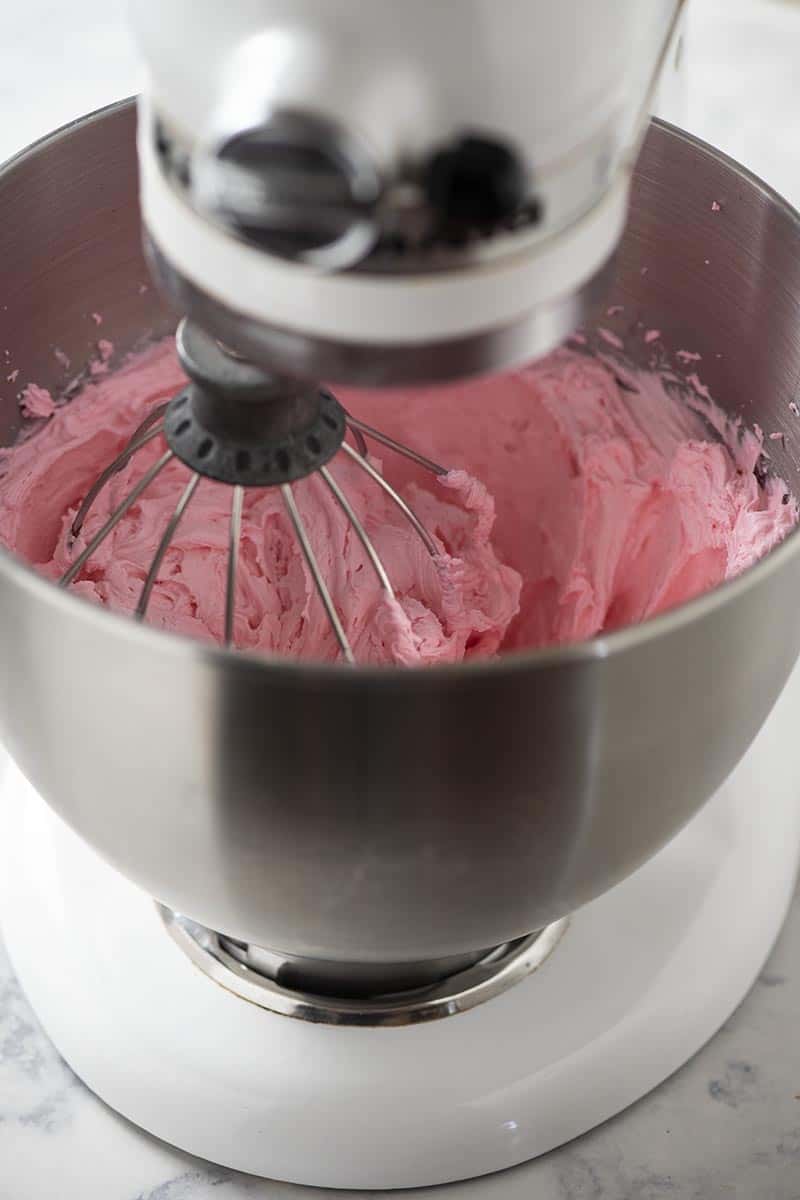
While the cakes are baking, it’s a good time to mix up the icing. I use my favorite recipe for buttercream frosting.
The regular buttercream icing needs to be pink, so add enough pink food color until you’re satisfied with the shade you have.
When the cakes have cooled, place them on a square cake board that’s been wrapped in white freezer paper.
Once you have all of that done, you’re ready to decorate…
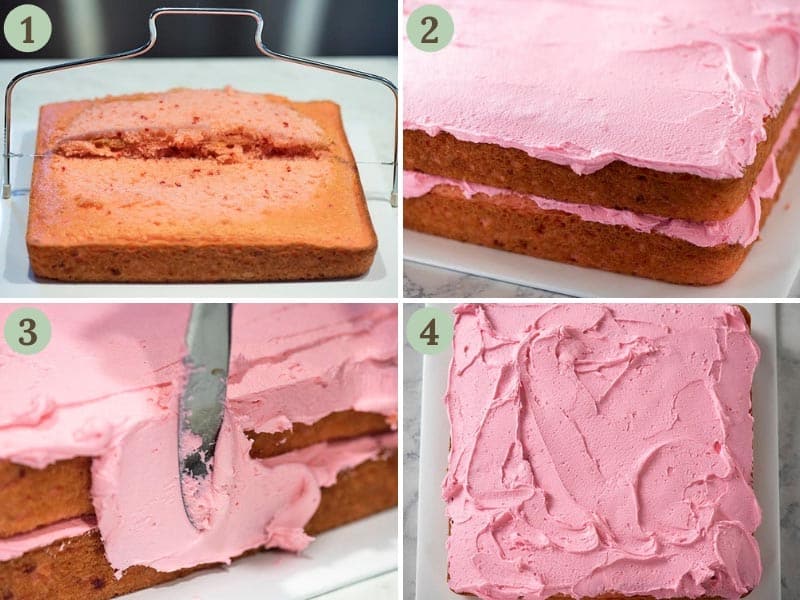
- An optional step is to slice the rounded top off of the cakes with a cake slicer/leveller. This helps the cakes to have a flatter shape and makes them easier to decorate.
- Spread about 1 cup of the buttercream frosting on top of one cake.
- Then sandwich the two cakes together.
- Spread more icing on top of and around the sides of the cake, until your cake is completely covered in pink icing.
HOW TO DECORATE A MINECRAFT PIG BIRTHDAY CAKE
First things first, you’ll need to prep both the wafer cookies and the sugar paper. You’ll need the following:
- 2 chocolate wafer cookies cut in half
- 2 – 1″x2″ pieces of white sugar paper
- 2 – 1″x1″ pieces of black sugar paper
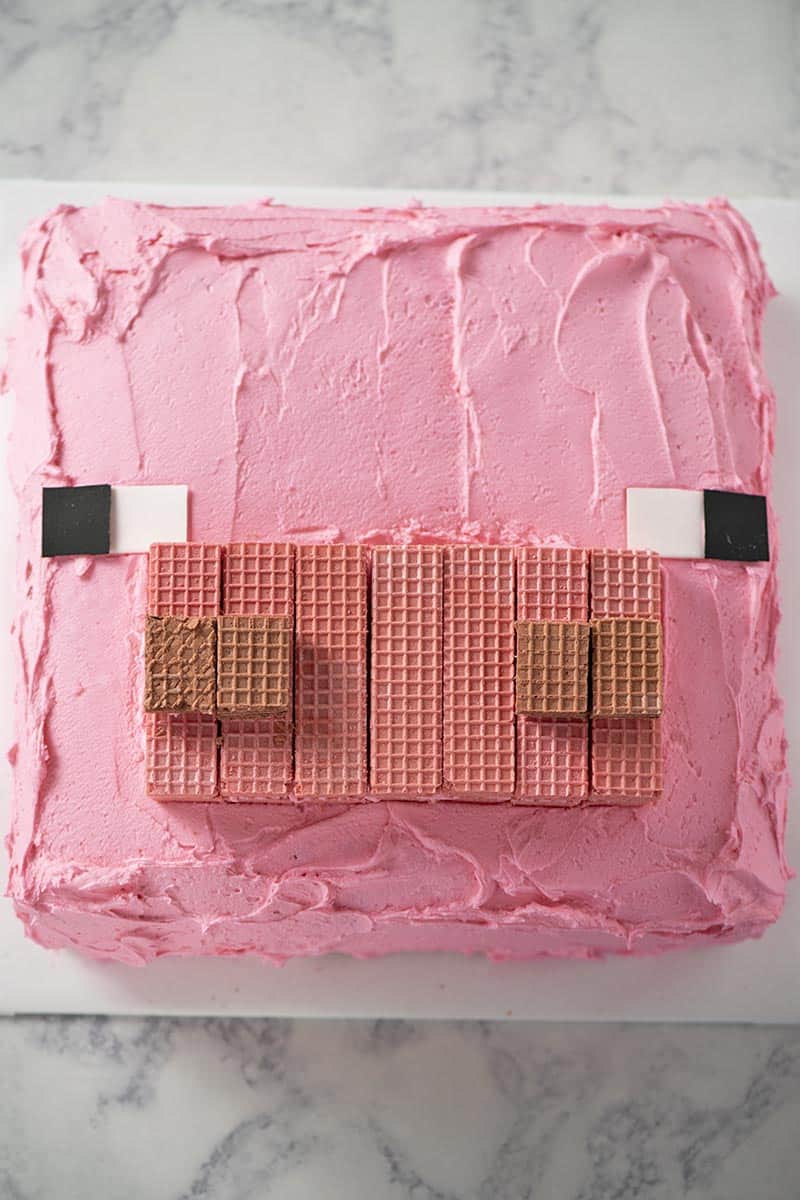
Now you’re ready to put the decorations for your Minecraft pig face in place on top of the cake.
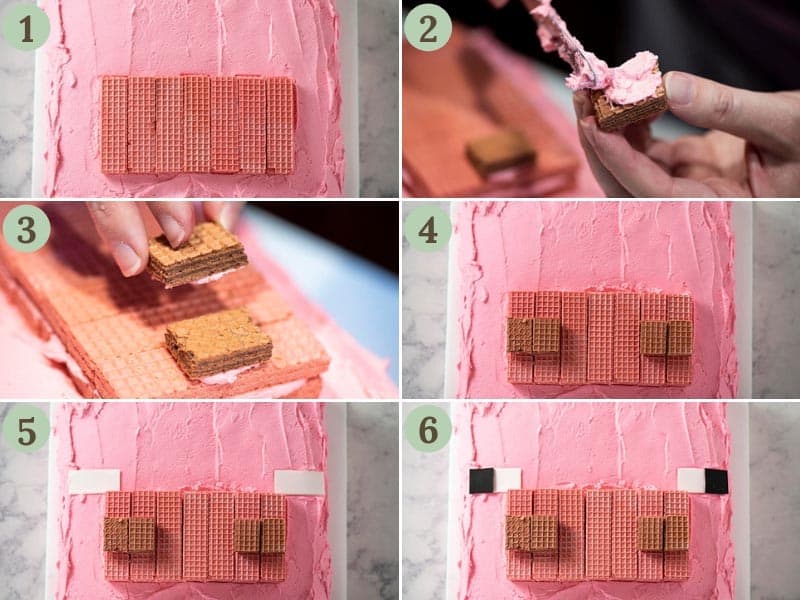
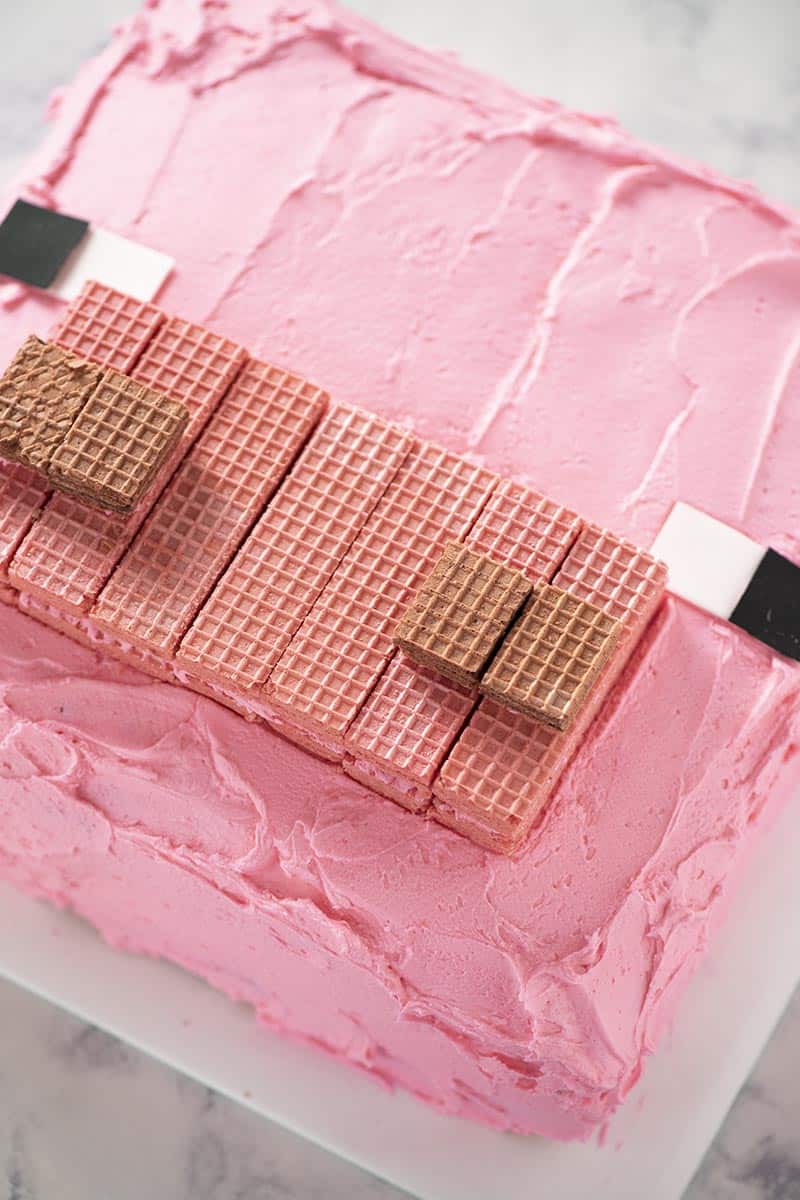
- Find the center of your cake and place 1 layer of pink wafer cookies for the pig’s snout. You should have your center cookie and then 3 cookies on each side of the center, so 7 cookies total. As you place a second layer of 7 more wafer cookies on top of the first layer, use some of the leftover buttercream to hold those cookies in place. (see picture 1)
- Using more buttercream for your “glue,” add the chocolate wafer cookies as nostrils on top of the snout. (see pictures 2, 3, and 4)
- At the top corners of each side of the snout, place the 1″x2″ pieces of white sugar paper in place for the eyes. (see picture 5)
- Then using buttercream as “glue,” place the smaller pieces of black sugar paper on the outside edge of the white sugar paper. (see picture 6)
And that’s pretty much it. I told you it was easy!
At this point, if it’s a Minecraft birthday cake, you can add the candles. Then slice it up and serve to your guests!
Tip: I do recommend refrigerating this cake before/after serving.
MORE MINECRAFT PARTY IDEAS TO GO WITH YOUR CAKE
Free Minecraft Potion of Healing Drink Labels
SUPER AWESOME MINECRAFT PARTY SUPPLIES
Minecraft Plates, Napkins, and Cups
Minecraft Character Wristbands
MINECRAFT BIRTHDAY CAKE RECIPE
If you love this Minecraft pig cake as much as we do, please write a 5 star review, and help me share the recipe on Facebook and Pinterest!
CONNECT WITH ADVENTURES OF MEL!
Be sure to follow me on social, so you never miss a post!
Facebook | Pinterest | YouTube | Instagram | Twitter
Sign up to receive my newsletter, filled with delicious recipes and outdoor travel adventures, in your inbox:

Easiest Minecraft Pig Cake Ever
Ingredients
- 2 square strawberry cakes *
- 4 cups buttercream frosting colored pink
- 2 teaspoons pink food coloring **
- 2 tablespoons light corn syrup
- 14 pink strawberry wafer cookies
- 2 brown chocolate wafer cookies
- 2 rectangles white sugar paper
- 2 squares black sugar paper
Instructions
- Bake 2 square cakes, using 10″x10″ cake pans and following recipe/cake mix instructions.
- While the cakes are baking, mix up the buttercream frosting.
- The buttercream icing needs to be pink, so add enough pink food color until you’re satisfied with the shade you have, about 2 teaspoons.
- When the cakes have cooled, place them on a square cake board that’s been wrapped in white freezer paper.
- An optional step is to slice the rounded top off of the cakes with a cake slicer/leveller. This helps the cakes to have a flatter shape and makes them easier to decorate.
- Spread about 1 cup of the buttercream frosting on top of one cake. Then sandwich the two cakes together.
- Spread more icing on top of and around the sides of the cake, until your cake is completely covered in pink icing.
- Prep the wafer cookies and sugar paper by cutting 2 chocolate wafer cookies in half; then cut 2 – 1″x2″ pieces of white sugar paper and 2 – 1″x1″ pieces of black sugar paper.
- Find the center of your cake and place 1 layer of pink wafer cookies for the pig’s snout. You should have your center cookie and then 3 cookies on each side of the center, so 7 cookies total.
- As you place a second layer of 7 more wafer cookies on top of the first layer, use some of the leftover buttercream to hold those cookies in place.
- Using more buttercream for your “glue,” add the chocolate wafer cookies as nostrils on top of the snout (on the left and right edges).
- At the top corner of each side of the snout, place the 1″x2″ pieces of white sugar paper in place for the eyes.
- Then using buttercream as “glue,” place the smaller pieces of black sugar paper on the outside edge of the white sugar paper.
- At this point it's ready to decorate with candles and serve.


The purpose of the MBTI® is to “make the theory of psychological types described by Carl Jung understandable and useful in people’s lives” (Briggs Meyers, McCaulley, Quenk, & Hammer, 2009, p. 3). Jung’s theory claims that what we perceive to be somewhat random variations in people’s behavior can actually be attributed to basic differences in the way individuals perceive their world and use their judgment. In essence, he found that we are all actually quite orderly and consistent in our approaches to dealing with the world around us. The MBTI® was designed to measure these differences and bring understanding to a person’s approaches and process by placing a person on four dichotomous continuums: introversion (I) to extroversion (E), sensing (S) to intuition (N), thinking (T) to feeling (F), and judging (J) to perceiving (P). Neither side of each continumm is better or worse than the other, but rather a way of describing how we form attitudes, relate to the world, and perceive and judge experiences. An individual’s preferences are then combined to develop an overall MBTI® type identified as four letters (e.g. ESTJ). More information on the MBTI® instrument can be found at http://www.myersbriggs.org.
The MBTI® has been used around the globe in a variety of way including assisting in the development of strong collaborative teams, understanding business relationships, and informing educational practice. Through an understanding and awareness of the MBTI®, the preferences within each dichotomy, and the learning needs of those with different preferences, we can strive to build Extension programs that are appropriate for all personality types.
https://camp-fire.jp/profile/personalitytest2k23