
How to transfer family pictures and travel photographs to a DIY photo canvas, using Mod Podge and acrylic paint. Cheap, simple, and creative!

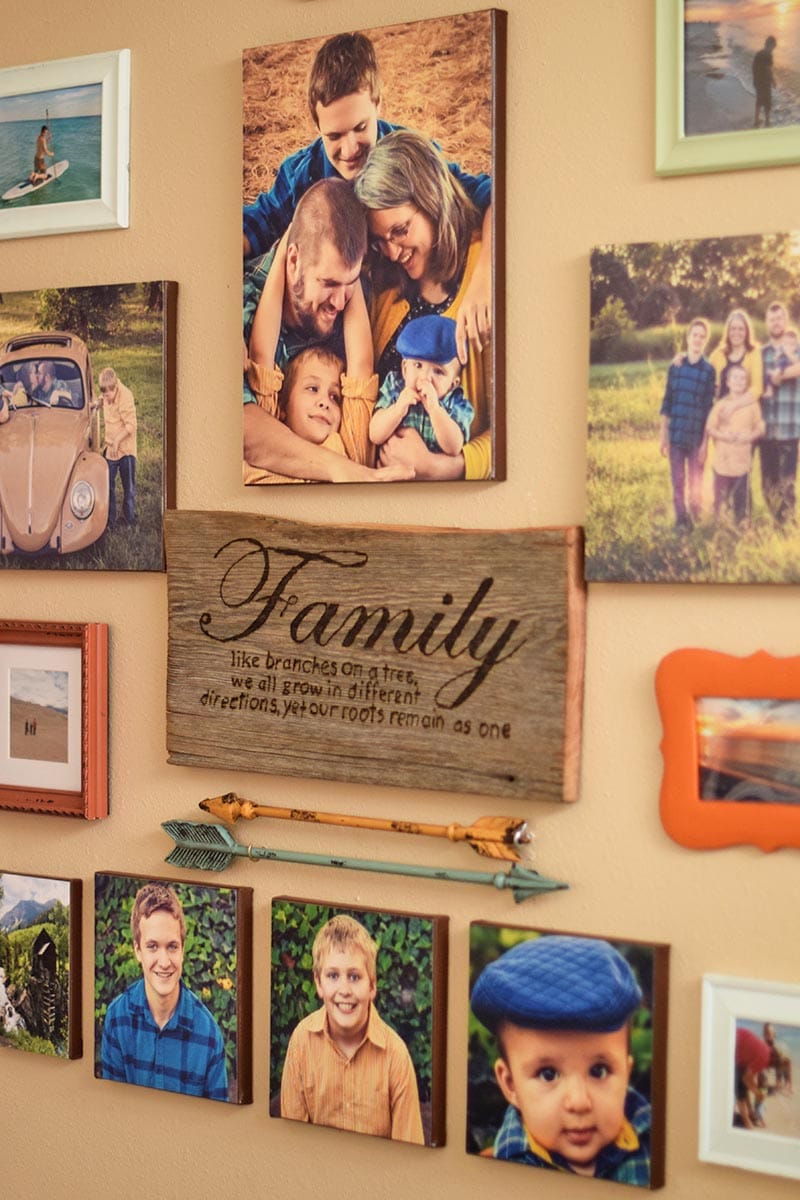
A few months after Zeke was born, we had family photos taken. Shortly after, I decided I wanted to learn how to make a DIY photo canvas and create a gallery wall in our living room.
I started to price canvas prints, and wowsers, the price for even a small print was shocking.
So I thought to myself, “How can I make my own photo transfer to canvas?” And I started looking for DIY canvas print tutorials.
That's when I found the Youtube video below. Y'all, I would totally have made a video for this (because I'm loving video production), but why re-invent the wheel when this perfectly beautiful tutorial is already out there?
I'm just gonna share the steps for how to make your own canvas, and then embed the video below for all my visual readers and to give credit where credit is due.
Love using Mod Podge? Learn how to make a Mod Podge photo plaque and a beautiful pair of DIY earrings with Mod Podge.
Supplies You'll Need for a DIY Photo Canvas
You'll need the following craft supplies:
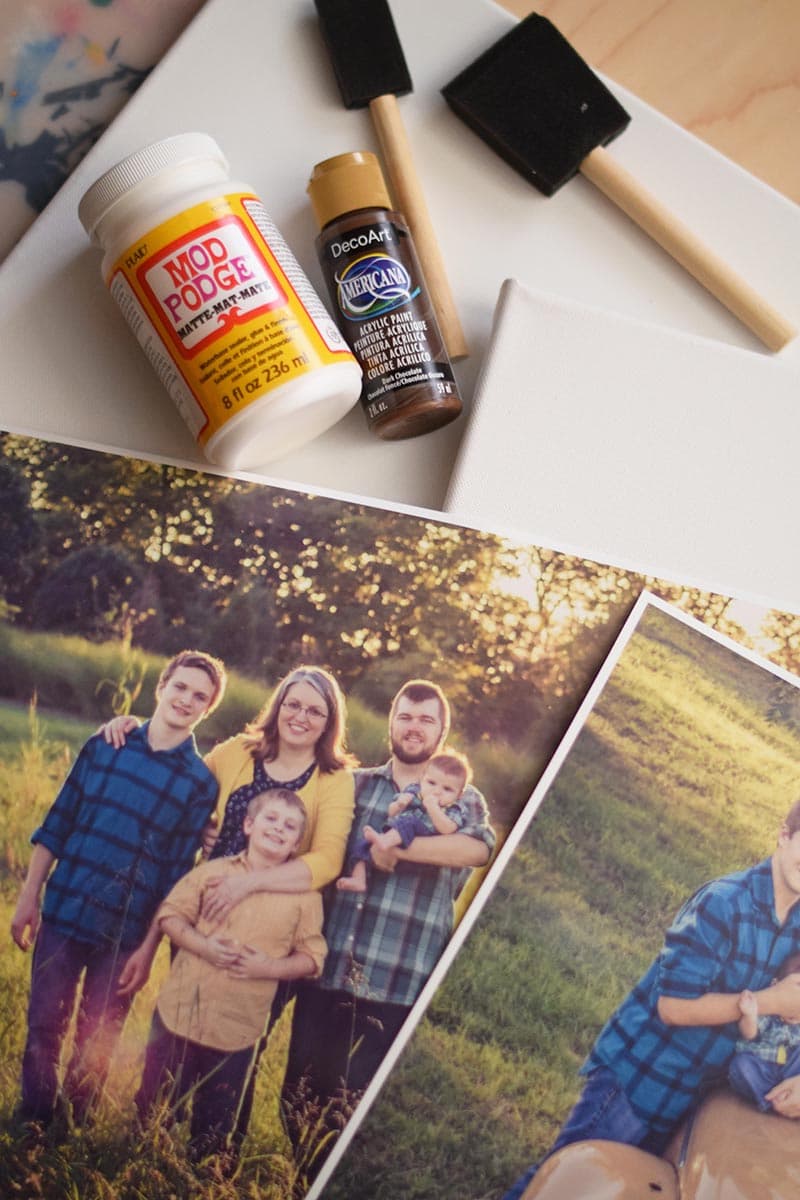
- Photo Prints – in whatever sizes you want to use on your wall… I ordered photo prints through Snapfish. They have photo printing services for small, medium, and large photo sizes.
- Canvases to fit those prints – I picked mine up at Hobby Lobby while they were 50% off and bought a few of the cheaper multi-packs, as well.
- Craft knife
- Dark acrylic paint – She suggests black in the video; I used Americana Acrylic Paint – Dark Chocolate.
- Matte Mod Podge
- Foam brushes
- Paper plates – to hold your paint
How to Do a Photo Transfer to Canvas
Now it's time to have some fun. This is truly such an easy project, I don't know why I haven't done this before now.
Mod Podge really works great for so many different projects, especially DIY canvas prints.
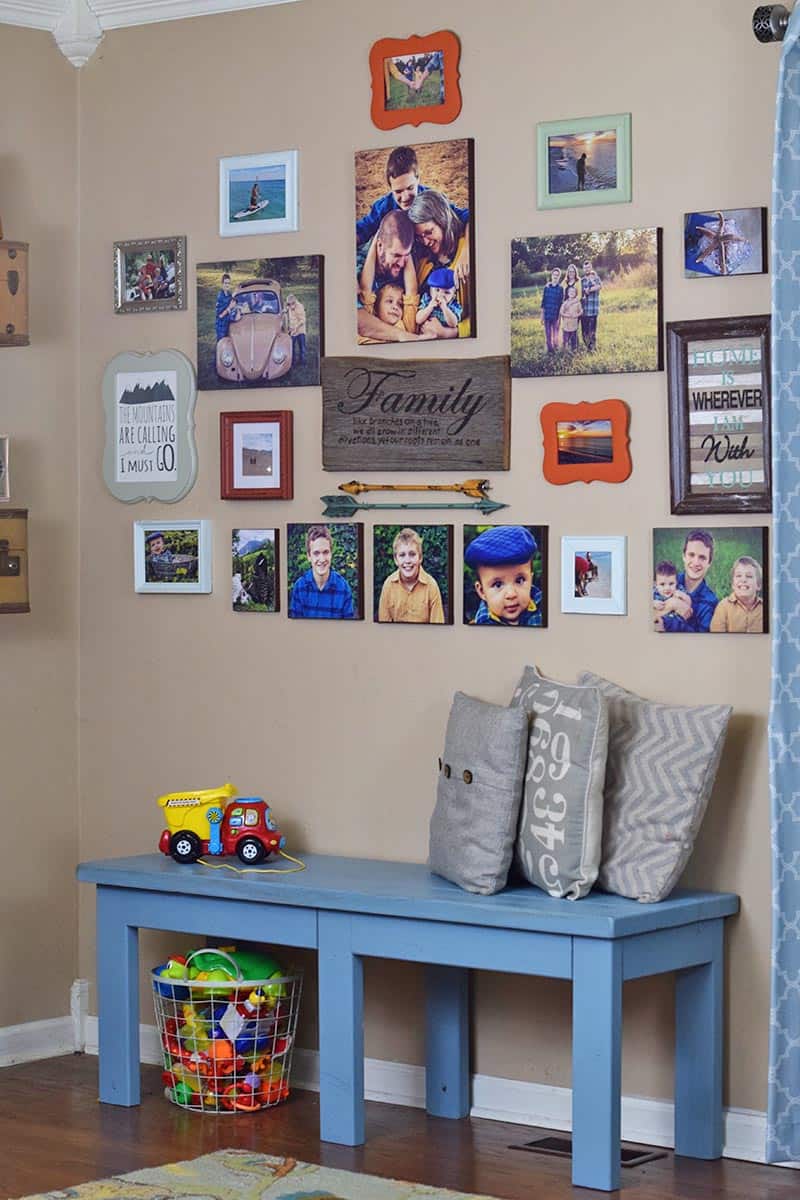
I decided to create a few different photo canvases, some with family photos and some with travel photos and family adventures.
Prep Your Canvas
The first step, since it's a step that requires time to dry, is to paint the edges of your canvas.
With a foam brush, paint the edge of the canvas, overlapping all around the top, as well as the sides, the bottom, and just over the front and back. It'll take about 2 to 3 coats of paint to get a good amount of coverage.
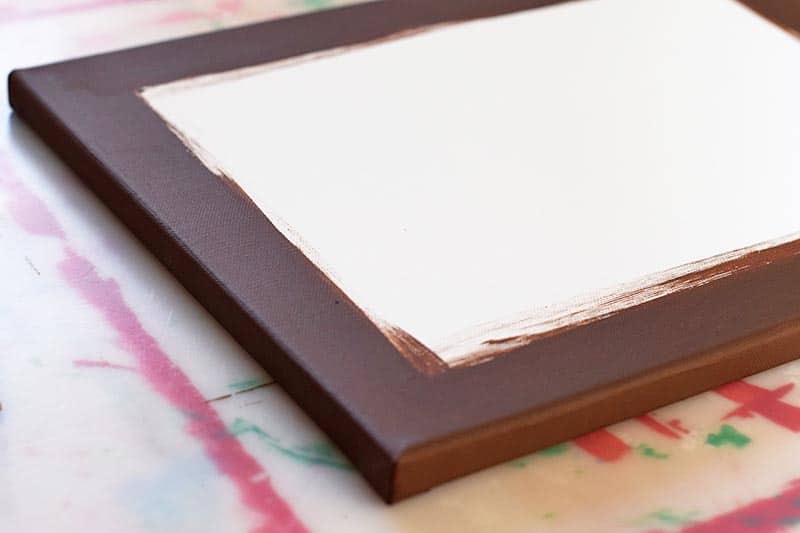
Time Saver Tip: Set out 2 to 4 canvases, paint them, and then start the process all over again even if the paint is still a little damp (because I'm impatient like that).
Allow your paint to get good and dry before attempting to apply your photos.
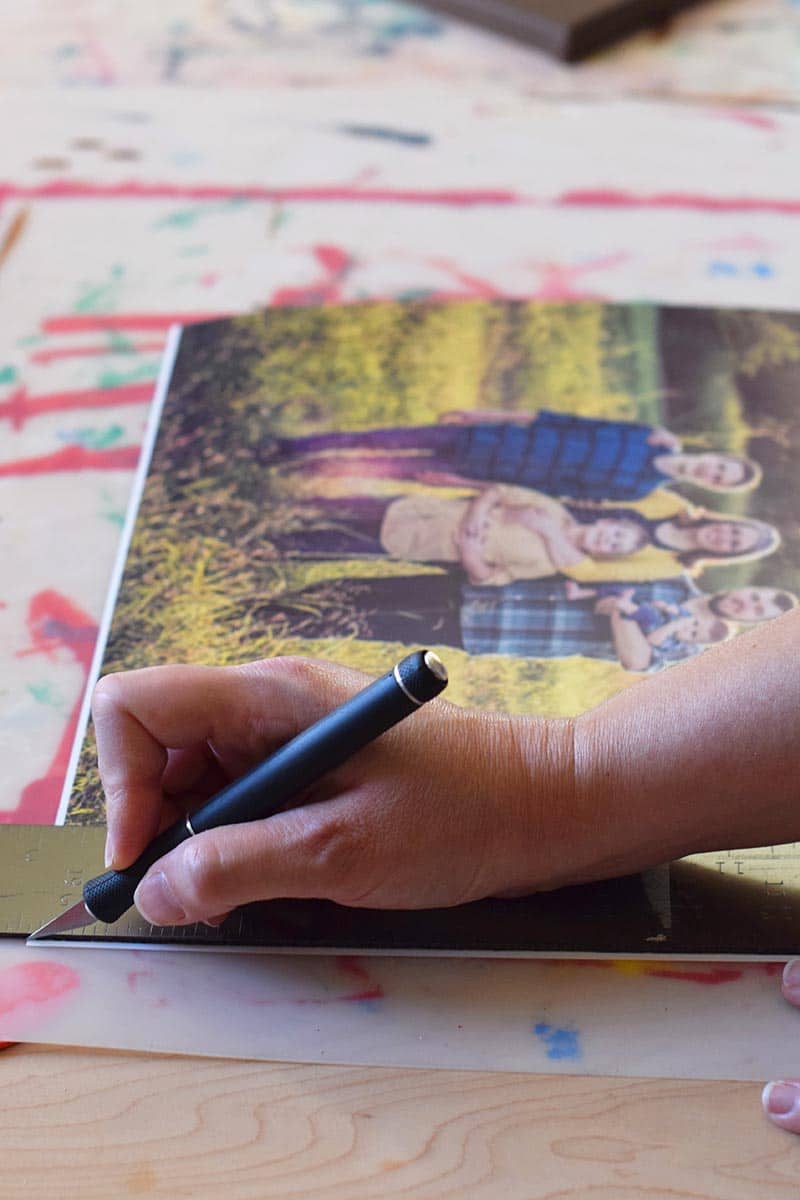
Prep Your Photo Prints
While you're waiting, trim any white edges off of your photo prints. You may even need to size them up to the canvas and make sure you don't need to do any extra trimming.
What Kind of Paper Should I Use to Print My Photos?
If you're printing the photos yourself, you may be wondering what kind of paper to use. I've actually gotten this question from readers.
Should you decide not to have them printed, but you want to print them at home, use a matte photo paper.
Photo paper will be strong enough to withstand all of the Mod Podge you're going to brush onto the photo. Regular paper may snag or tear and just isn't strong enough for this kind of project.
How to Mod Podge Photo to Canvas
The process of actually Mod Podging photo canvases takes a few steps…
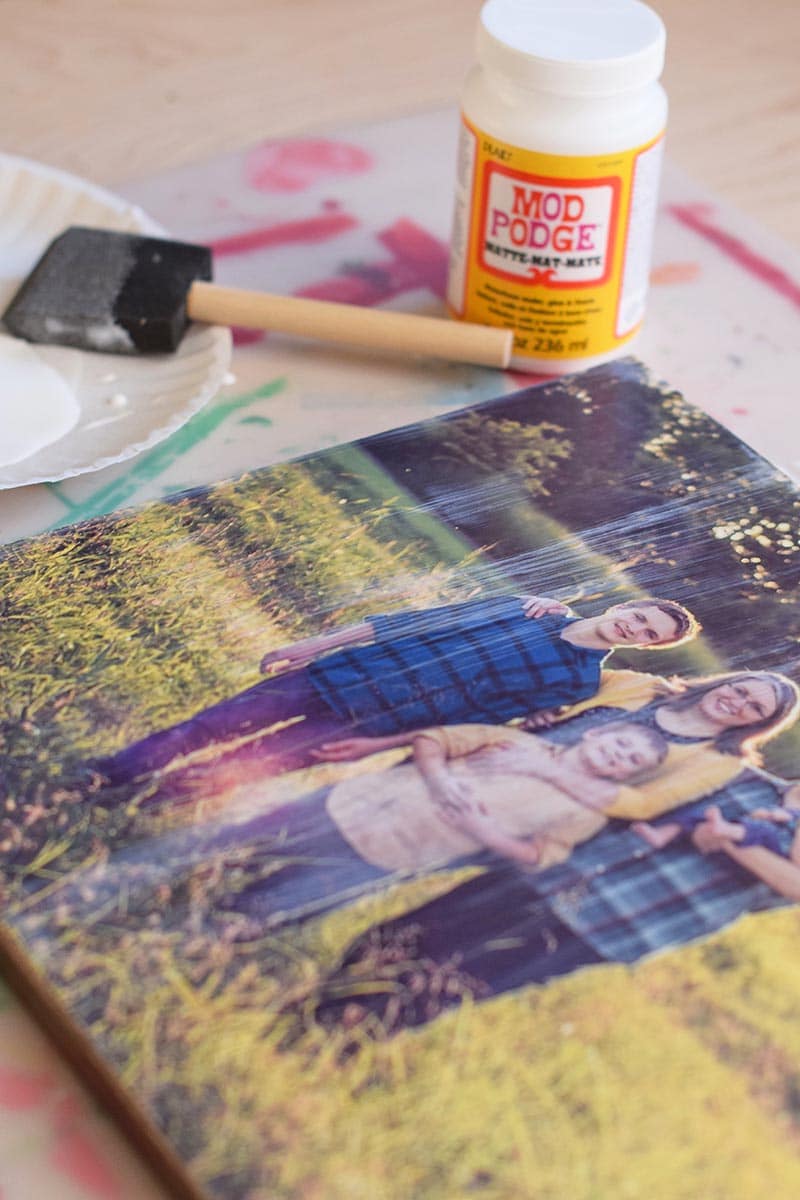
- After your paint is dry, apply a good layer of Mod Podge to the front of your canvas. Make sure you're using Matte Finish Mod Podge.

- Then place the photo on the canvas, maneuvering it into place, making sure the edge of the photo lines up with the edge of the canvas.
- Once the photo is placed correctly, flip the canvas over and rub your hands all along the back side of the canvas inside the frame. This will work out any bubbles and ensure that the photo adheres well to the canvas.
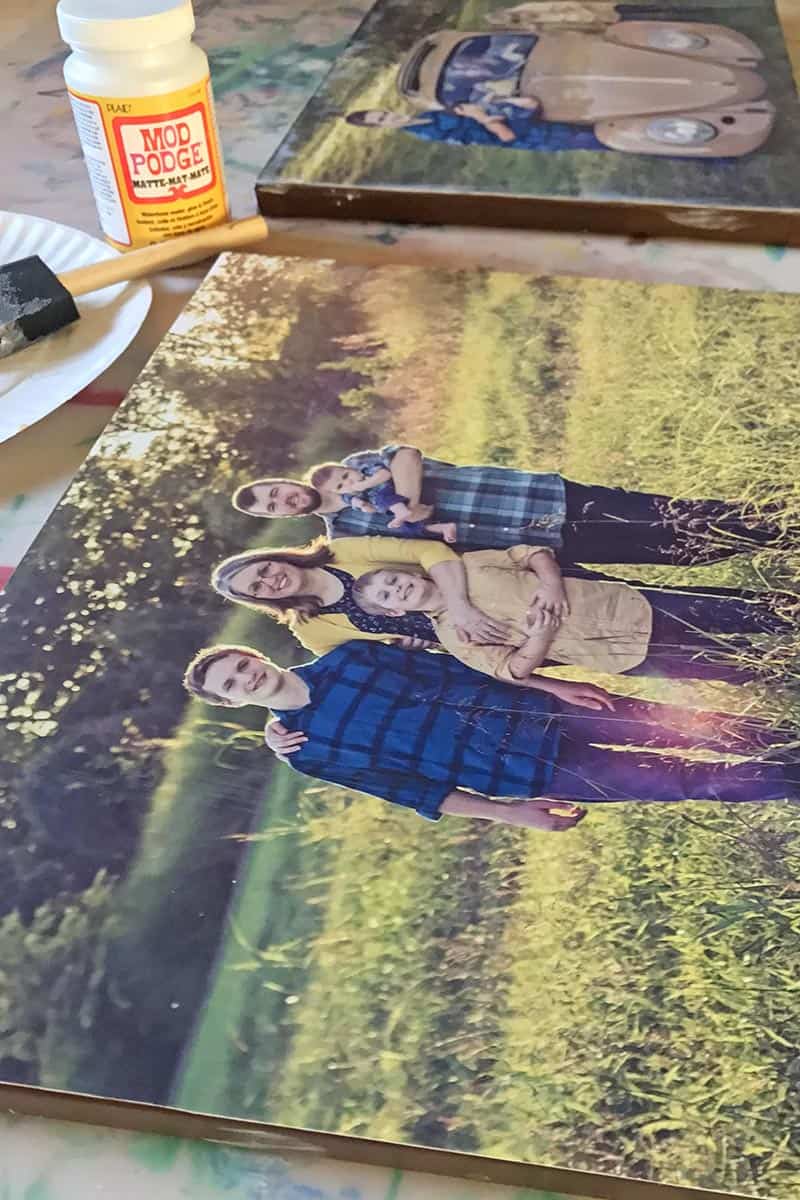
- Finally, flip your canvas back over and apply another good layer of Mod Podge to the photo and the sides of the canvas. This will not only seal the photo and protect it, but it will also provide a really nice matte texture to your photo canvas.
- Allow your Mod Podge to dry completely before touching the canvas; otherwise you'll end up with smudges or fingerprints on your otherwise beautiful photos.
Mod Podge Tip: While I used up and down strokes, you can go any direction with your brush. The Mod Podge will dry clear.
Watch How to Make a DIY Canvas Print
Here is the video I mentioned above… Watch and behold the magic of Mod Podge on a DIY photo canvas!
Time to Decorate!
And that's it… Wasn't that so simple and easy? That's really all there is to it!
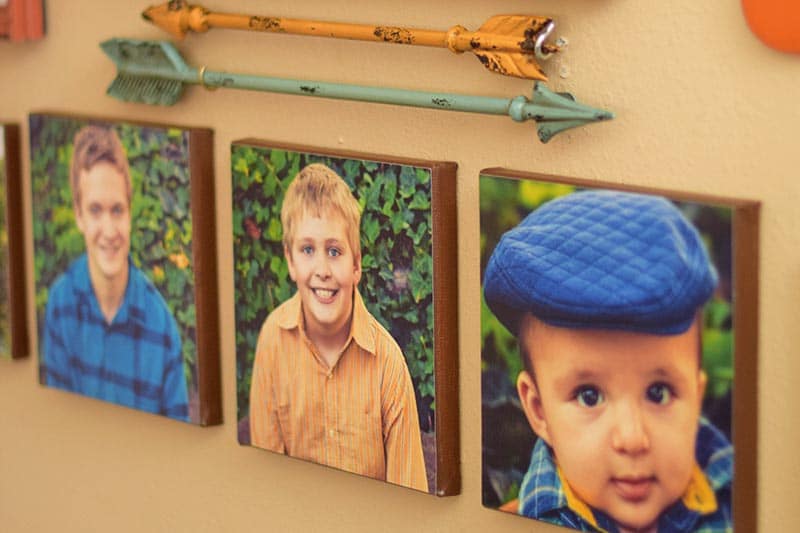
Now you're ready to decorate with your own beautiful photo canvases. They add a really beautiful touch to any room and make a wonderful gallery wall.


Wow, love what you did! It must be frustrating having people ask questions that you’ve already answered in the instructions! Great project! I’ll look for more projects you offer!🤗
Thank You, Marie!
After I have prepped my canvas/ picture transfer with Mod Podge and getting ready to remove the paper, too much of my picture is coming off. I don’t mind a little bit. I am not sure if I am getting it to wet or rubbing it to hard.
Hi, if the background of the picture is white do I still paint the edges that dark color?
You can do whatever you want. Using a typical picture, the dark edges are simply there to add sort of a faint, dark border or “vignette,” around the edges. It makes it look more professional. With a white background, I don’t know that I would add the dark border. It’s your call!
Hi I have 2 questions, when painting the canvas, does it matter what type or acrylic paint you use such as satin or gloss or matte? Also I’m having pictures printed from Walgreens is it ok if they are glossy? Or do they need to be printed as matte?
Katrina, I don’t know that the type of paint really matters. It’s up to you, the look you prefer. And the pictures… I don’t know that it matters either. It might work better, Mod Podging a matte photo. You can use whatever type of finish you want with Mod Podge, though.
I tried this technique using a laser printed photo from my home printer. It didn’t quite work…the ink peeled off when I painted the Mod Podge on the front. I just wanted to let you know so someone else doesn’t make the same mistake I did. 😀
Thank you, Kristin. I’m sorry that happened. Just curious… Did you use photo paper or regular paper?
Mine has bubbles everytime! What could be the possible reason? I am using the technique from the video for reducing bubbles but it does not seem to work with mine. Please suggest
Hmmm, it could depend on the thickness of your photo paper; thinner paper tends to bubble more. You might try using a roller. Or you might even try applying the Mod Podge to the back of the photo, and let it dry. Then apply a coat to the canvas, and apply the paper. Then after that dries, do your top coat. This might help.
I am printing at walgreens poster size. Do u think that paper would be thick enough?
As long as it’s photo paper.
After it dried from outing the mod podge on it, I now have paint brush lines on it. And I used the same brush you did. What did I do wrong?
Chris, you shouldn’t have lines… I’m not sure what might have gone wrong. Sometimes there can be very minute lines when you look from the side… But they’re not noticeable to the normal eye when the pictures are hanging on the wall. Only if you get really up close.
What type of paper do I print the pictures on? Regular paper or photo paper!
Hello Mel, It is looking very beautiful. I love your beautiful photo canvas. It always looks amazing. I will surely try at home on wall photos. It makes connectivity with family . Thanks for sharing such a nice idea.